Can You Proof Sourdough in a Plastic Bowl?
Yes, you can proof sourdough in a plastic bowl. These bowls are lightweight and easy to handle, making your baking process smoother. They retain moisture well, which is essential for proper yeast fermentation.
However, keep in mind that plastic may limit airflow compared to traditional proofing baskets. To achieve great results, consider using a damp cloth to cover the bowl, maintaining humidity and warmth.
Lightly oiling the bowl or lining it can prevent sticking too. If you’re curious about optimizing your proofing techniques, there’s much more valuable info to explore.
Key Takeaways
- Yes, you can proof sourdough in a plastic bowl due to its lightweight and easy handling features.
- Plastic bowls retain heat and moisture, promoting consistent fermentation and yeast activity during proofing.
- Ensure cleanliness of the plastic bowl to avoid contamination and maintain dough quality.
- Use a cloth liner or lightly oil the bowl to prevent sticking and facilitate easy dough removal.
Benefits of Plastic Bowls
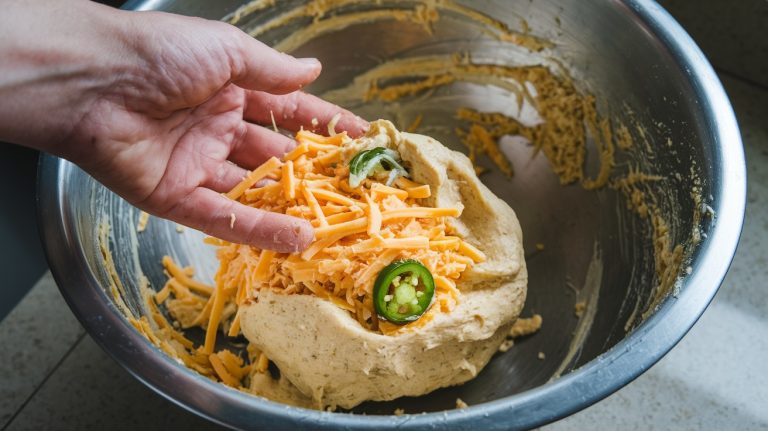
Plastic bowls are often the go-to choice for bakers because they’re lightweight, easy to handle, and designed to enhance the proofing process of sourdough. When you’re working with dough, a plastic bowl’s effective heat retention speeds up fermentation, giving your sourdough a better rise.
The snap-on lids that come with many plastic bowls eliminate the need for plastic wrap, reducing waste and providing a simple way to cover your dough during proofing. Thick-walled plastic bowls play a significant role in maintaining a consistent rising temperature, minimizing drafts that could disrupt ideal yeast activity.
This means you get a more reliable rise, essential for achieving that perfect sourdough texture. Plus, their stackable design makes them ideal for both home kitchens and professional environments, allowing for efficient storage when you’re not using them.
With food-safe options available, you won’t have to worry about harmful chemicals leaching into your dough. Using a plastic bowl for proofing not only simplifies your process but also creates a safe environment for your sourdough to flourish. Embrace the benefits and watch your baking game elevate!
Understanding Proofing
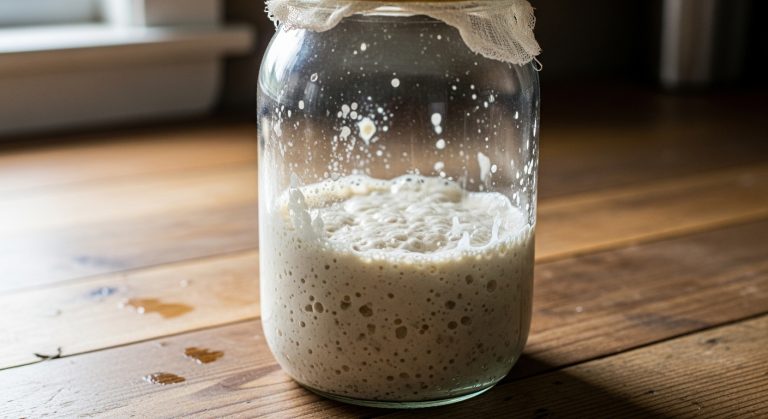
Proofing is an essential step in the sourdough-making process. During proofing, you shape your dough into loaves or rolls, allowing it to expand further. You let your shaped dough rest and rise, releasing its full flavor and texture potential before baking. This stage is distinct from bulk fermentation, which occurs when the dough rises as a single mass.
Controlling moisture is vital during proofing. Too much or too little can hinder the dough’s development and affect the final crust quality of your bread. You’ll also want to pay attention to temperature and environment, as yeast activity directly depends on these conditions. Warmer temperatures generally speed up proofing, while cooler ones slow it down.
Understanding the different stages of proofing, including the first and second rises, helps you achieve the desired texture and flavor. The first rise allows for gas production and flavor development, while the second rise refines the structure.
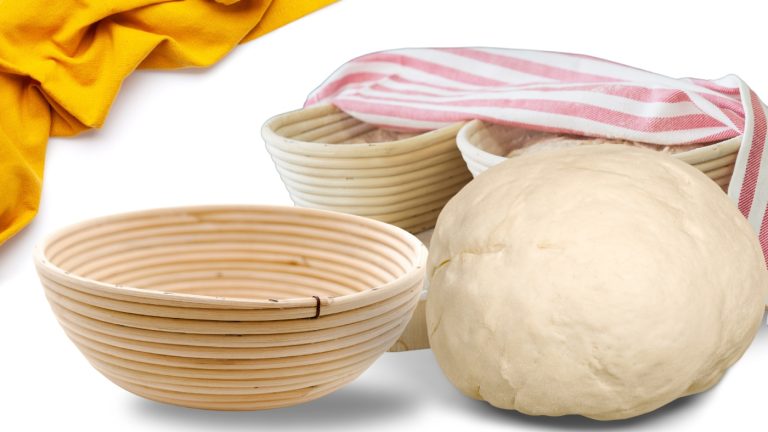
Alternatives to Proofing Baskets
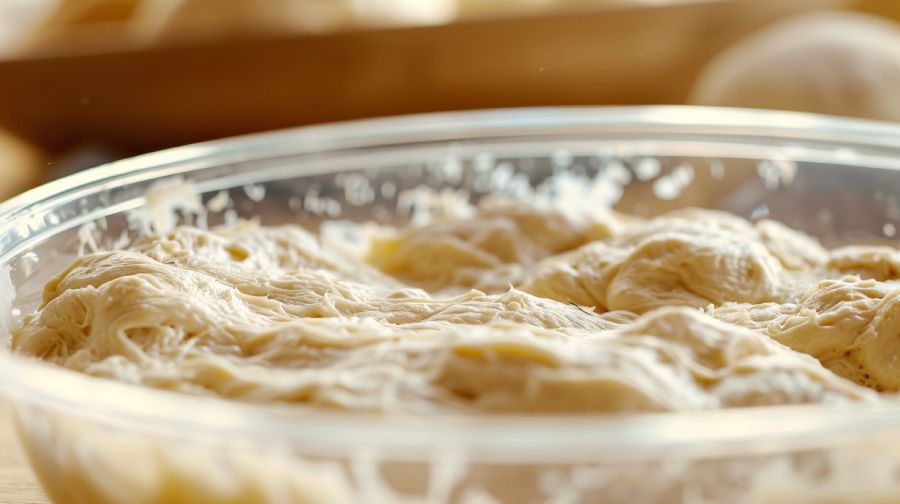
Exploring alternatives to traditional proofing baskets reveals that transparent plastic bowls can effectively showcase your dough’s rise while providing ease of use.
Using a plastic bowl for proofing offers the advantage of visibility, letting you monitor the fermentation process without lifting a cover. Just make certain you line the bowl with a clean cloth to prevent sticking and retain moisture.
While these bowls are lightweight and often come with handy snap-on lids, they mightn’t allow for the same airflow that rattan bannetons provide. As a result, you’ll want to keep an eye on your dough’s hydration to guarantee it doesn’t become overly sticky. It’s essential to choose a food-safe plastic bowl to avoid any potential chemical leaching during fermentation.
With their convenience and practicality, plastic bowls can be a great addition to your proofing toolkit. They simplify the process, allowing you to focus on creating your perfect sourdough without the fuss of traditional methods.
Whether you’re a beginner or a seasoned baker, using a plastic bowl for proofing can make your sourdough journey even more enjoyable.
Choosing the Right Cloth
Selecting the right cloth for lining your bowl is essential, as it directly influences the dough’s moisture retention and ease of removal. When proofing sourdough, you want a material that breathes well while keeping your dough properly hydrated. Here are some options to evaluate:
- Thin cotton or linen: These materials provide excellent airflow and moisture control, ensuring your dough stays in top condition.
- Old cotton pillowcases: They offer a practical solution, are easy to wash, and give a smooth surface for your dough, making removal effortless.
Avoid using thick materials like fluffy tea towels, as they can trap the dough and lead to deformation.
Regularly check your cloth’s condition to maintain cleanliness and prevent any contamination during the proofing process.
Choosing the right cloth can make all the difference in achieving that perfect sourdough loaf, so take the time to select wisely for the best results!
Disadvantages of Alternatives
Using a plastic bowl for proofing can hinder your dough’s ability to breathe, potentially stalling fermentation and undermining the development of flavors and textures essential for a great sourdough loaf. Unlike traditional proofing baskets, plastic bowls don’t promote ideal airflow, leading to a less effective rise.
| Disadvantages | Plastic Bowls |
|---|---|
| Airflow | Limits breathing, stalling fermentation |
| Moisture Retention | Can create sticky dough that’s hard to handle |
| Shape | Lacks support, may cause spreading |
| Oven Spring | Inadequate for achieving desired height |
When you use plastic bowls, you might notice your dough becoming overly moist, resulting in a sticky texture that complicates shaping. Additionally, the absence of a specific shape means your dough could overflow, compromising the structure of your final loaf. Without the proper support for oven spring, your bread may not rise as beautifully as you hoped. These inconsistencies can lead to disappointing results, making it clear that while plastic bowls may be convenient, they aren’t the best choice when you want to proof sourdough effectively.
Common Proofing Techniques
When it comes to proofing sourdough, using plastic bowls offers unique benefits that can enhance your baking experience.
You’ll find that alternative methods can be just as effective, but understanding temperature control strategies is key to achieving that perfect rise.
Let’s explore these common proofing techniques to help you get the best results from your dough.
Plastic Bowls
Opting for plastic bowls in your sourdough proofing routine offers numerous advantages, from lightweight handling to superior heat retention that encourages excellent fermentation. These bowls are an excellent choice for both novice and experienced bakers alike.
Lightweight and easy to handle: You’ll find plastic bowls effortless to move around your kitchen, making it simple to monitor your dough’s progress.
Effective heat retention: Thick-walled plastic bowls maintain a consistent temperature, promoting ideal yeast activity and protecting your dough from drafts.
Reduced waste: The snap-on lids eliminate the need for plastic wrap, providing a more sustainable way to store your dough.
Using food-safe plastic bowls guarantees that no harmful chemicals leach into your sourdough, creating a safe environment for dough development.
Plus, the ease of cleanup makes these bowls a practical choice for everyday baking.
With their many benefits, you’ll see why plastic bowls are favored in both home kitchens and commercial bakeries.
Alternative Proofing Methods
While plastic bowls offer great advantages for proofing sourdough, exploring alternative proofing methods can reveal even more ways to enhance your baking experience.
One popular technique is using a proofing basket, also known as a banneton. These baskets support the dough’s shape and create a beautiful pattern on the crust while allowing for excellent air circulation.
Another option is the oven method. You can place your dough inside your oven with the light turned on, creating a warm environment that encourages fermentation. Just be sure to keep an eye on it, as it can get too warm.
You might also consider using a Dutch oven or a cast-iron pot. These provide an ideal environment for proofing and can even double up for baking, helping to trap steam for a crusty loaf.
Temperature Control Strategies
How can you effectively manage the temperature during the proofing process to guarantee your sourdough rises perfectly?
Temperature control is essential, as a consistent ambient temperature of 75°F to 78°F (24°C to 26°C) allows the yeast to thrive. Here are some strategies to keep in mind:
- Choose the right location: Place your plastic bowl in a warm, draft-free area to create a stable environment for rising.
- Use a heating pad: Set it on low under your plastic bowl for gentle warmth, ensuring your dough stays cozy during proofing.
Tips for Successful Proofing
To achieve successful proofing of sourdough in a plastic bowl, start by confirming your bowl is clean and made from food-safe materials to avoid any contamination. Cover the bowl with a lid or a damp cloth to maintain moisture levels, which is essential for ideal yeast fermentation.
Next, place your plastic bowl in a draft-free area with a consistent temperature. This stability enhances the rising process, helping your dough develop flavor and texture. It’s also vital to monitor your dough closely during proofing, as plastic bowls retain heat better than glass or metal, potentially speeding up fermentation.
To avoid sticking and guarantee easy dough transfer, consider using a lightly oiled interior or a cloth liner. Here’s a quick reference table to guide you:
| Tip | Description | Benefit |
|---|---|---|
| Clean Bowl | Use food-safe materials | Prevents contamination |
| Covering | Use a lid or damp cloth | Maintains moisture |
| Draft-Free Area | Place in a stable environment | Enhances rising |
| Monitor Temperature | Keep an eye on dough progress | Prevents over-fermentation |
| Oiling or Lining | Lightly oil or line the bowl | Facilitates easy release |
Preferred Proofing Techniques
In the world of sourdough baking, proofing techniques vary widely, with each baker sharing unique insights that reflect their personal journeys and successes. Many bakers have found that using plastic bowls for proofing sourdough is not only effective but also convenient. The lightweight nature of these bowls makes handling a breeze, especially when you’re managing multiple batches.
| Advantages of Plastic Bowls | Tips for Use |
|---|---|
| Lightweight and easy to handle | Always verify bowls are food-safe |
| Snap-on lids reduce plastic waste | Keep bowls clean to prevent contamination |
| Excellent heat retention | Monitor humidity during proofing |
| Just as effective as glass/metal | Experiment to find your ideal method |
Community members appreciate that plastic bowls can promote faster dough rising, which is essential for achieving that perfect loaf. They emphasize the importance of verifying your bowls are clean and food-safe to maintain the integrity of your sourdough. So, if you’re considering proofing your sourdough in plastic bowls, don’t hesitate—many bakers have made it a go-to technique that reflects their success in the kitchen!
Tips for Plastic Bowls
Using plastic bowls for proofing sourdough can greatly enhance your baking experience, offering practical benefits that cater to both novice and seasoned bakers alike. Here are some tips to maximize your sourdough proofing in plastic bowls:
Lightweight and Easy to Handle: Their lightweight nature makes it simple to move your dough around, whether you’re checking on it or transferring it to the oven.
Snap-On Lids for Moisture Retention: Many plastic bowls come with lids that help retain moisture, eliminating the need for plastic wrap and reducing waste.
Consistent Temperature Maintenance: Thick-walled plastic bowls often provide better insulation, helping your dough maintain a steady temperature for ideal rising.
To achieve the best results when you proof sourdough in plastic bowls, consider placing them in a draft-free area. This can create the perfect environment for fermentation, ensuring your dough rises beautifully.
Plus, after you’re done, cleaning up is a breeze—scrape the dough out, and your bowl’s ready for the next batch.
With these tips in mind, you’ll find plastic bowls to be a fantastic addition to your baking toolkit.
Frequently Asked Questions
Can Dough Rise in a Plastic Bowl?
Yes, dough can rise beautifully in a plastic bowl. Its heat-retaining properties keep the environment warm, promoting yeast activity. Plus, lightweight and easy to handle, it’s a practical choice for any baker.
Can I Use a Plastic Container for Sourdough?
Absolutely, you can use a plastic container for sourdough. Just make certain it’s food-safe. Plastic’s lightweight and stackable nature, plus its heat retention, makes it ideal for quick, effective dough rising during proofing.
Do You Have to Use a Glass Bowl for Sourdough?
You don’t have to use a glass bowl for sourdough; plastic bowls work just as well. They retain heat, promote faster rising, and are lightweight, making your baking experience more efficient and enjoyable.
Can You Put Sourdough Bread in Plastic?
You can definitely put sourdough bread in plastic. Picture your dough rising warmly in a lightweight bowl, its edges gently pulling away as it expands. Plus, the easy cleanup means your baking experience stays enjoyable and efficient.
Experiment and Succeed: Finding the Best Proofing Method for Your Sourdough
To sum up, using a plastic bowl for proofing sourdough can be a practical choice, especially since 70% of bakers report success with non-traditional proofing vessels.
Just remember to keep your dough covered to prevent it from drying out.
With the right techniques and a bit of patience, you’ll enjoy the process and the delightful aroma of freshly baked bread filling your kitchen.
Don’t hesitate to experiment and find what works best for you.