How to Make Rye Sourdough Bread: Dense and Delicious
To make rye sourdough bread, you’ll combine whole rye flour with a mature sourdough starter, balancing ingredients and hydration to produce a dense, moist loaf. You’ll start by creating a levain with equal parts rye flour and water, allowing it to ferment for 12 hours.
Then, you’ll mix the levain with more rye flour, high-protein white flour, water, and salt, aiming for 90% hydration. As you mix and proof the dough, you’ll develop the bread’s signature texture and flavor. With careful attention to detail and technique, you’ll reveal the secrets to crafting a perfect, crusty rye sourdough loaf.
Key Takeaways
- Mix equal parts whole rye flour and water with ripe sourdough starter to create a levain, fermenting for 12 hours at 75°F/24°C.
- Combine levain with whole rye flour, high-protein white flour, water, and salt, aiming for 90% hydration and a shaggy dough.
- Perform regular stretch and fold techniques to develop strength and elasticity in the rye dough, essential for a well-structured crumb.
- Shape the dough gently to maintain surface tension, proof in a floured banneton, and score before baking to control expansion.
Rye Sourdough Bread Ingredients
To make a delicious and authentic rye sourdough bread, you’ll need whole rye flour, high-protein white bread flour, water, salt, and a mature sourdough starter. The typical hydration level for rye sourdough is around 90%, which will give you the ideal texture. For a basic recipe, you can use 272g of whole rye flour, 60g of high-protein white bread flour, 272g of water, and 11g of fine sea salt. Don’t forget to create a levain with equal parts rye flour and water.
Incorporating a large preferment, at least 40% of the total flour weight, will enhance the flavor and fermentation, contributing to the bread’s unique sour profile. You can also add optional ingredients like seeds or molasses to give your bread extra depth.
Using freshly milled flour won’t only improve the flavor but also the nutritional profile of your final loaf. Whole grain flours retain more nutrients compared to refined options, making your rye sourdough a healthier choice.
With these ingredients, you’ll be on your way to creating a delicious and authentic rye sourdough bread.
Benefits of Using Rye Flour
As you explore the benefits of using rye flour in your sourdough bread, you’ll discover that it offers a distinct set of advantages compared to traditional wheat flour.
With its naturally lower gluten content and higher fiber count, rye flour produces a denser, moister loaf that’s not only more nutritious but also boasts a unique flavor profile.
Advantages of Rye
Rye flour boasts a distinct set of advantages that set it apart from other types of flour, making it an attractive choice for bakers looking to create nutritious and flavorful bread. You’ll appreciate its exceptional nutritional profile, with higher amounts of vitamins, minerals, and antioxidants compared to whole wheat.
| Advantages of Rye | Benefits |
|---|---|
| Higher nutritional profile | Contributes to overall health |
| Enhanced fermentation process | Supports gut health |
| Lower glycemic index | Stabilizes blood sugar levels |
| High water absorption | Results in a moist texture and longer freshness |
| Unique flavor profile | Offers earthy notes and added depth |
When you use rye flour, you’ll notice its fermentation process enhances the nutritional availability of your bread, making it easier to digest and more beneficial for gut health. Additionally, rye bread has a lower glycemic index, which helps regulate blood sugar levels and reduces the risk of diabetes. The high water absorption capacity of rye flour gives your bread a moist, chewy texture that stays fresh longer than breads made with all-purpose flour. Its unique flavor profile, with earthy and nutty notes, will keep you and your family coming back for more.
Rye Vs Wheat
Compared to wheat flour, using rye flour in your bread recipes offers a number of benefits, from a lower gluten content that yields a denser, more moist loaf to a higher fiber content that promotes digestive health and supports weight management.
By choosing rye flour, you’ll end up with a bread that’s not only more nutritious but also uniquely flavorful.
Here are just a few advantages of using rye flour over wheat flour:
- You’ll achieve a denser bread with a more complex flavor profile, thanks to rye flour’s lower gluten content and earthy, nutty taste.
- The fermentation process enhances rye flour’s nutritional availability, making it more digestible and enriching the bread with beneficial gut bacteria.
- Rye flour retains more bran and germ than refined wheat flour, leading to a higher fiber content that’s beneficial for digestive health and weight management.
- Rye bread stays fresh longer due to its higher moisture retention, compared to wheat bread which can dry out quickly.
Creating the Perfect Levain
You’re now ready to build the foundation of your rye sourdough bread: the levain.
To start, you’ll mix equal parts of whole rye flour and water with a ripe sourdough starter, creating a harmonious balance of flavors and textures.
Building the Levain Base
As the foundation of a great rye sourdough bread, building the levain base requires mixing equal parts whole rye flour and water with a small amount of ripe sourdough starter to create a naturally fermented culture that will elevate the bread’s flavor and texture.
To create a successful levain, follow these key guidelines:
- Mix 1:1 whole rye flour and water with a small amount of ripe sourdough starter.
- Ferment the mixture for 12 hours at 75°F/24°C until bubbly and active.
- Confirm at least 40% of the total flour weight is used in the levain for high acidity and flavor development.
- Control the temperature at 78-80°F (26-27°C) during fermentation for ideal yeast and bacteria activity.
Starting Fermentation Process
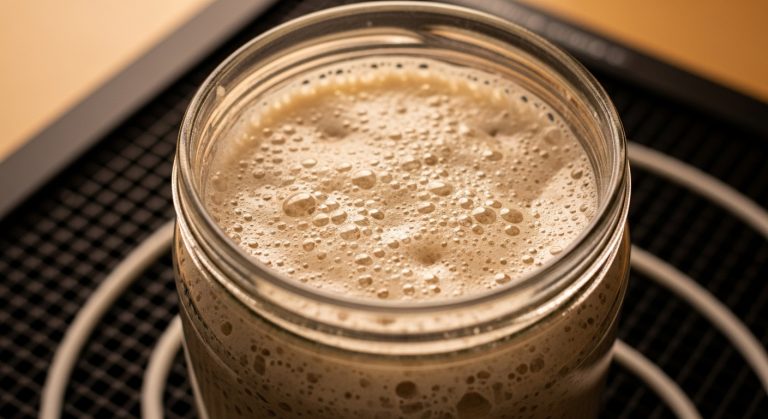
To initiate the fermentation process, mix 272g of whole rye flour with 272g of water and 41g of ripe sourdough starter in a clean container, creating a levain that will serve as the foundation for your rye sourdough bread.
As you combine these ingredients, you’re taking the first step towards cultivating the perfect environment for wild yeast and bacteria to thrive. The large preferment, constituting at least 40% of the total flour, guarantees high acidity, which is essential for inhibiting excessive amylase activity that can lead to gummy interiors.
Allow the levain to ferment at a warm temperature for about 12 hours, or until it becomes bubbly and active.
Monitor its progress closely; a successful levain should float in water, indicating it has developed enough gas and is ready for incorporation into the final dough.
Be mindful of the type of rye flour you’re using and the environmental humidity, as adjustments in hydration may be necessary to achieve the desired consistency.
Mixing the Rye Dough
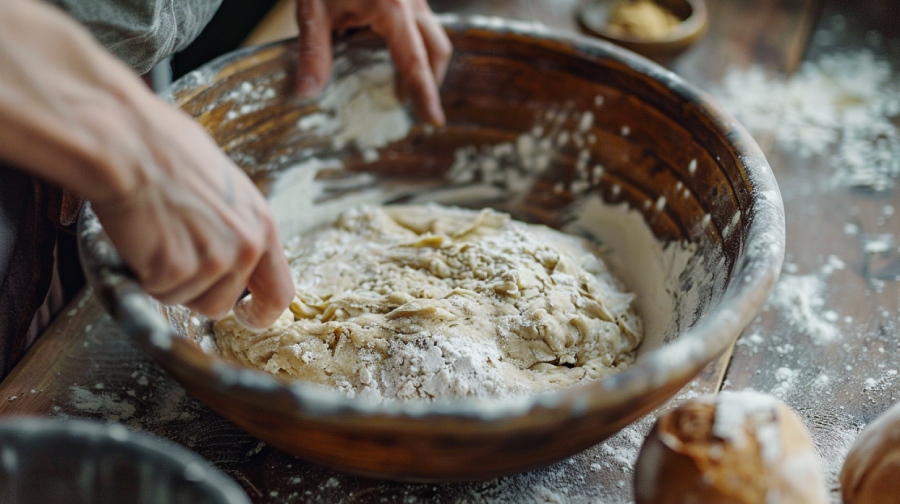
Begin by mixing your active sourdough starter with 1/3 cup of lukewarm, non-chlorinated water to awaken the fermentative action of the natural yeast and launch the rye dough development process. This initial step is essential for activating the yeast and ensuring the best fermentation.
Next, incorporate whole rye flour and high-protein white bread flour into the mixture, aiming for a total hydration level of around 90% to achieve a moist and sticky dough. Use a brief mixing technique to combine the ingredients until a shaggy dough forms, allowing the flour to fully hydrate through the autolyse process for improved structure.
Here are some key considerations for mixing the rye dough:
- Use a non-chlorinated water source to prevent yeast inhibition.
- Aim for a total hydration level of around 90% for a moist and sticky dough.
- Use whole rye flour for a more robust flavor and texture.
- Incorporate high-protein white bread flour for added gluten strength.
Importance of Stretch and Fold
During bulk fermentation, you’ll employ the stretch and fold technique at regular intervals to coax the rye dough into developing the strength and elasticity it needs to produce a well-structured crumb. This process is essential for rye sourdough bread, as the lower gluten content in rye flour requires additional handling to achieve elasticity and structure.
By stretching and folding the dough, you’ll improve its hydration management, ensuring even moisture distribution throughout. This technique also enhances the bread’s overall rise and volume, compensating for rye’s tendency to produce denser loaves. Additionally, it encourages gas retention from fermentation, contributing to a more open crumb and better flavor development.
| Stretch and Fold Benefits | Impact on Dough | Result in Final Bread |
|---|---|---|
| Develops gluten strength | Improves elasticity | Well-structured crumb |
| Enhances hydration management | Even moisture distribution | Tender crumb texture |
| Improves gas retention | Increased rise and volume | Lighter, airier texture |
| Encourages flavor development | Complex flavor compounds | Rich, sourdough flavor |
| Compensates for rye’s density | Better texture and structure | Less dense, more palatable loaf |
Shaping and Proofing Techniques
As you move on to shaping your rye sourdough, you’ll want to handle the sticky dough with care to preserve its delicate moisture.
You’ll use a bench scraper to gently transfer and shape the dough, minimizing friction to prevent it from tearing.
Next, you’ll prepare your proofing basket, lightly dusting it with flour to guarantee the dough releases smoothly, and then you’ll carefully place the shaped loaf inside.
Shaping the Dough
With your dough now fully fermented, you’ll gently turn it out onto a floured surface and use a bench scraper to divide it into the desired portions for shaping.
Lightly shape the dough into a round by tucking the edges into the center, creating surface tension, and then let it rest for about 20-30 minutes under a damp cloth to relax the gluten.
Before final shaping, consider these tips to achieve the perfect loaf:
- Handle the dough gently to maintain surface tension and prevent over-working.
- Keep the dough at room temperature to promote even fermentation.
- Use a proofing basket (banneton) to support the dough and create a uniform shape.
- Cover the dough with a plastic bag or damp cloth to prevent drying out.
After the dough has rested, you’ll perform the final shaping, and then place it into the proofing basket, seam side up, to prepare it for the next stage of the bread-making process, where it will continue to enhance flavor and texture.
Proofing the Loaf
You’ll now transfer the shaped loaf to a well-floured banneton, carefully positioning it seam side up to create a uniform shape and encourage even proofing.
Cover the banneton with a damp cloth to maintain moisture and create a humid environment that fosters fermentation. For room temperature proofing, you can expect a typical duration of about 1 hour, but keep an eye out for visual cues like slight puffing and a soft feel, which indicate the loaf is ready.
If you prefer a more developed flavor and crust blisters, consider cold proofing the shaped loaf in the refrigerator for 5 to 36 hours. This slow fermentation process will enhance the sourdough’s characteristic tanginess and texture.
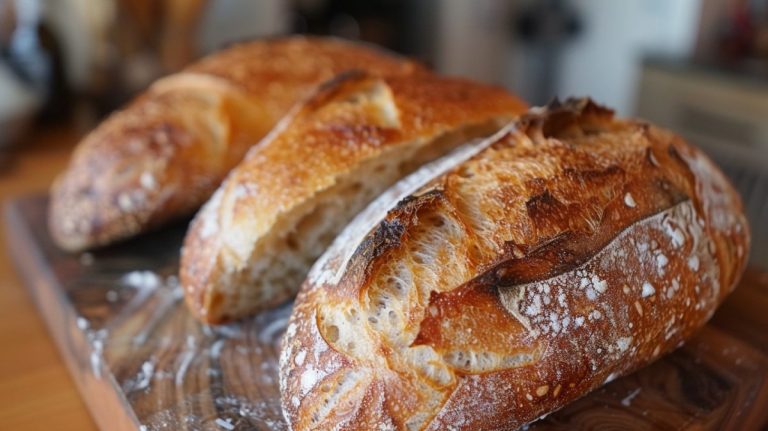
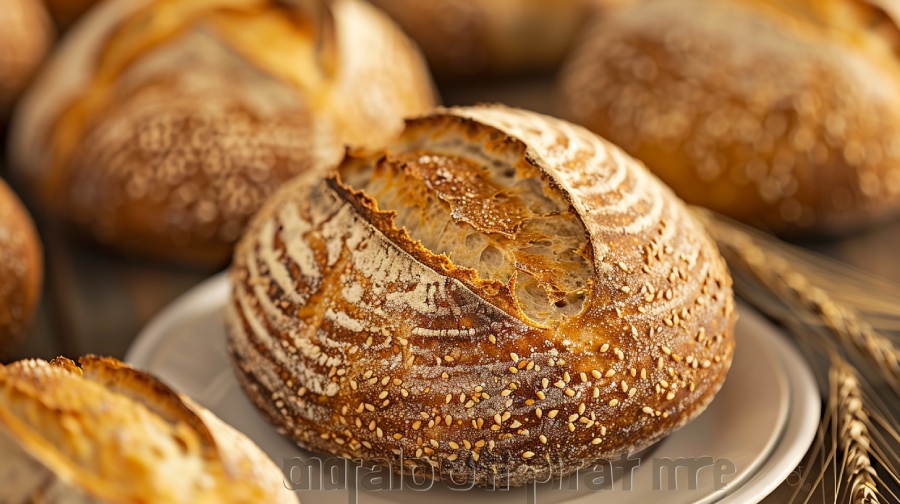
Before baking, always score the loaf, ideally while the dough is still cold from refrigeration. Scoring controls the expansion during baking and creates an attractive pattern on the crust.
With your loaf properly proofed and scored, it’s now ready to be baked to perfection.
Scoring and Baking the Bread
Chill the dough in the refrigerator to firm it up, making it easier to handle and score with precision. This is an essential step in creating a beautifully textured rye sourdough crust.
Once the dough is chilled, use a sharp bread lame or knife to make quick, shallow cuts on the surface. This scoring process allows for controlled expansion during baking, creating a more even and attractive crust.
Next, preheat your oven to 475°F (245°C) with a Dutch oven inside. Place the scored dough into the preheated Dutch oven and bake at the following temperatures:
- 450°F (232°C) covered for the first 20 minutes
Initially, the Dutch oven’s lid traps moisture, enhancing the crust’s texture. As the bread bakes uncovered, the crust dries and darkens, developing its characteristic crackle.
Once done, remove the bread from the oven and let it cool on a wire rack for at least one hour before slicing.
Cooling and Storing the Loaf
As the rye sourdough bread emerges from the oven, let it cool on a wire rack for at least one hour. This cooling period is essential for allowing the interior to set and the flavors to mature, which contributes to the bread’s signature texture and flavor.
During this cooling process, the bread will firm up and become easier to handle. Once cooled, store the rye bread in a bread box or paper bag to maintain moisture without trapping excess humidity. This will ensure it stays fresh for a longer period.
For ideal flavor and texture, it’s best to enjoy the rye bread within 24 hours of baking. If you don’t plan to consume it within this timeframe, you can refrigerate it for 48-72 hours or freeze it in an airtight bag for 2-3 months.
When you’re ready to serve, slice the bread only after it has cooled completely to avoid a squishy texture. By following these cooling and storing steps, you’ll be able to enjoy your rye sourdough bread at its best, with a perfect balance of texture and flavor.
Rye Sourdough Bread Variations
With a solid understanding of the basic rye sourdough bread recipe, it’s time to explore the many variations that can enhance and transform this traditional bread into something truly unique.
You can create a wide range of flavor profiles and textures that suit your taste preferences by experimenting with different ingredients and techniques.
Here are some variations to reflect upon:
- Use pumpernickel rye flour for a deeper, more robust flavor or medium rye for a lighter texture.
- Add seeds like caraway, sunflower, or flax for added crunch and unique flavor profiles.
- Experiment with different hydration levels to achieve your desired texture, whether it’s a denser loaf or a moister crumb.
- Mix in other flours like whole wheat or spelt to balance out the dense nature of rye flour.
Tips for a Perfect Crust
To take your rye sourdough bread to the next level, focus on developing a perfect crust, which requires a combination of proper oven preparation, precise baking techniques, and a well-crafted dough that balances texture and flavor.
In the domain of sourdough baking, achieving a crispy crust is a holy grail. To get there, you’ll want to preheat your oven to 475°F (245°C) with a Dutch oven inside, creating a steam-rich environment that fosters crust development.
A high-hydration dough, around 90% hydration, guarantees a moist interior that complements a crunchy exterior. Incorporating a preferment, or levain, not only boosts flavor but also enhances the crust’s structure and color.
Bake your bread covered for 20 minutes, then uncover and reduce the temperature to 430°F (220°C) for an additional 20-25 minutes to achieve a deep, crackly crust.
After baking, allow your bread to cool on a wire rack for at least an hour – this cooling period is vital for setting the crust and preventing a gummy interior.
Frequently Asked Questions
Is Rye Good for Sourdough?
You’ll find rye is an excellent choice for sourdough due to its higher soluble fiber and nutrient content, which enhances flavor and nutrition, and its unique gluten structure, which yields a denser, moist, and chewy texture.
Is Sourdough Rye Bread the Healthiest Bread?
You’re considering the healthiest bread option, and sourdough rye is a top contender. With its high fiber content, lower glycemic index, and beneficial bacteria, you’ll be boosting your digestive health and nutrient absorption.
Does Rye Make Sourdough More Sour?
You’re likely to notice that rye makes sourdough more sour, as rye flour naturally contains higher levels of pentosans and enzymes, increasing acidity by up to 20% during fermentation, contributing to a more pronounced sour flavor.
Does Rye Sourdough Need More Water?
You’ll find that rye sourdough requires more water due to its higher absorption capacity, and you’ll need to adjust the hydration level carefully, taking into account environmental humidity to achieve the perfect dough consistency.
Perfectly Baked: Relish the Texture and Taste of Your Artisan Rye Sourdough
As you slice into your perfectly baked rye sourdough, the aromatic wisps of caraway and coriander envelop you, transporting you to a rustic European bakery.
The tangy, slightly sour flavors meld with the earthy undertones of the rye, a symphony of taste and texture.
Your patience and persistence have paid off, yielding a crusty, chewy loaf that’s a true masterpiece of artisanal bread-making.
Savor the fruits of your labor, and relish the joy of creating something truly special.