What Tools Do You Need to Make Sourdough Bread?
To make sourdough bread, you’ll need several key tools. Start with a strong sourdough starter and a digital scale for precise measurements. Use clear mixing bowls to monitor dough rise and a banneton for shaping proofing loaves.
Essential baking equipment includes a baking stone or Dutch oven, along with a bread lame for scoring. Don’t forget a bench scraper for easy dough handling and parchment paper to prevent sticking.
These tools help create the perfect environment for your sourdough. If you’re keen to improve your baking skills, there’s even more to discover.
Key Takeaways
- A digital scale ensures precise measurements of flour and water, improving the texture and flavor of your sourdough bread.
- Mixing and proofing containers like clear, straight-sided vessels allow you to monitor dough rise during fermentation effectively.
- A Dutch oven creates a moist baking environment, trapping steam for better crust formation during baking.
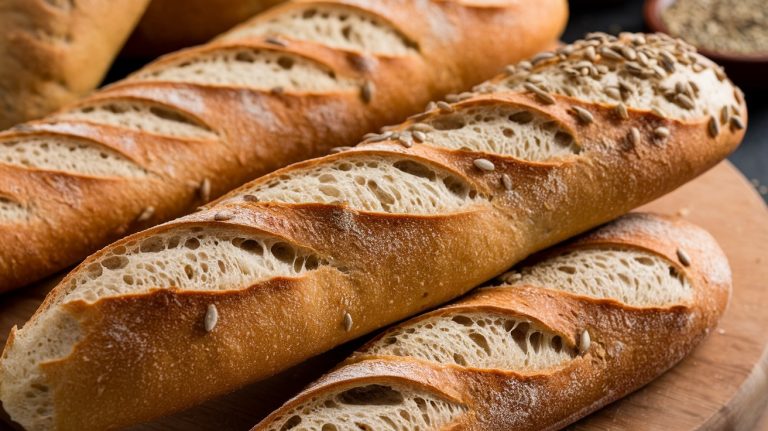
- Use a bread lame for precise scoring, which promotes controlled expansion and enhances the final appearance of your loaf.
Sourdough Starter Essentials
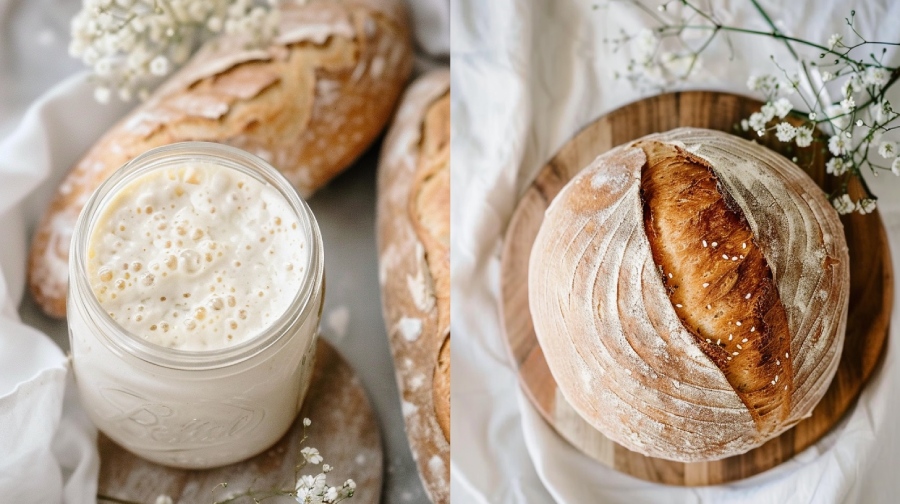
You’ll need a strong starter to bake delicious sourdough bread, which provides the natural yeast and bacteria fundamental for fermentation and leavening.
Start with a reliable sourdough starter recipe that incorporates whole rye flour. This type of flour is packed with nutrients that boost wild yeast growth, giving your starter a robust kick.
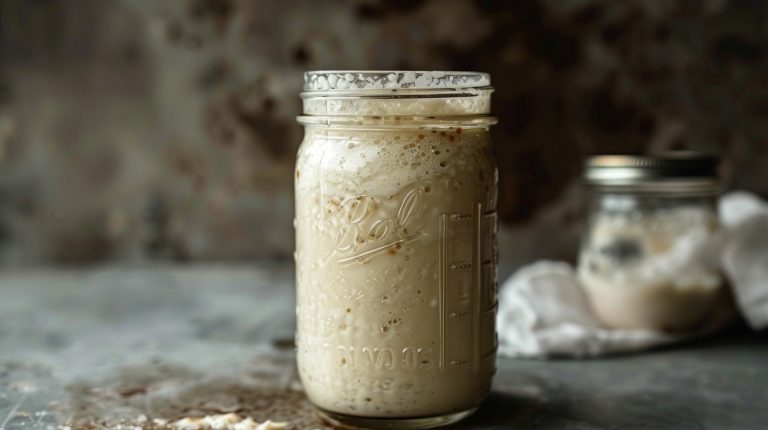
For ideal storage, choose tall, narrow glass jars like Weck jars. These allow you to easily monitor the starter’s activity and expansion, ensuring it’s alive and well.
Regular feeding is essential; you should feed your starter with equal weights of flour and water every day. This consistent care keeps the yeast thriving and ready for baking.
Gathering your baking tools is also significant. A digital scale will help you measure your flour and water accurately, which is crucial for the health of your starter.
With these essentials in place, you’ll be well on your way to cultivating a lively sourdough starter that will elevate your bread-making experience.
Maintaining this starter is the key to achieving that perfect rise and tangy flavor in your sourdough bread.
Measuring Tools for Accuracy
Regarding sourdough baking, precision is key to achieving the perfect loaf.
You’ll want to invest in a digital scale, like the OXO 11-lb. scale, which offers accuracy in 1-gram increments, ensuring your ingredient measurements are spot on.
Mastering these measuring techniques not only improves your results but also elevates your overall bread-making experience.
Importance of Precision
Precision in sourdough baking hinges on accurate measurements, making a digital scale an indispensable tool for achieving consistent results. Unlike measuring cups, which can yield varying amounts of flour due to differences in packing, a digital scale allows you to measure ingredients in grams. This method guarantees that you replicate successful recipes with precision, minimizing the risk of overly dry or wet dough.
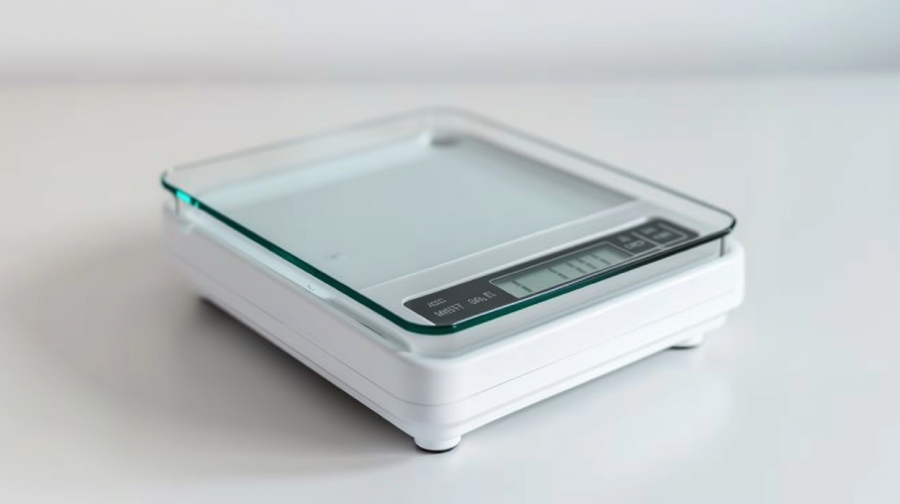
Investing in a high-quality scale, like the OXO 11-lb. scale that reads in 1-gram increments, can greatly enhance your baking experience. For smaller quantities, the American Weigh pocket scale offers the accuracy you need. Consistency in measurements not only affects the texture and flavor of your sourdough but also impacts the overall quality of your bread.
In addition to a digital scale, using measuring spoons for precise amounts of salt and other ingredients can further elevate your final loaf. By focusing on accurate measurement, you’ll develop a better understanding of the ingredients and their interactions, leading to improved results.
Measuring Techniques for Success
Mastering measuring techniques is crucial for achieving the perfect balance of ingredients in your sourdough bread, guaranteeing consistent and delicious results every time. A digital scale is your best friend in this endeavor, as it provides accurate ingredient measurement in grams. Unlike measuring cups, which can lead to inconsistent flour density, a digital scale guarantees that you get precise amounts every time.
To help you understand the importance of different scales, here’s a quick comparison:
| Scale Type | Best For |
|---|---|
| OXO 11-lb. scale | High capacity & accuracy |
| American Weigh pocket scale | Small quantities & portability |
| Budget kitchen scale | General use, under $10 |
Investing in a good digital scale can greatly enhance your baking outcomes by promoting consistency in measurements. When you weigh your ingredients, you’re setting yourself up for success, allowing for easier replication of your favorite sourdough recipes. This consistency in measurements is crucial, especially when trying to recreate successful batches of bread.
Mixing and Proofing Containers
Choosing the right mixing and proofing containers is essential for achieving ideal dough rise and fermentation in your sourdough baking. Clear mixing containers, like glass or plastic bowls with straight sides, offer excellent visibility to monitor your dough rise closely. This way, you can easily determine when the dough is ready to shape.
A batter bowl with a lid is another valuable tool, as it helps maintain moisture during fermentation, making the process smoother. For those baking multiple loaves, the Cambro 4 QT container is perfect; it accommodates two 500 g loaves comfortably.
When it comes to your starter, opt for tall, narrow starter containers, such as Weck glass jars. These provide a clear view of your starter’s expansion and fermentation activity, allowing you to gauge its readiness effectively.
Additionally, mixing bowls with measurement markings on the sides can help you track dough rise, ensuring consistent results.
Proofing Container Options
Exploring various proofing container options can greatly enhance your sourdough baking experience by providing the right environment for the dough to rise beautifully. A clear, straight-sided vessel like a 4-qt Cambro is vital for monitoring dough rise. Its transparent design allows you to observe when your dough is ready to shape easily.
Batter bowls with lids also prove useful, as their clear sides and measurement markings assist in tracking dough expansion during the resting phase. For those who prefer a more rustic approach, banneton baskets are excellent for proofing. They help maintain shape and texture, ensuring that your final product has a delightful crust and crumb.
If you’re serious about fermentation, consider investing in dedicated proofers, like the Brod & Taylor Sourdough Home, which maintains ideal temperatures between 75°F to 85°F. This consistent warmth is essential for achieving the perfect rise and flavor in your bread.
Lastly, if you’re observing starter activity, tall, narrow containers like Weck glass jars are perfect. They make it easy to stir and clean while allowing you to monitor fermentation closely. You’ll elevate your sourdough baking to new heights with the right proofing container.
Key Baking Equipment
Having the right baking equipment is crucial for achieving the perfect sourdough loaf, as each tool plays a specific role in the process.
Start with a digital scale; this tool guarantees you measure your ingredients accurately in grams, leading to consistent results every time.
Next, a baker’s bench knife is invaluable for dividing and shaping your dough. It helps prevent sticking, making handling much easier.
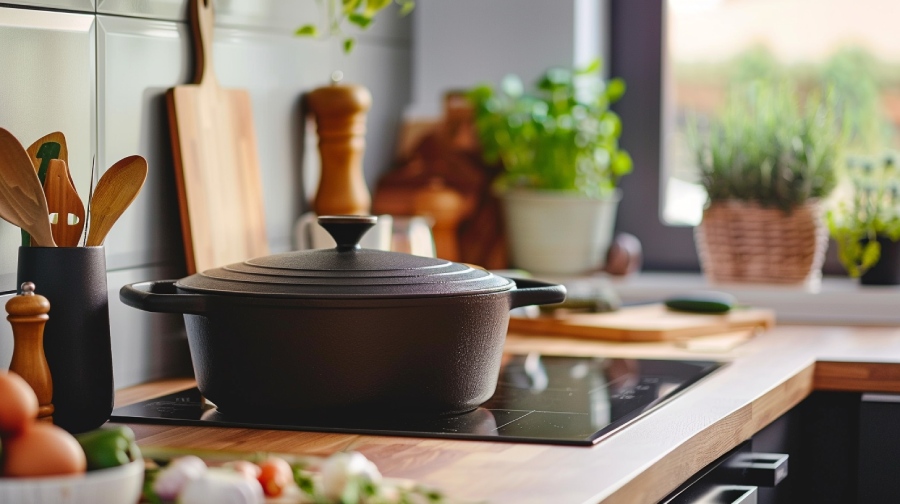
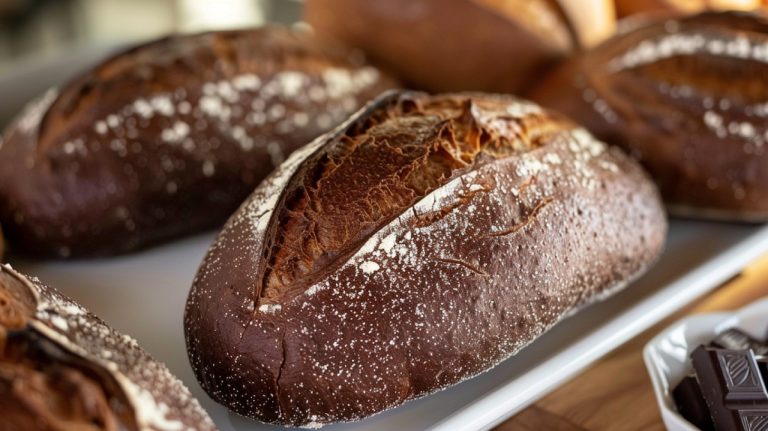
A Dutch oven is a must-have when it comes to baking. This covered baking vessel creates steam, which is essential for developing the desirable crusty texture in sourdough.
To make transferring your dough a breeze, use parchment paper. It minimizes sticking and mess, allowing you to move your dough effortlessly from the counter to the oven.
Essential Baking Accessories
Equipping yourself with essential baking accessories can greatly enhance your sourdough experience, guaranteeing you have everything you need at your fingertips for a successful bake. Here are a few must-have tools:
- Digital scale: This is vital for measuring ingredients accurately in grams. It assures you achieve consistent results every time you bake.
- Baker’s bench knife: Use this versatile tool for dividing and shaping your dough, making it easier to handle your sourdough creations.
Additionally, don’t forget to stock up on parchment paper to simplify transferring dough and prevent sticking.
A lame is also essential for scoring your dough before baking, allowing for controlled expansion and enhancing the visual appeal of your loaf.
Tools for Dough Handling
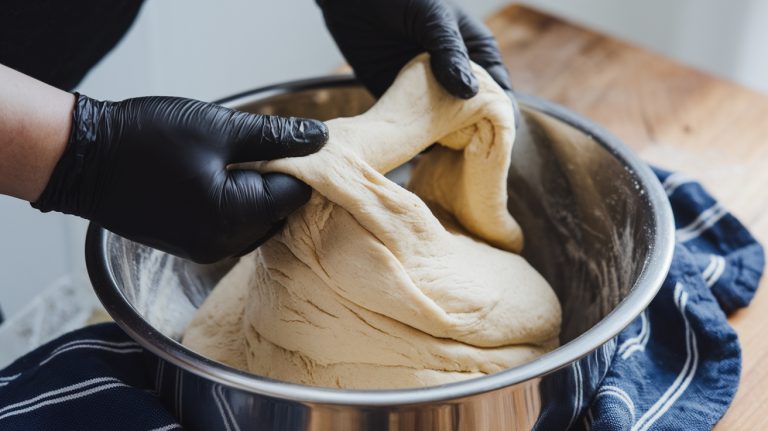
Once you’ve gathered your baking accessories, it’s time to focus on the tools specifically designed for handling your dough effectively. A bench scraper is indispensable for dividing and shaping your dough. It prevents sticking and allows you to handle the dough without adding extra flour to your surfaces.
When it comes to cleanup, a bowl scraper shines by effortlessly removing sticky dough from mixing bowls, ensuring you waste nothing and keep your workspace tidy.
For proofing, bannetons are your best friends. These baskets support your dough during its final rise, helping it maintain shape while creating an attractive pattern on the crust.
Mixing can be a breeze with a dough whisk. Its unique design fosters thorough ingredient incorporation without overly working the dough, which is essential for a great texture.
Finally, don’t forget a shower cap or a similar covering. This simple tool is crucial for protecting your proofing loaves from drying out, ensuring they stay moist during the rising process.
Maintaining Starter Health
To keep your sourdough starter thriving, you need to establish a proper feeding schedule and create ideal storage conditions.
Regular feedings every 12-24 hours with equal parts flour and water guarantee your starter remains active and bubbly.
Additionally, maintaining a warm environment will help promote fermentation and yeast activity, essential for great bread.
Proper Feeding Schedule
Maintaining a proper feeding schedule is crucial for your sourdough starter’s health, as it needs to be fed every 12 to 24 hours with equal parts flour and water by weight to thrive.
For best growth, you should aim for a 1:1:1 ratio of starter, flour, and water—like 50g of each. This guarantees your starter gets the nutrients it needs to flourish.
When feeding your starter, consider using unbleached all-purpose or whole grain flour, such as whole rye, since they provide important nutrients for fermentation.
Here are some tips to keep in mind:
- Always use equal weights of flour and water to maintain consistency.
- Store your starter in a warm environment, ideally between 75°F and 85°F, to enhance fermentation.
Ideal Storage Conditions
Storing your sourdough starter in an environment between 75°F and 85°F guarantees ideal fermentation and vibrant activity. This temperature range promotes healthy yeast growth, resulting in a bubbly and robust starter ready for baking. Using a clear glass container allows you to easily observe its growth and bubbles, giving you visual cues about its health.
To maintain this vitality, keep your starter loosely covered with a lid or cloth. This method retains moisture while allowing gases to escape during fermentation. Regular feedings every 12 to 24 hours are essential when your starter is at room temperature; this guarantees it remains active and ready for use.
If you’re looking for longer storage, refrigerate your starter. Just remember to feed it at least once a week to keep it lively.
Ultimately, maintaining the right storage temperature and consistent feedings are key components for keeping your sourdough starter healthy. By following these guidelines, you’ll make sure that your starter remains a reliable partner in your sourdough baking adventures.
Recommended Flour Types
Choosing the right flour type is essential for creating a robust sourdough starter and achieving the desired texture and flavor in your bread. Each flour possesses unique characteristics that can greatly influence your baking results. Here are some recommended flour types to evaluate:
- Unbleached All-Purpose Flour: This dependable choice strikes a balance between protein and gluten, making it great for feeding your starter and baking.
- Whole Rye Flour: Known for its high nutrient content, this flour excels at supporting wild yeast growth, making it an excellent option for starter development.
For consistent quality, contemplate using King Arthur Flour, which is highly favored by seasoned bakers.
Don’t hesitate to experiment with whole wheat or other specialty grains; they can introduce unique flavors and textures that elevate your sourdough experience.
Troubleshooting Common Issues
As you refine your sourdough skills through community resources, you may encounter common issues that can hinder your baking success. However, troubleshooting these problems is often straightforward with a bit of knowledge and practice.
To tackle these challenges effectively, keep the following tips in mind:
- Sourdough Starter: Verify your starter is active and well-fed. A weak starter can lead to insufficient rise, so give it time to bubble before using it in your dough.
- Sticky Dough: If your dough is too sticky, high humidity might be the culprit. Adjust your flour quantities and try dusting your work surface with rice flour to ease handling.
Frequently Asked Questions
What Tools Do I Need to Bake Sourdough Bread?
To bake sourdough bread, you’ll need a digital scale for precise measurements, a baker’s bench knife for shaping, a Dutch oven for ideal baking, and parchment paper for easy removal. Don’t forget a lame for scoring!
What Tools Do You Need to Make Bread?
Did you know that 90% of successful bakers swear by their digital scales? You’ll need one for precise measurements, plus a bench scraper, Dutch oven, parchment paper, and a sharp bread knife to create delicious loaves.
Do You Need a Dutch Whisk for Sourdough?
You don’t need a Dutch whisk for sourdough, but it makes mixing easier. Its design aerates the dough efficiently, reducing effort and time, while enhancing the rise and texture of your bread.
Do I Need a Mixer for Sourdough?
You don’t need a mixer for sourdough; many bakers prefer hand mixing. It lets you feel the dough’s texture and consistency. If you do use one, just be careful not to overwork the dough.
Bring Tradition and Sourdough Together
Now that you’re equipped with the essential tools for making sourdough bread, you’re ready to begin this rewarding baking journey.
Did you know that approximately 1 in 3 Americans have tried their hand at sourdough during the pandemic?
With your starter thriving and the right equipment at your fingertips, you can create artisanal loaves that not only taste incredible but also connect you to a rich baking tradition.
Enjoy the process, and happy baking!