
How to Make Papad in Air Fryer Without Oil for Healthy Crunch?
To make crispy, golden papad in your air fryer, start by preheating it to 180°C (360°F) for 5 minutes.
Place papads in a single layer, cutting large ones to fit. Avoid overlapping to guarantee even crisping.
Cook for 2–3 minutes, flipping halfway for uniform browning. You can lightly brush oil for extra color or skip it for a healthier snack.
Perfect for quick snacking. Discover tips on toppings, batch cooking, and storage next.
Key Takeaways
- Preheat the air fryer to 180°C (360°F) for 5 minutes to ensure even heat and quick crisping of the papad.
- Place papads in a single layer without overlapping, cutting larger ones to fit and prevent curling during cooking.
- Air fry papads for 2–3 minutes, flipping halfway to crisp both sides evenly and avoid burning.
- Optionally, lightly brush papads with oil before air frying for enhanced browning and a fried-like finish.
- Cook in batches if needed, remove promptly after cooking, and store leftovers in an airtight container to maintain crispness.
Essential Recipe Breakdown for Perfect Papad in Your Air Fryer
| Step | Action | Details & Tips | Timing & Temperature |
|---|---|---|---|
| 1 | Preheat Air Fryer | Set air fryer to 180°C (360°F) and preheat for 5 minutes to ensure even heat. | 180°C / 360°F — 5 mins |
| 2 | Arrange Papad | Place papads in a single layer without overlapping. Cut larger papads if needed. Use a rack or weight to prevent curling. | N/A |
| 3 | Optional Oil Application | Lightly brush with oil for enhanced browning and a fried-like finish or skip for a healthier snack. | N/A |
| 4 | Air Fry Papad | Cook for 2–3 minutes. Flip papad halfway through to ensure even crisping and avoid burning. | 180°C / 360°F — 2 to 3 mins |
| 5 | Check & Reposition | Monitor papad closely. Reposition or flip if curling or uneven crisping occurs for a golden, blistered finish. | During cooking |
| 6 | Serve or Store | Serve immediately for best crispness, especially with masala toppings. Store leftovers in an airtight container after cooling completely. | N/A |
How to Preheat Your Air Fryer for Perfect Papad?

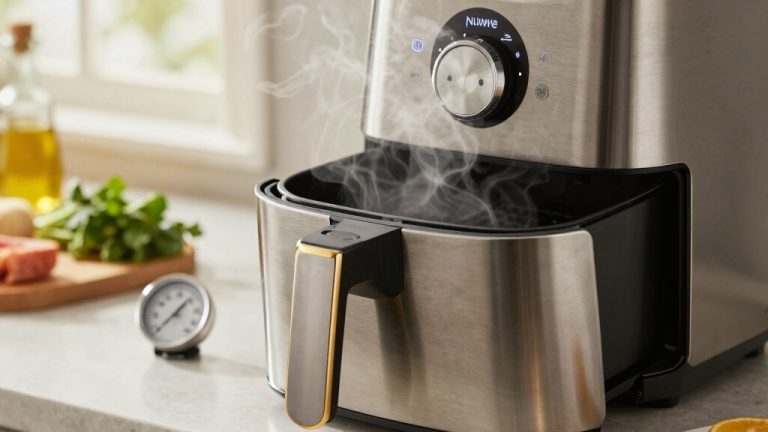
Before you start cooking your papad, preheating your air fryer is essential to get that perfect crispiness.
Set the temperature to 180°C (360°F) and let it run for about 5 minutes.
This step guarantees the basket reaches the ideal heat so your papad cooks evenly and crisps up quickly without sogginess.
Some recipes suggest 190°C (375°F) as an alternative, but sticking to 180°C is safe and effective.
While the fryer heats, prepare your papad for placement.
Remember, a properly preheated air fryer reduces cooking time, helping you achieve that golden, blistered finish.
Skipping this step could leave your papad unevenly cooked or limp, so give your air fryer a few minutes before adding your papad.
Using an air fryer with strong convection helps maintain even airflow and consistent heat for the best crisp results.
Arranging Papad in the Air Fryer Basket to Prevent Curling
To keep your papad nice and flat while cooking, make sure to arrange each piece in a single layer without overlapping.
You want them to have their own space!
If you have a lightweight rack, that’s great—just place it on top.
If not, you can gently press down with a clean weight to stop them from curling as they cook.
Oh, and definitely check in halfway through!
If you notice any papad starting to lift, just give them a little repositioning.
This way, they’ll crisp up evenly.
Remember to clean the air fryer basket promptly after use to maintain optimal performance and prevent residue buildup.
Single Layer Placement
When you arrange papad in the air fryer basket, placing each piece in a single layer is key to preventing curling and ensuring even crisping.
Lay the papads flat without overlapping, giving each enough space so hot air circulates freely around them.
Overlapping or stacking causes uneven cooking and curling, ruining that perfect crisp texture.
If your air fryer basket is small, cut larger papads into halves or quarters to fit them comfortably side by side.
Take care to position them gently to avoid breakage.
This single-layer setup helps the papad cook evenly and quickly, so you get that golden, blistered finish every time.
Remember, the goal is crispness without curling or burning.
Single-layer placement is the simple, effective way to achieve it.
For best results, preheat your air fryer to the recommended temperature to ensure even cooking and a crispy texture, similar to techniques used in air fryer focaccia.
Using Weights Or Racks
Although placing papad in a single layer helps prevent curling, you might still notice some pieces lifting or warping during cooking.
To keep them flat, try using weights or racks inside the air fryer basket. A mesh rack or trivet works well to hold the papad steady, preventing those lightweight pieces from flying toward the heating element.
If you don’t have a rack, placing a clean, heatproof weight like a small metal lid or another basket gently on top can help keep papad flat.
Just be sure weights don’t block air circulation; good airflow guarantees even crisping.
Using these simple tools keeps your papad perfectly flat, crisp, and evenly cooked without curling or burning at the edges.
Repositioning During Cooking
Keep an eye on your papad as it cooks, and don’t hesitate to rearrange the pieces if you notice any curling or uneven crisping.
Since air fryer baskets vary, some papads may lift or curl unevenly. Gently reposition them flat to guarantee consistent heat exposure.
If you spot edges lifting or one side crisping faster, flip or shift the papad to balance the cooking. Arrange them in a single layer without overlap.
If needed, cut larger papads to fit comfortably. Repositioning prevents uneven texture and helps achieve that perfect golden, blistered finish.
Using an air fryer with a viewing window and internal light can make monitoring and repositioning your papad easier without losing heat.
Best Temperature and Time for Air Fryer Papad
Mastering the perfect crispness for your papad in an air fryer hinges on selecting the right temperature and timing.
Set your air fryer to 180°C (360°F) and preheat for about 5 minutes to create an ideal cooking environment.
Preheat your air fryer to 180°C (360°F) for 5 minutes to ensure perfect papad crispiness.
Place the papad in a single layer to ensure even heat exposure.
Cook it for 2 to 3 minutes, keeping a close eye; papad crisps quickly and can burn if unattended.
For thinner papads, 1.5 to 2 minutes at 180°C (350°F) works well, while thicker versions may need up to 5 minutes.
Remember, papad continues to crisp after removal, so check early to avoid overcooking.
For best results, ensure the papad is arranged in a single layer without overlapping to allow optimal air circulation.
Adjusting Time and Temperature for Different Papad Types and Sizes
When you’re using an air fryer for papad, it’s all about adjusting the temperature based on thickness. So, for those thinner papads, you’ll find they crisp up nicely around 180°C. But if you’re working with thicker ones, you might want to turn up the heat a little.
Now, let’s talk timing. The size of your papad really influences how long it needs to cook. Smaller ones are pretty quick, usually taking under 2 minutes. On the other hand, larger papads can take up to 5 minutes to reach that perfect crispiness. Just remember to keep an eye on them while they’re cooking; you don’t want to burn them, and even browning is key!
To ensure the best results, it’s important to avoid overcrowding the basket to promote proper airflow and even cooking.
Temperature Settings By Thickness
Three key factors determine the ideal temperature and time for air frying papad: its thickness, size, and type.
Focusing on thickness, thinner papad crisps quickly at a lower temperature. Thicker ones need more heat and time to cook through evenly. Adjust your air fryer settings accordingly to avoid burning or undercooking.
| Thickness | Temperature (°C) | Temperature (°F) | Time (minutes) | Notes |
|---|---|---|---|---|
| Very thin | 175 | 350 | 1.5 – 2 | Crisp fast, watch closely |
| Thin | 180 | 360 | 2 – 3 | Standard setting |
| Medium | 185 | 365 | 3 – 4 | Flip halfway for even crisp |
| Thick | 190 | 375 | 4 – 5 | May need extra check |
| Extra thick | 200 | 390 | 5+ | Use rack or weight to prevent curling |
For best results, avoid overcrowding the basket to ensure even heat circulation and consistent crisping of the papad, similar to the importance of air fryer arrangement in cooking potato slices.
Timing Based On Size
When cooking papad in an air fryer, the size of each piece plays a vital role in determining the ideal timing and temperature.
Smaller papads usually crisp up quickly, typically in 2 minutes at 180°C (360°F).
Larger or thicker papads need more time, around 3 to 5 minutes, to ensure even cooking without burning. If your papads are extra large, consider breaking them into halves or quarters to fit and cook evenly.
Keep them in a single layer to prevent overlapping, which causes uneven crisping. Check them early, around the 1-minute mark, and flip halfway through if possible.
For best results, preheat the air fryer to optimal temperature range before cooking to promote even heat circulation and crispiness.
Using Oil on Papad Before Air Frying: Is It Necessary?
Although adding oil to papad before air frying can enhance the golden color and give a fried-like finish, it’s not strictly necessary for achieving crispness.
Adding oil before air frying papad enhances color and finish but isn’t essential for crispness.
You can air fry papad without any oil and still get a perfectly crispy result.
Using oil is optional and depends on the texture and appearance you prefer.
If you decide to use oil, remember:
- Lightly brush or spray a small amount to avoid sogginess.
- Oil helps mimic traditional deep-fried papad’s look and taste.
- It can improve browning, especially for thicker varieties.
- Skip oil for a healthier, zero-oil snack with just crispness.
Ultimately, whether you use oil or not, the key is to watch your papad closely during the quick air frying process.
Using perforated liners can help maintain airflow and ensure even crisping when air frying papad.
How to Flip Papad for Even Crisping?
Deciding whether to use oil or not, you’ll want to make certain your papad crisps evenly without burning. Start by placing the papad in a single layer inside your preheated air fryer basket.
Set the timer for about 2 minutes at 180°C (360°F), then pause to flip each papad carefully using tongs. Flipping halfway ensures both sides get equal heat, preventing one side from getting too browned or burnt.
Keep a close eye because papad cooks fast and can burn quickly once flipped. If your papads start curling or lifting, reposition them gently to keep them flat.
After flipping, air fry for another 1 to 2 minutes until golden and crisp, then remove promptly to avoid overcooking from residual heat.
For easier cleanup, consider using disposable parchment liners to catch any crumbs or grease during cooking.
Making Masala Toppings for Your Air-Fried Papad
Bring your air-fried papad to life by topping it with fresh, zesty masala that bursts with flavor and crunch.
To make your masala topping, start by finely chopping onion, tomato, cucumber, and coriander.
Next, squeeze fresh lemon juice over the mix, then sprinkle red chili powder and chaat masala for a tangy kick.
Here’s a quick way to assemble:
- Mix chopped veggies with lemon juice and seasoning.
- Spread the mixture evenly over the crisp papad.
- Add optional extras like sprouts or sev for texture.
- Serve immediately to keep your papad crisp and prevent sogginess.
This vibrant topping transforms your air-fried papad into a delightful snack with invigorating crunch and complex flavors.
Tips for Batch Cooking and Handling Small Air Fryers
When working with a smaller air fryer, you’ll often need to cook papad in batches to avoid overcrowding and guarantee even crisping.
Place papads in a single layer without overlap, or cut them into halves or quarters to fit your basket comfortably.
Preheat your air fryer to 180°C (360°F) for about 5 minutes before cooking.
Keep a close eye on each batch since papads crisp quickly—check after 1 minute and flip halfway if needed.
Using a mesh or rack can prevent lightweight papads from flying into the heating element.
After each batch, remove the crisp papads promptly to avoid overcooking from residual heat.
Batch cooking takes a bit longer but makes certain every papad turns out golden, blistered, and perfectly crisp every time.
Serving and Storing Air Fryer Papad to Keep It Crispy
To keep your air fryer papad crisp and delicious, serve it immediately after cooking or topping, especially for masala versions. The moment papad cools, moisture sets in, risking sogginess.
Serve air fryer papad immediately after cooking to maintain crispness and avoid sogginess from moisture.
When storing leftover plain papad, follow these tips to maintain crunch:
- Let papad cool completely on a wire rack to avoid trapped steam.
- Store in an airtight container or zip-lock bag with a paper towel to absorb moisture.
- Keep the container in a cool, dry place away from humidity.
- Re-crisp leftovers briefly in the air fryer at 180°C (360°F) for 30-60 seconds before serving.
Avoid refrigerating papad, as cold air softens its texture. By serving promptly and storing carefully, you’ll enjoy that perfect snap every time.
Frequently Asked Questions
Can I Freeze Air-Fried Papad for Later Use?
Yes, you can freeze air-fried papad for later use.
Just make sure they’re completely cooled and crisp before freezing to keep their texture.
Store them in an airtight container or freezer bag to prevent moisture from making them soggy.
When you want to enjoy them again, reheat briefly in the air fryer or microwave to restore crispiness.
What Brands of Papad Work Best in an Air Fryer?
You might think any papad brand will magically crisp to perfection in your air fryer, but some play nicer than others.
Go for well-known Indian brands like Lijjat, Haldiram’s, or MTR. They offer consistent thickness and quality that air fryers love.
Avoid super-thick or unevenly shaped papads; they might end up half-cooked or burnt.
Stick with thinner, uniform papads to get that golden, blistered crunch without drama.
How Do I Clean My Air Fryer After Cooking Papad?
To clean your air fryer after cooking papad, first unplug it and let it cool.
Remove the basket and tray, then soak them in warm, soapy water for 10–15 minutes to loosen any stuck bits.
Use a soft sponge or brush to gently scrub away residue.
Wipe the interior and heating element carefully with a damp cloth, avoiding water pooling.
Dry all parts fully before reassembling to keep your air fryer fresh and ready.
Can I Use an Air Fryer to Cook Flavored or Stuffed Papad?
Yes, you can use an air fryer to cook flavored or stuffed papad!
Just place them in a single layer, ensuring they don’t overlap, and air fry at around 180°C for 2-3 minutes.
Watch closely since stuffed papads may take a bit longer and can burn easily.
Use a mesh or rack to prevent curling or flying.
Adding toppings after cooking keeps them crispy and delicious.
Is It Safe to Cook Papad With Added Spices Inside the Air Fryer?
Yes, it’s safe to cook papad with added spices inside the air fryer.
Just make sure the spices are well adhered or sprinkled lightly, so they don’t fly off and burn.
You can dab the papad with a wet tissue before adding masala to help it stick.
Keep an eye on cooking time; spiced papad crisp quickly.
This way, you get flavorful, evenly roasted papad without any mess or smoke.
Keep the Crunch Alive! Learn How to Make Papad in Air Fryer and Store It Right
Now that you know the perfect temperature and timing, you can enjoy crispy papad in just minutes.
Did you know air frying reduces oil usage by up to 75% compared to traditional frying? That means healthier, guilt-free snacking without sacrificing crunch.
Just preheat, arrange, and flip your papad for even crisping.
Whether plain or masala-topped, air-fried papad is quick, delicious, and easy to store. Perfect for anytime munching.