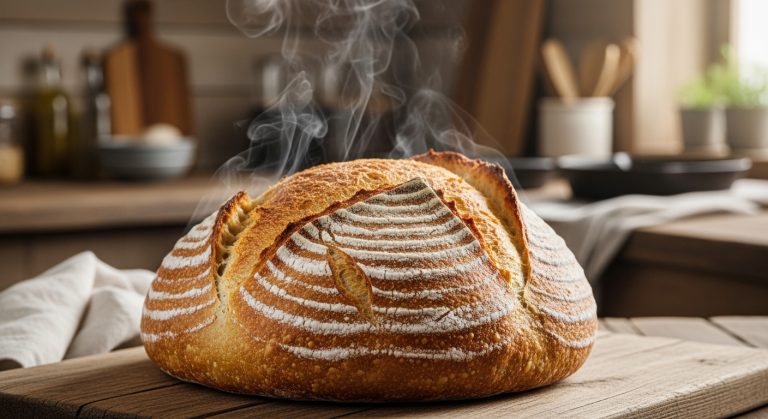
How to Make Sourdough Bread With Instant Yeast?
Making sourdough bread with instant yeast is easy and rewarding! Start by mixing warm water (105-110°F) with instant yeast in a large bowl. Gradually add all-purpose flour and salt until you form a sticky dough.
Let it rise in a warm spot until doubled, about 1-1.5 hours. Shape your dough into a round loaf and proof it for another 30 minutes.
Preheat a Dutch oven and score the top of your loaf before baking. Cover for 30 minutes, then uncover and bake for an additional 10-15 minutes until golden. You’ll discover tips and tricks that can elevate your bread-making game even further.
Key Takeaways
- Combine equal parts sourdough starter, warm water (105-110°F), and instant yeast in a large bowl for optimal fermentation.
- Gradually add bread flour and salt until a sticky dough forms, ensuring well-mixed ingredients.
- Allow the dough to rise in a warm area for 1-1.5 hours until it doubles in size.
- Shape the dough into a round loaf, proof for an additional 30 minutes, then preheat your Dutch oven.
Essential Ingredients
To create a delicious loaf of sourdough bread, you’ll need a few key ingredients that work together to deliver that signature flavor and texture.
Start with all-purpose flour, which provides the necessary structure for your bread. Next, grab some instant yeast, which not only gives you the rapid leavening action you want but also helps retain that classic sourdough flavor.
Warm water is essential for activating the instant yeast, so make certain it’s between 105-110°F to guarantee everything mixes properly. Don’t forget the salt; it enhances the bread’s flavor and helps regulate yeast activity during fermentation, promoting a balanced rise.
For those looking to add a twist, consider including optional ingredients like sugar for a touch of sweetness and browning or sour cream and Greek yogurt for added richness and tang.
The beauty of these ingredients lies in their ability to create a no-knead recipe, making sourdough baking accessible for everyone.
With the right combination, you’ll achieve a stunningly textured loaf that’s perfect for any occasion. Happy baking!
Flour Type Options
Choosing the right flour is essential for achieving the perfect sourdough bread, as each type brings its own unique flavor and texture to the table.
For a classic result, bread flour is your best bet. With a protein content of around 12-14%, it develops gluten effectively, giving your loaf that delightful chewy texture. If you’re a beginner or prefer a softer crumb, all-purpose flour can work wonders, creating a more tender loaf.
Whole wheat flour adds a denser texture and robust flavor to your bread. You might want to mix it with white flour in a 30/70 ratio to strike a balance between taste and lightness.
For those adventurous bakers, specialty flours like rye or spelt can introduce unique flavor profiles and additional nutritional benefits, though you’ll need to adjust hydration levels due to their different absorption rates.
If you’re aiming for an artisan-style loaf, consider high-gluten flour for an even chewier texture and improved structure.
Experimenting with these flour types won’t only enhance your sourdough bread but also make each baking experience a delightful journey!
Additional Flavor Enhancements
Once you’ve selected your flour, enhancing your sourdough bread with additional flavors can transform a simple loaf into a culinary masterpiece. One great way to achieve this is by incorporating sour cream or Greek yogurt into your dough. These ingredients add richness and a tangy depth that elevates the overall flavor profile of your sourdough bread.
Consider experimenting with different flours like whole wheat or rye. Each brings its unique flavors and textures while still capturing the essence of sourdough.
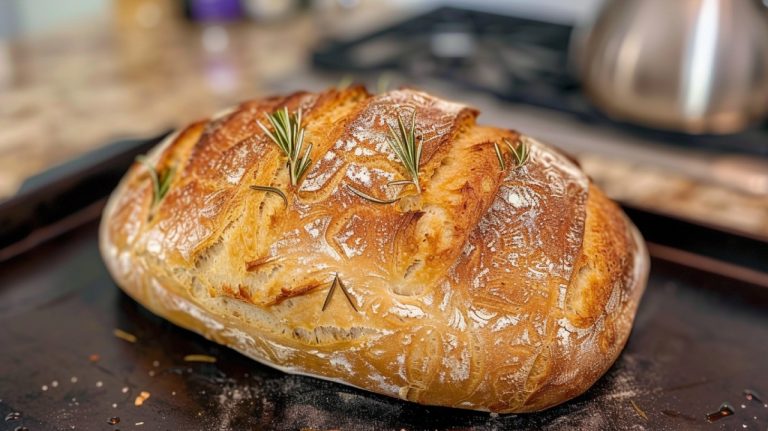
For an aromatic kick, adding herbs and spices—think rosemary or garlic powder—can infuse your bread with delightful flavors that complement its natural sourness.
If you’re aiming for a savory twist, don’t hesitate to include shredded cheese or grated Parmesan. This cheesy addition creates a deliciously rich loaf, perfect for any meal.
Finally, mixing in seeds such as sunflower or sesame can enhance the texture with a delightful crunch while also providing nutritional benefits.
Required Equipment
Gathering the right equipment is vital for your sourdough bread journey, as each tool plays an important role in achieving that perfect crust and texture. Without the proper gear, you might struggle to create the artisanal loaf you envision. Here’s what you need:
- Dutch Oven: This heavy pot is essential for baking sourdough bread with instant yeast. It traps steam, resulting in a crunchy crust that’s simply irresistible.
- Digital Scales: Accurate measurements are key to consistent results. Digital scales guarantee you get the precise amounts of flour, water, and yeast, setting you up for success.
- Bowl: A spacious bowl is vital for mixing your ingredients and allowing for proper dough proofing. It gives your dough the space it needs to rise beautifully.
- Sharp Knife or Lame: Scoring the dough with a sharp knife controls how your bread expands during baking. It’s not just functional; it adds an artistic touch to your loaf.
With these tools in hand, you’re well-equipped to start your delicious sourdough adventure. Happy baking!
Step-by-Step Preparation
Now that you’ve gathered your equipment, it’s time to jump into the heart of sourdough preparation.
You’ll mix your ingredients, let the dough rise, and master the baking process to achieve that perfect loaf.
With careful attention to each step, you’ll create a delicious bread that’s sure to impress!
Ingredients and Equipment Needed
To create a delicious sourdough bread, you’ll need to collect a few essential ingredients and some key equipment to guarantee a successful baking experience.
Here’s what you’ll need:
- Sourdough starter – 1 cup of active starter to give your bread that signature tang.
- Warm water – 1 cup heated to 105-110°F, ideal for activating the instant yeast.
- Bread flour – 3 cups for a strong structure and chewy texture.
- Dutch oven – This will help create steam while baking, giving your loaf a beautiful crust.
You’ll also need salt and sugar: 1 teaspoon of salt to enhance flavor and 1 tablespoon of sugar for a hint of sweetness.
With your ingredients ready, mix the sourdough starter and warm water in a large bowl. Then, add the bread flour, instant yeast, sugar, and salt until a sticky dough forms.
Let it rise in a warm spot for about 1-1.5 hours until it doubles in size.
Afterward, shape the dough into a round loaf and let it proof for another 30 minutes.
Preheat your Dutch oven, and you’re all set to bake!
Mixing and Rising Dough
Combining your active sourdough starter with warm water and instant yeast in a large bowl creates the perfect foundation for a flavorful loaf. Mix these ingredients thoroughly to guarantee the yeast is evenly distributed. Gradually add bread flour and salt, stirring until no dry flour remains. You’ll notice the dough becoming sticky—this is a good sign!
Now, it’s time to let your dough rise. Place it in a warm environment for about 1 to 90 minutes or until it doubles in size. This rise indicates that your yeast is active and the fermentation process has begun, contributing to the bread’s flavor.
Once the dough has risen, gently shape it into a round loaf. Allow it to rise again for about 30 minutes. This second rise is essential for enhancing the flavor and texture of your bread.
While the dough is rising, preheat your Dutch oven. A hot baking environment is critical for achieving that desired crusty exterior and soft interior.
With the dough ready and the oven hot, you’re well on your way to baking a delicious sourdough loaf!
Baking and Serving Tips
Preheating your Dutch oven is essential for achieving that perfect crust on your sourdough loaf, so don’t skip this crucial step as you prepare to bake. The heat from the Dutch oven will help create a crispy crust that contrasts beautifully with the soft interior.
- Shape your dough into a round loaf and let it proof for 30 minutes. This rest allows the gluten to relax and the dough to expand.
- Score the top of your loaf with a sharp knife or lame. This creates controlled openings for steam to escape, enhancing the loaf’s appearance and texture.
- Bake your loaf covered in the Dutch oven for 30 minutes. This traps steam, contributing to a beautifully chewy crust.
- Uncover and bake for an additional 10-15 minutes at 450°F, until it turns a glorious golden brown crust.
Once it’s done, let your sourdough cool on a wire rack before slicing.
Enjoy the delightful aroma and flavor of your homemade bread, made with active sourdough, warm water, and instant yeast.
You’ve earned that crispy, golden crust!
Baking Instructions

Begin by mixing equal parts of sourdough starter, warm water heated to around 105-110°F, and instant yeast in a large bowl until everything’s well combined.
Next, gradually add bread flour and salt, stirring until a sticky dough forms—make certain no dry flour remains. Once mixed, cover the bowl and let the dough rise in a warm spot until it doubles in size, which typically takes about 1-90 minutes.
While your dough is rising, preheat your Dutch oven for 30 minutes. This step is essential—it helps create that perfect crust you crave.
Once the dough has risen, shape it gently and place it inside the preheated Dutch oven. Cover it for the first 30 minutes to trap steam and enhance the crust’s texture.
After the initial 30 minutes, remove the lid and bake uncovered for an additional 10-15 minutes. Keep an eye on it; you want a golden brown crust.
To verify it’s perfectly done, check that the internal temperature reaches around 200°F. Now, you’re ready to enjoy your homemade sourdough, bursting with flavor and warmth!
Storage and Freezing Tips
To keep your sourdough bread fresh and delicious, it’s important to know the best storage and freezing methods. Here’s how you can guarantee your bread stays moist and flavorful:
- Airtight Container: Store your unsliced loaves in an airtight container at room temperature for up to 4 days. This helps prevent staleness and keeps the crust from getting too hard.
- Freezing: For longer storage, wrap your sourdough bread tightly in plastic or aluminum foil before placing it in the freezer. It can last up to 2 months without freezer burn.
- Thawing: When you’re ready to enjoy your frozen bread, simply leave it at room temperature for several hours. If you’re in a hurry, toast slices directly from the freezer for a warm treat.
- Restoring Crustiness: To bring back that fresh-baked flavor, heat the thawed bread in a preheated oven at 350°F for 5-10 minutes. This will help restore its crustiness and make it taste as good as new.
Nutritional Information
Understanding the nutritional information of sourdough bread can enhance your appreciation for this flavorful staple, especially when considering how it fits into your overall diet.
Each serving of sourdough bread made with instant yeast contains approximately 168 calories, making it a relatively low-calorie option. You’ll find about 35 grams of carbohydrates, providing a quick source of energy, paired with 5 grams of protein to help keep you feeling satisfied.
What’s even better is that this bread is low fat, containing only about 1 gram of total fat per serving, with negligible saturated fat.
Additionally, sourdough bread is a source of essential minerals, offering around 366 mg of sodium, 56 mg of potassium, and 2 mg of iron. These minerals are crucial for various bodily functions, including muscle contraction and oxygen transport.
Keep in mind that nutritional values may vary based on the specific ingredients you use, like different types of flour.
To get the most accurate nutritional information, consider verifying it through personal calculations or reliable online nutritional calculators.
Enjoy your homemade sourdough bread while keeping your health goals in mind!
Variations and Substitutions
Exploring variations and substitutions can elevate your sourdough bread experience, allowing you to tailor flavors and textures to your personal taste.
Start by using instant sourdough yeast as a quick alternative to traditional starters; it simplifies fermentation while preserving that signature sourdough tang.
For the flour, consider a mix of all-purpose flour and whole wheat flour. A 30/70 ratio gives you a lighter texture while adding a nutty flavor and extra nutrition.
You can also enhance richness by incorporating dairy ingredients like sour cream or Greek yogurt, which contribute a delightful tanginess to your loaf.
Don’t forget about salt content! Adjusting it to your preference can greatly influence the overall taste, with about 1.5 teaspoons recommended for ideal flavor.
Frequently Asked Questions
Can You Use Instant Yeast to Make Sourdough?
Yes, you can use instant yeast to make sourdough! It speeds up fermentation while still delivering that signature tangy flavor. Combining it with a sourdough starter gives you a delicious, authentic loaf in less time.
Can I Use Yeast in Sourdough Starter?
Oh, sure! Toss instant yeast into your sourdough starter and watch the wild yeast flee in horror. You’ll get faster results, but don’t be surprised if your bread loses that classic tangy charm.
Do I Need to Let Bread Dough Rise if I Use Instant Yeast?
Yes, you need to let your bread dough rise, even with instant yeast. It develops flavor and texture, creating that light, airy crumb you love. Don’t skip this step; it’s essential for delicious bread!
How Much Sourdough Starter Is Equal to One Package of Yeast?
Surely, substituting sourdough starter’s strength is simple! For one package of yeast, use about 1/2 to 1 cup of active starter, adjusting liquid by 1/4 cup for perfect, pleasing, flavorful results in your bread.
From Quick Bakes to Artisan Loaves: Versatility of Instant Yeast
In the end, making sourdough bread with instant yeast is like planting a garden; with a little patience and care, you’ll reap the rewards of your efforts.
Just like watching seedlings sprout into vibrant blooms, you’ll witness your dough rise and transform into a crusty, golden loaf.
So, don’t hesitate—embrace the process, savor the aroma, and enjoy the delicious, homemade bread that awaits you.
Your kitchen will become a haven of warmth and flavor, one loaf at a time.