How to Make Bread in Air Fryer Without Yeast: Quick & Easy Recipe
You can make quick, golden yeast-free bread in your air fryer using common ingredients like flour, baking powder or soda, and Greek yogurt for moisture and lift.
Mix just until combined to keep the dough tender. Then shape it into small loaves or buns and bake at 300–360°F for 15–45 minutes until the crust is golden and crisp.
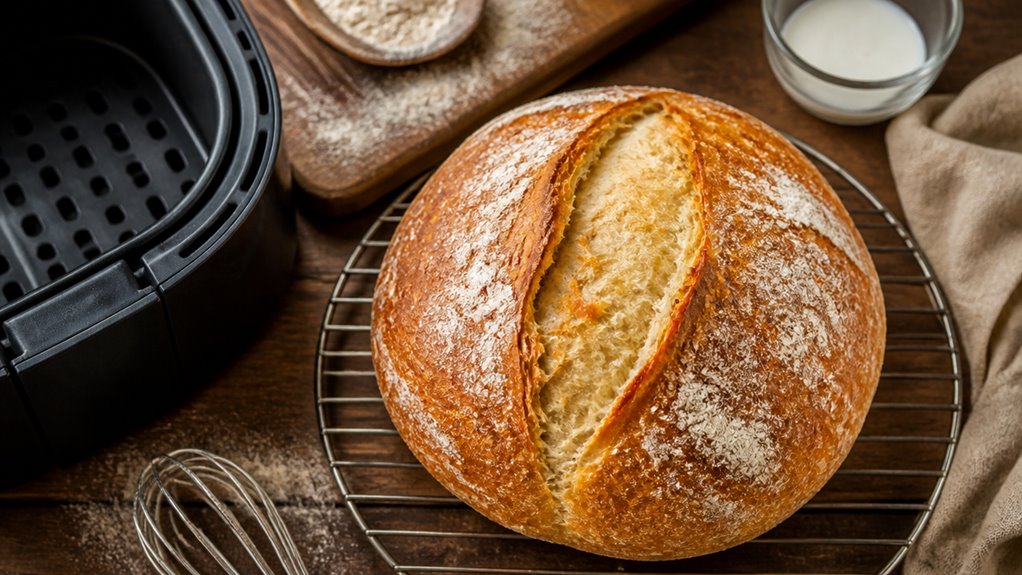
Cooling on a rack keeps crusty perfection. Keep going to explore tips for flavor twists, dough handling, and perfect doneness.
Key Takeaways
- Use baking powder or baking soda with an acid like Greek yogurt to replace yeast and achieve a quick rise in the dough.
- Mix flour, leaveners, salt, and yogurt just until combined to avoid toughness and maintain a tender crumb.
- Preheat the air fryer and bake dough at 300–360°F for 15–45 minutes, depending on loaf size, flipping halfway for even browning.
- Shape dough into small loaf or buns, place on parchment or silicone liner in the air fryer basket for even cooking.
- Check doneness by a golden crust, toothpick test, or internal temperature of 200–205°F before cooling on a rack.
Key Ingredients and Baking Tips for Yeast-Free Air Fryer Bread
| Ingredient / Step | Description | Purpose / Benefit | Tips for Best Results |
|---|---|---|---|
| All-Purpose or Self-Rising Flour | Primary base for dough structure | Creates a soft crumb and firm loaf foundation | Measure accurately; avoid too much flour to prevent toughness |
| Baking Powder or Baking Soda | Chemical leavening agents replacing yeast | Provides quick rise and airy texture | Mix just until combined to trap carbon dioxide bubbles |
| Greek Yogurt (or Buttermilk, Sour Cream) | Dairy acid that activates baking soda/powder | Adds moisture, tang, and tender crumb | Use full-fat for richer flavor and better rise |
| Salt | Enhances flavor | Balances taste and strengthens dough | Use moderate amounts; too much can inhibit rising |
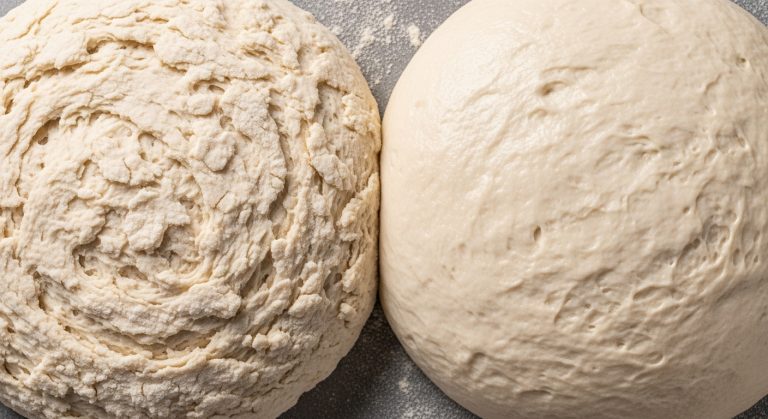
| Mixing Technique | Combine dry and wet ingredients gently | Prevents tough texture by avoiding overmixing | Stop mixing when dough is just shaggy and slightly sticky |
| Shaping Dough | Form into small loaves or buns | Ensures even baking and attractive crust | Use parchment or silicone liner; score tops lightly if desired |
| Air Fryer Temperature & Time | Bake at 300–360°F for 15–45 minutes depending on size | Creates golden crust and fully cooked interior | Preheat air fryer; flip larger loaves halfway for even browning |
| Doneness Checks | Visual cues, toothpick test, internal temperature | Ensures bread is perfectly baked without under or overcooking | Look for golden crust; toothpick should come out clean; internal temp 200–205°F |
| Cooling & Storage | Cool on wire rack; store in airtight container | Preserves crust texture and crumb softness | Reheat briefly in air fryer to refresh if bread dries out |
Why Make Yeast-Free Bread in Your Air Fryer?

Frequently, you might find yourself craving fresh bread but lacking the time or patience to wait for yeast to rise.
Making yeast-free bread in your air fryer solves that instantly. You mix a simple dough with quick-acting leaveners like baking powder or soda, then pop it in the air fryer.
In under an hour, you pull out a golden, crusty loaf or soft, pillowy buns with a tender crumb. The air fryer’s rapid circulating heat creates a perfect crust while locking in moisture.
Plus, it’s compact and energy-efficient, so you don’t heat up your whole kitchen. This method is ideal for last-minute baking, small batches, or when you want fresh, homemade bread without the fuss of yeast fermentation or lengthy proofing times.
For best results, preheating your air fryer ensures even cooking and a crispy crust, just like when reheating quesadillas with preheating guidelines.
Key Ingredients for Yeast-Free Air Fryer Bread
To kick things off, you’ll need to choose the right flour. All-purpose or self-rising flour works best to give your bread the structure it needs. Got that? Great!
Next up, you’ll want to add some baking powder or baking soda into the mix. This is what’ll give your dough that lovely light and airy lift, even without yeast. Pretty cool, right?
And here’s the fun part: incorporating a tangy dairy acid, like Greek yogurt or buttermilk. This not only adds flavor but also reacts with the leaveners, helping your air fryer loaf rise perfectly. So, get ready to enjoy some delicious, fluffy bread!
Using the air fryer’s hot circulating air helps create a crispy exterior while keeping the inside soft and fluffy.
Essential Flour Choices
Flour forms the foundation of any yeast-free air fryer bread, shaping not just the dough’s structure but its flavor and texture too. You’ll usually reach for all-purpose flour; it’s versatile, light, and creates a soft crumb.
If you want a heartier, nuttier taste, swap in whole-wheat flour. It adds depth but can make the bread denser, so balance it with all-purpose flour.
Self-rising flour simplifies things by already including leavening and salt, perfect for quick mixes. When measuring, be precise; too much flour makes the dough tough, too little makes it sticky and hard to handle.
Visualize a smooth, slightly tacky dough that holds its shape. Choosing the right flour guarantees your bread bakes evenly with a golden crust and tender inside every time.
For optimal texture, ensure you measure flour accurately and avoid overworking the dough to maintain a tender crumb and avoid toughness, a technique similar to toasting techniques that emphasize gentle handling for best results.
Leavening Agents Explained
Reveal the secret to fluffy, tender bread by understanding the leavening agents that replace yeast in your air fryer recipes.
Instead of waiting for yeast to ferment, you’ll rely on baking powder or baking soda to create that light, airy texture.
Baking powder releases carbon dioxide bubbles when heated, puffing up your dough quickly.
Baking soda, on the other hand, needs an acid to activate; think of it as a spark waiting to ignite.
These agents work fast, so you mix your dough just until combined to trap those tiny bubbles.
Picture dough rising right before your eyes as the air fryer’s hot air crisps the crust.
Mastering these leaveners guarantees your yeast-free bread is tender, risen, and perfectly golden every time.
Using sourdough discard as a natural leavening agent can add unique flavor and improve the texture of your bread.
Dairy Acid Options
Choosing the right dairy acid is essential for activating your baking soda or powder and achieving that perfect rise without yeast.
These acids not only trigger leavening but also add moisture and tang, enhancing flavor and crumb texture. You’ll want to pick options that balance acidity and richness to create a tender, fluffy loaf.
Here are three popular dairy acid choices:
Greek Yogurt: Thick and creamy, it creates soft, fluffy buns with a subtle tang.
Buttermilk: Offers classic soda bread flavor and encourages a golden crust.
Sour Cream: Adds richness and moisture, producing a dense, tender crumb.
Using any of these will give life to your quick bread, helping it rise beautifully in the air fryer.
Basic Yeast-Free Air Fryer Bread Recipe Overview
Let’s dive into making some delicious, yeast-free bread in the air fryer! You only need a few basic ingredients: flour, baking powder or soda, and some tangy Greek yogurt. These come together to create a quick, fluffy dough that’s super easy to work with.
Once you mix everything, just be sure to combine it until it’s just right—don’t overdo it! You want to keep the dough a bit sticky; that’s the secret to getting that amazing texture. Now, shape your loaf or buns however you like.
Next up, pop them into your preheated air fryer at about 350°F. You’ll want to keep an eye on them; they can turn into golden beauties in just 15 to 45 minutes, depending on how big you made them. It’s so exciting to watch them rise and get that perfect crust!
Though yeast is not used, adding a small amount of baking soda or powder helps the bread rise and achieve a light texture.
Key Ingredients Overview
Several simple ingredients come together to create a basic yeast-free bread perfect for your air fryer. You’ll rely on chemical leaveners like baking powder or baking soda instead of yeast, which means your bread rises quickly and easily.
The base often combines all-purpose flour with a tangy dairy ingredient such as Greek yogurt or buttermilk, adding moisture and subtle acidity. Salt enhances flavor, while optional mix-ins like herbs or cheese can add character.
Flour (all-purpose or self-rising) forms the structure of your bread. Baking powder or baking soda triggers the rise without yeast. Greek yogurt or buttermilk brings moisture and tender crumb.
These ingredients create a simple, quick dough that bakes into a golden, crusty loaf with a soft, fluffy interior. Incorporating chemical leaveners ensures a reliable rise and texture in yeast-free bread recipes.
Basic Mixing And Baking
Start by whisking your dry ingredients—flour, baking powder or soda, and salt—until they’re evenly blended, creating a light, airy base for your bread.
Next, gradually add your wet ingredient, like tangy Greek yogurt or buttermilk, stirring just until a shaggy dough forms.
Don’t overmix; slight stickiness is perfect.
Lightly flour your surface and knead briefly to shape a smooth ball or loaf, avoiding toughness from too much handling.
Place your dough on parchment or a silicone liner in the air fryer basket, ensuring space for air to circulate.
Set your air fryer between 300°F and 360°F depending on size, and bake for 15–45 minutes until golden and cooked through.
Let your bread cool before slicing for the best texture and flavor.
For best results, avoid overcrowding the basket and ensure proper air circulation to achieve even baking and prevent sogginess.
How to Mix and Handle Quick Bread Dough Right?
Whisk the dry ingredients thoroughly to evenly distribute the baking powder or soda, ensuring your bread rises consistently.
When you add wet ingredients like yogurt or buttermilk, mix just until the dough comes together. Overmixing makes bread tough.
Expect a slightly sticky, shaggy dough; add flour sparingly if it’s too wet. Lightly flour your workspace, then knead the dough briefly. Just form a smooth ball without overworking it.
Keep these tips in mind:
- Combine ingredients gently to maintain tender crumb.
- Avoid excessive kneading to prevent toughness.
- Use small flour additions to manage stickiness without drying out dough.
This careful handling guarantees a soft, fluffy texture perfect for your air fryer bread. Using eco-friendly materials in your kitchen tools supports sustainable cooking practices.
Shaping Your Dough for Even Air Fryer Baking
Shape your dough thoughtfully to guarantee even baking and a beautiful crust in your air fryer.
Start by gently shaping the dough into a smooth ball if making a small loaf or buns, assuring the surface is taut without tearing.
For larger loaves, form a round or log shape that fits comfortably in your air fryer basket, leaving space for hot air to circulate.
Use parchment paper or a silicone liner to prevent sticking and promote even heat exposure.
If you want, score the top lightly with a sharp knife; this helps control expansion and creates an attractive crust.
Avoid overcrowding the basket; spacing the dough pieces evenly assures each side browns uniformly.
Thoughtful shaping sets the stage for a balanced bake that’s golden and tender throughout.
Additionally, choosing the right pan size and depth can influence the thickness and texture of your bread even in an air fryer.
Set the Right Air Fryer Temperature and Time
When you set the right temperature and time in your air fryer, you release the perfect balance between a golden crust and a tender crumb.
Achieving the perfect golden crust and tender crumb starts with the right air fryer temperature and timing.
For yeast-free bread, aim for a moderate heat—around 300°F for smaller buns or 350°F to 360°F for larger loaves. This range ensures even cooking without burning the exterior.
Timing varies: small rounds bake in 15–20 minutes, while bigger loaves need 25–45 minutes. Keep an eye on your bread’s size and density to adjust accordingly.
Preheat your air fryer for consistent heat distribution. Space dough pieces evenly for prime air circulation. Consider flipping larger loaves halfway to brown the bottom nicely.
Setting these parameters right guarantees a visually appealing, delicious quick bread every time. Preheating also stabilizes heating element and fan circulation to achieve even heat distribution throughout the chamber.
How to Check When Your Yeast-Free Air Fryer Bread Is Done?
You’ll know your yeast-free air fryer bread is ready when the crust turns a rich golden brown and feels nice and firm to the touch.
If you want to double-check, just poke the center with a toothpick. It should come out clean or maybe have just a few crumbs sticking to it.
For the ultimate assurance, grab a thermometer. You’re aiming for an internal temperature of about 200°F. That way, you can be sure you’ve got a perfectly baked loaf every time!
Visual Indicators Of Doneness
Although baking times provide a useful guideline, the most reliable way to know your yeast-free air fryer bread is done lies in observing key visual cues.
You’ll want to look for a golden-brown crust that signals caramelization and a slight firmness when you gently press the loaf’s surface.
Avoid pale or doughy spots, which mean it needs more time. Also, watch for even browning all around; the top and sides should have a consistent color without overly dark patches or burnt edges.
The crust should be matte or slightly shiny, not wet or sticky. The bread might pull slightly away from the parchment or basket edges.
Small cracks on the surface can indicate proper expansion and doneness.
Trust these signs to pull your bread out at just the right moment!
Internal Temperature Guide
I always rely on an instant-read thermometer to nail the perfect doneness of yeast-free air fryer bread.
After you slide your thermometer probe into the center of the loaf, watch for a reading between 200°F and 205°F. This range means your bread’s interior is fully set but still tender.
You’ll notice the crust is golden and firm, while the inside feels springy when pressed gently. Avoid guessing by touch alone; the thermometer takes the guesswork out of timing variations caused by different air fryer models or loaf sizes.
Once the ideal temperature hits, pull the bread out and let it rest. This final step lets residual heat finish the bake and locks in moisture, giving you a soft, fluffy crumb with a perfectly baked core.
Toothpick Test Method
When checking if your yeast-free air fryer bread is done, the toothpick test offers a quick, reliable way to assess doneness without specialized tools.
Simply insert a clean toothpick into the center of your loaf or bun. If it comes out clean or with a few dry crumbs, your bread is perfectly baked. If wet dough clings to the toothpick, it needs more time.
Here’s how to nail the toothpick test:
Insert the toothpick gently into the thickest part of the bread. Rotate it slightly to check for any sticky batter. Test multiple spots for larger loaves to make certain of even baking.
This method helps you avoid undercooked or overly dry bread, giving you that soft, fluffy inside with a golden crust every time.
Tips for a Perfect Crust and Soft Interior
Achieving the perfect crust and soft interior in yeast-free air fryer bread often hinges on balancing temperature and timing carefully.
Start by preheating your air fryer to around 350°F to encourage a golden, crispy crust without drying the inside.
Keep an eye on the bread as it bakes; too long at high heat can harden the crust and toughen the crumb.
For a soft interior, avoid overmixing the dough; gentle kneading preserves tenderness.
Using parchment paper prevents sticking and promotes even browning.
Halfway through baking, flip smaller loaves or buns to brown the underside evenly.
Once baked, let the bread rest on a cooling rack. This lets steam escape, maintaining crust crispness while keeping the crumb soft and fluffy.
This balance creates that inviting contrast you want in every bite.
Flavor Variations and Add-Ins for Yeast-Free Bread
Frequently, adding flavors and mix-ins transforms simple yeast-free bread into something memorable and uniquely yours. You can elevate the basic dough with ingredients that bring bursts of taste and texture.
Enhance simple yeast-free bread with vibrant flavors and textures for a truly unique and memorable bite.
Imagine biting into warm bread studded with melted cheese or fragrant herbs. Or how about a touch of sweetness from dried fruits? These additions make each slice more exciting and personal.
Try these flavor boosters next time you mix your dough:
- Fresh rosemary or thyme for an earthy aroma and herbal punch.
- Grated sharp cheddar or parmesan for gooey, savory pockets.
- Chopped olives or sun-dried tomatoes to add tangy, Mediterranean flair.
Cooling, Storing, and Troubleshooting Yeast-Free Air Fryer Bread
Right after your yeast-free bread comes out of the air fryer, letting it cool properly on a wire rack is key to locking in its texture and preventing sogginess.
This air circulation stops steam from softening the crust, preserving that golden, slightly crisp finish.
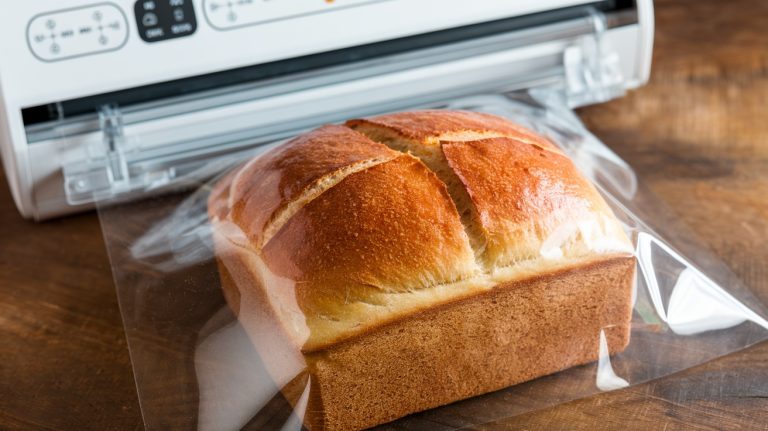
Store your cooled bread in an airtight container or wrap it tightly in foil to keep it fresh for up to two days.
If it starts to dry out, a quick refresh in the air fryer for a couple of minutes will revive its softness.
Troubleshoot dense or gummy bread by checking your leavening agents’ freshness and avoiding overmixing the dough.
Too much kneading tightens the crumb.
Perfect cooling and storage make your yeast-free bread taste as good as it looks!
Frequently Asked Questions
Can I Use Gluten-Free Flour for Yeast-Free Air Fryer Bread?
Yes, you can use gluten-free flour for yeast-free air fryer bread, but expect a different texture.
Gluten-free dough tends to be more delicate and crumbly, so you’ll want to add a binder like xanthan gum or psyllium husk to hold it together.
Mix your ingredients gently, shape carefully, and watch the baking time closely since gluten-free breads can brown faster.
Your bread will be tender with a slightly different crumb, but still delicious!
How Do Altitude Changes Affect Air Fryer Bread Baking?
Altitude changes dramatically affect your air fryer bread baking. You mightn’t expect how!
At higher elevations, lower air pressure means your bread rises faster but can collapse or dry out.
To fix this, you’ll want to reduce baking powder slightly, add a bit more liquid, and maybe lower the temperature by 10–15°F. These tweaks keep your bread’s texture soft and crumb perfect, turning tricky high-altitude baking into a delicious success.
What Is the Best Way to Reheat Air Fryer Bread?
To reheat air fryer bread, preheat your air fryer to 320°F.
Lightly spritz or brush the bread with water to keep it moist, then place it inside the basket.
Heat for 3 to 5 minutes until the crust crisps and the interior warms evenly.
Keep an eye on it to prevent drying out. This method revives that golden, crusty exterior while preserving the soft, fluffy inside perfectly.
Can I Freeze the Dough Before Air Frying?
Yes, you can freeze the dough before air frying. Shape it into a ball or loaf, wrap it tightly in plastic wrap, then place it in a freezer bag to protect from freezer burn.
When ready, thaw it overnight in the fridge, then let it come to room temperature before air frying. This helps the dough relax, ensuring your bread bakes evenly with a soft, fluffy interior and a golden crust.
How Do I Prevent Air Fryer Bread From Drying Out?
Did you know air fryer bread can dry out if baked over 40 minutes? To prevent this, keep your temperature between 300°F and 360°F and avoid overbaking.
Wrap your dough in parchment paper or a silicone liner for moisture retention. Also, don’t forget to rest your bread after baking.
Letting it cool under a towel traps steam, keeping the crumb soft and tender. This ensures every bite stays delightfully moist.
Keep Perfecting Your Technique for the Ultimate Air Fryer Bread Without Yeast
Baking yeast-free bread in your air fryer is like painting a masterpiece with simple ingredients and warm air.
You’ve learned how to mix, shape, and bake dough that turns golden and soft, proving that great bread doesn’t need yeast or a fancy oven.
With these tips, you’re ready to create comforting loaves bursting with flavor and crusty perfection.
So, grab your ingredients and let your air fryer work its magic!