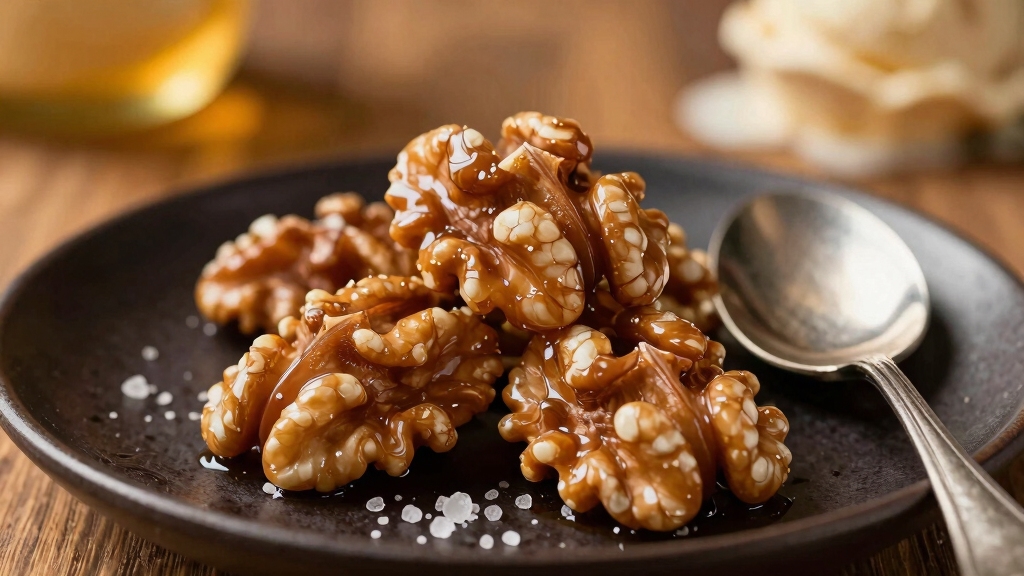
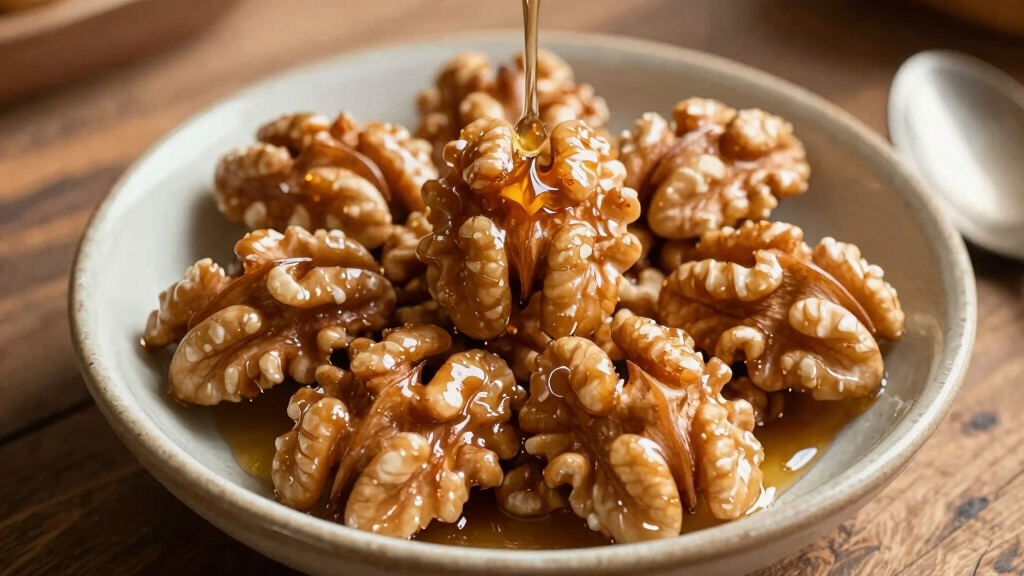
How to Make Wet Walnuts for Ice Cream with Crispy, Chewy Topping?
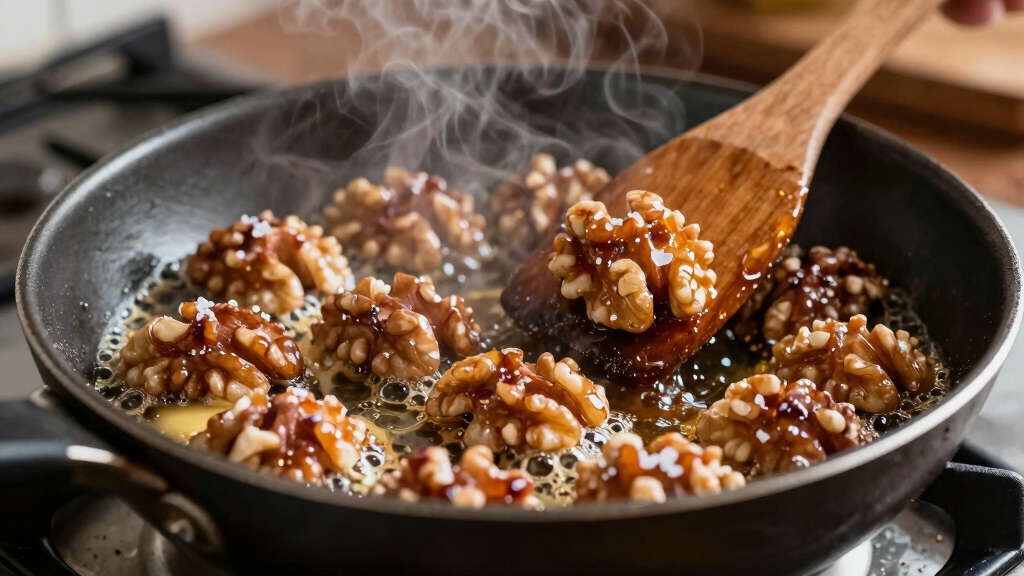
To make wet walnuts for ice cream, start by lightly toasting chopped walnuts in a dry pan over medium heat until golden and fragrant.
Gently warm pure maple or light corn syrup without boiling, then add the toasted walnuts and simmer for about two minutes to coat them evenly.
Remove from heat, stir in vanilla extract, and cool before refrigerating for a few hours to thicken.
This process yields a syrupy, crunchy topping that enhances any dessert’s texture and flavor.
For more detailed methods and storage tips, keep exploring the steps and variations.
Key Takeaways
- Toast walnuts gently in a dry pan for 2-3 minutes until golden for enhanced flavor and crunch.
- Warm pure maple syrup without boiling, then add toasted walnuts to absorb the sweetness.
- Simmer walnut-syrup mixture for about 2 minutes, then cool to room temperature before refrigerating for 3 hours.
- Refrigerate the mixture to thicken syrup and meld flavors, creating a rich, syrupy texture ideal for ice cream topping.
- Serve chilled wet walnuts atop ice cream to add a gooey, crunchy, and sweet nutty flavor.
Recipe Guide to Wet Walnut Toppings
| Step | What You Do | Key Ingredients | Tips | Expected Texture |
|---|---|---|---|---|
| 1 | Toast walnuts in a dry pan until golden | Walnuts, optional salt | Stir often for even browning; use medium heat | Nutty, fragrant base |
| 2 | Warm syrup base (maple or light corn syrup) | Maple syrup or light corn syrup; optional maple or palm sugar | Heat gently, do not boil to preserve flavor | Syrupy coating ready to absorb |
| 3 | Coat nuts with syrup | Toasted walnuts, syrup | Add vanilla; keep simmering 2 minutes | Glossy, sticky coating |
| 4 | Cool and set | Coated walnuts | Refrigerate a few hours for thickening | Chewy, clinging texture |
| 5 | Storage | Room temperature or refrigerate | Use a tight jar; stir before use | Long-lasting freshness |
Classic Maple Syrup Wet Walnuts Recipe
To make classic maple syrup wet walnuts, you first toast the walnuts in a dry saucepan over low to medium heat for 2 to 3 minutes, stirring frequently to prevent burning and ensure even toasting. Toasting enhances the walnuts’ flavor and crunch. Chop the walnuts into 1/4 to 1/3 inch pieces for optimal texture. Using high-quality nuts and ingredients supports the best flavor and texture for your recipe, similar to how real ingredients improve baking mixes.
Begin by toasting walnuts gently in a dry pan, stirring often to achieve even, golden toasting.
Next, gently heat pure maple syrup without boiling to preserve its flavor. Adding the walnuts to warm syrup allows them to absorb the syrup’s sweetness effectively. Add toasted walnuts to the warm syrup and stir thoroughly to combine.
Let the mixture simmer for about 2 minutes, allowing the walnuts to infuse their flavor into the syrup. Remove from heat and transfer to a container to cool to room temperature.
Refrigerate for approximately 3 hours to let flavors meld and the syrup thicken, preparing the perfect topping for ice cream. This refrigeration process helps the syrup to thicken and the flavors to deepen.
Make Sweet, Sticky Walnuts With Corn Syrup
To kick things off, you’ll want to mix together corn syrup, sugar, and water. This will give you a syrup base that perfectly coats your walnuts in that sticky goodness we all love. Just remember to use medium heat here. You want to make sure the sugar dissolves completely before you let it boil.
Oh, and it’s important not to stir during this boiling stage—this helps prevent any crystallization from happening. Using consistent medium heat is similar to how even heat distribution is crucial in Dutch oven baking.
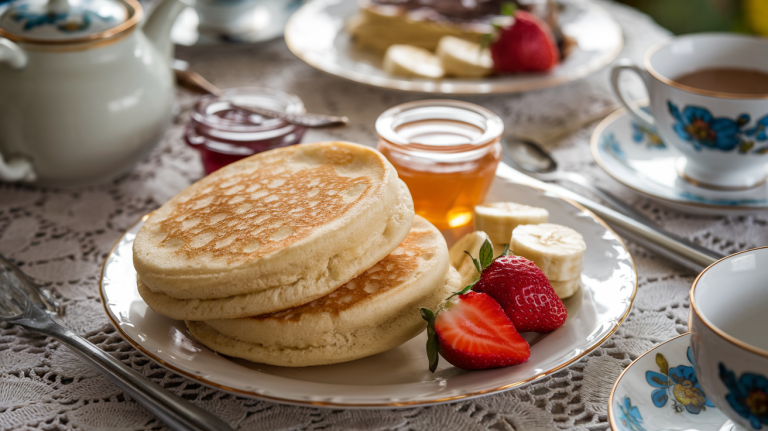
Once you’ve got that syrup bubbling away, it’s time to bring in the flavor! Add in some vanilla and toss in your walnuts during the final boil. Keep stirring constantly to make sure everything gets coated evenly. This will help you achieve that beautiful, glossy finish that’s just perfect for topping off your ice cream. Wet walnuts are versatile and also great as a topping for pancakes, French toast, or oatmeal.
Corn Syrup Walnut Recipe
How do you achieve perfectly sweet, sticky walnuts using corn syrup? Start by combining 1 cup chopped walnuts with 1 cup light corn syrup, 1 cup brown sugar, 1/4 cup milk, and 2 tablespoons butter in a saucepan. This method is similar to creating toppings that enhance dishes like baked brie, where brown sugar adds rich sweetness and texture.
Boil on medium heat for 5 minutes, stirring constantly to prevent scorching and crystallization. Remove from heat, then stir in 1/2 teaspoon vanilla and a pinch of salt. This yields about 2 cups of wet walnuts, perfect for ice cream topping. To enhance the texture, you can blanch walnuts briefly in boiling water before coating them to reduce their crunch.
Key steps to follow:
- Maintain medium heat and stir constantly to ensure syrup consistency.
- Boil the mixture for exactly 5 minutes for optimal caramelization.
- Incorporate vanilla and salt only after removing from heat to preserve flavor.
Store at room temperature or refrigerate for extended use.
Tips For Sticky Texture
Achieving a perfectly sticky texture with wet walnuts hinges on controlling syrup composition and cooking time. Use a 1:1 ratio of light corn syrup to sugar to prevent crystallization and ensure smooth, glossy coating. To enhance flavor and add a crunchy element, consider incorporating real food syrups like maple or coconut syrup instead of corn syrup.
Boil this mixture with water for 3-4 minutes, stirring constantly at medium heat to avoid scorching. Toast and roughly chop 2 cups of walnuts to optimize syrup absorption and surface area.
After the initial boil, add walnuts and vanilla, then simmer 1-4 minutes until syrup thickens to a soft-ball stage. Remove promptly to prevent brittleness.
Allow cooling at room temperature; the syrup will thicken further, maintaining chewiness. Store at room temperature in a covered jar, stirring before use to maintain consistency.
Avoid overcooking to keep the walnuts sticky, not hard.
Toasting Wet Walnuts for Best Flavor
Toasting wet walnuts is a fantastic way to bring out those deeper, nuttier flavors. When you toast them, you’re activating their natural oils, which really enhances that delightful crunch. So, if you’re looking to elevate your walnut game, here’s what you need to do: preheat your oven to 350°F and pop those walnuts in for about 10 minutes.
If you’re in a hurry, you can crank the heat up to 425°F and toast them for 5-7 minutes. Just make sure to keep an eye on them so they don’t burn! Using a heat-resistant utensil to stir the walnuts during toasting helps ensure even browning.
Now, why go through the trouble of toasting? Well, proper toasting not only intensifies the taste but also improves the texture of the walnuts. This is especially important if you’re planning to use them as a topping for something sweet, like ice cream.
The crunchy, toasted walnuts will beautifully complement the sweet syrup, making your dessert even more delicious. Trust me, it’s worth it! Additionally, warming the toasted walnuts with maple syrup and salt before adding them to the ice cream helps punch up their flavor and keeps them sticky enough to mix in perfectly.
Benefits Of Toasting
Why should you include a toasting step when preparing wet walnuts for ice cream?
Toasting enhances flavor, texture, and nutrition, making your walnuts a superior ice cream topping.
When you toast walnuts at 350°F for 10 minutes, you activate rich umami and caramel-like notes that pair beautifully with maple syrup and vanilla. This process also releases aromatic oils, boosting the nuts’ scent. Additionally, toasting improves texture and spreadability, ensuring the walnuts complement creamy desserts perfectly.
Three key benefits of toasting wet walnuts include:
- Flavor Enhancement: Intensifies nutty taste and improves syrup absorption for balanced salty-sweet profiles.
- Texture Improvement: Adds crunch and prevents sogginess, maintaining a firm bite against soft ice cream.
- Nutrient Activation: Unlocks antioxidants and healthy fats, improving digestibility without flavor loss.
Toasting walnuts by spreading them on a sheet and baking at 350°F with stirring halfway through helps to avoid burning and ensures even toasting preparation technique.
Incorporate toasting to elevate your wet walnuts’ overall quality and ice cream indulgence.
Toasting Techniques Explained
How can you master the art of toasting wet walnuts to bring out their best flavor?
Begin by preheating your oven between 325°F and 425°F, adjusting time accordingly: 10 minutes at 325°F or 5-7 minutes at 425°F.
Spread walnuts in a single layer on a baking sheet to guarantee even heat distribution. Using a baking sheet with a parchment paper lining can facilitate easy cleanup and prevent sticking.
Toast whole halves or pre-chopped pieces, stirring or tossing frequently to prevent uneven browning and burning.
Watch closely for a slight darkening and a toasty aroma, signaling optimal flavor concentration.
Once toasted, cool walnuts completely before chopping to preserve their oils and flavor integrity. Proper temperature control is essential, similar to the precise measurements needed in sourdough baking to achieve the best results.
Proper temperature control, timing, and preparation are essential to release the walnuts’ natural oils and achieve the rich, toasty taste ideal for your wet walnut ice cream recipe.
For an added layer of flavor, you can coat the toasted walnuts in a warm syrup mixture similar to the one used in the classic wet walnuts topping recipe, which combines corn syrup, brown sugar, and butter.
Flavor Enhancement Tips
What transforms simple walnuts into a richly flavored component for your wet walnut ice cream? It’s all about precise toasting and flavor infusion.
Dry roasting concentrates natural sugars, creating a golden-brown crust that enhances nutty aromas and sweetness. To maximize flavor, follow these key steps:
- Roast walnuts in a single layer, stirring frequently to ensure even browning and avoid burning. Using an adjustable grind setting on a grain mill can help finely chop nuts for a different texture in your ice cream topping.
- Use a syrup blend, light corn syrup with maple syrup or pure maple syrup, brought to a boil before adding nuts for optimal infusion.
- Incorporate complementary flavors such as a pinch of kosher salt or a splash of vanilla extract to balance sweetness and deepen complexity.
Additionally, to achieve a perfect texture and flavor balance, consider lightly coating the toasted walnuts with butter and honey before cooling, as this method helps create a sticky glaze that locks in spices and sweetness, similar to savory spiced nuts preparation techniques.
This method yields nuts with intensified flavor and texture, perfect for syrup absorption and elevating your ice cream topping.
Choosing the Best Syrup for Wet Walnuts
When selecting syrup for wet walnuts, you’ll weigh factors like flavor profile, sweetness, cost, and shelf life.
Light corn syrup offers mild sweetness and cost efficiency, ideal for classic sundaes and bulk production. Its consistency helps maintain syrup texture, similar to how cold butter in dough promotes flakiness in pie crusts.
Maple syrup provides richer, nutty complexity, enhancing premium recipes but at higher cost and shorter shelf life without preservatives.
Consider storage needs; maple requires refrigeration after opening. It is also common to use light corn syrup in the recipe for its balance of sweetness and texture.
| Syrup Type | Flavor Profile | Cost |
|---|---|---|
| Corn Syrup | Mild, neutral | Low |
| Maple Syrup | Nutty, complex | High |
| Commercial | Varies (preservatives) | Moderate to high |
| Homemade | Pure, fresh | Low to moderate |
| Shelf Life | Longer with preservatives | Shorter natural |
Choose based on your desired quality, budget, and storage capabilities.
How to Get the Perfect Syrupy Texture?
Why does achieving the perfect syrupy texture hinge on precise timing and temperature control?
Because the syrup’s consistency depends on a delicate balance during boiling and cooling. You start by boiling the syrup mixture for exactly 2 minutes before adding toasted walnuts. Then boil for an additional 2-4 minutes. Stir occasionally to avoid burning. Maintaining the right hydration level in your ingredients can help control the syrup’s final texture.
Removing the mixture from heat immediately after prevents over-thickening. Allow it to cool naturally; the syrup thickens from liquid to chewy as it cools, integrating flavors fully. Adding pure vanilla extract only after removing the saucepan from heat ensures the flavor remains vibrant without compromising the syrup’s texture.
To get the perfect syrupy texture, focus on:
- Boiling the syrup and walnuts for a total of 4 minutes to develop chewiness without stickiness.
- Using light corn syrup and balanced syrups to avoid crystallization.
- Cooling naturally before transferring to a jar to set the texture.
Storing and Reheating Wet Walnuts for Ice Cream
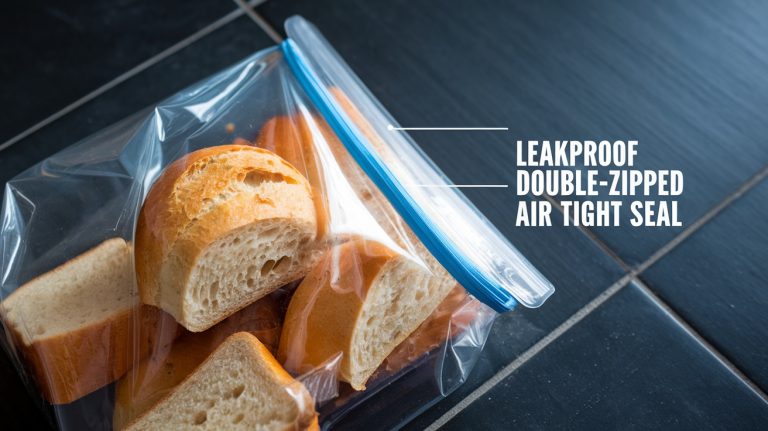
Since wet walnuts have a delicate syrup coating, storing them properly is crucial to maintaining their texture and flavor. Use airtight glass containers or Mason jars to prevent oxidation and rancidity. Proper packaging is essential because exposure to light and air can significantly reduce shelf life. Always ensure containers are completely dry and sealed tightly to preserve freshness and prevent moisture loss.
Proper storage in airtight glass jars preserves the delicate syrup and flavor of wet walnuts.
Refrigerate at 0°C to 5°C (32°F to 41°F), avoiding strong odors like cabbage or onions nearby. For extended storage, freeze wet walnuts at -18°C (0°F) in airtight containers, applying the FIFO method to manage inventory. Proper temperature control is key, as fluctuations can lead to spoilage and texture changes in the nuts.
Always cool walnuts slightly before refrigerating to ensure optimal texture. Wet walnuts require no reheating; serve them directly from the refrigerator as an ice cream topping.
Watch for rancid smells or changes in texture, which indicate spoilage. Proper airtight packaging and temperature consistency are crucial for preserving quality during storage and maintaining the syrup’s delicate balance. Utilizing moisture control strategies can further extend shelf life and maintain flavor integrity.
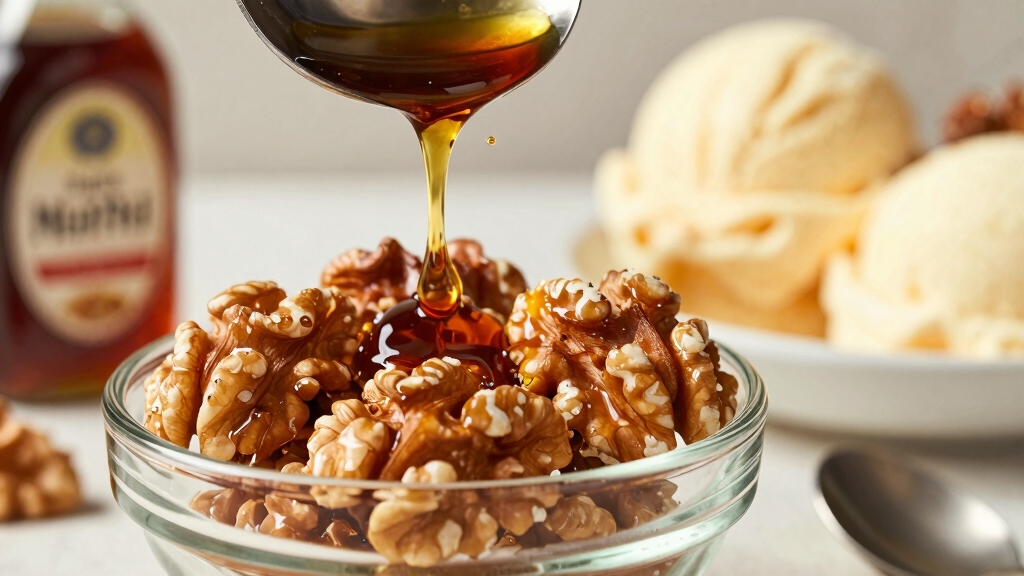
Creative Ways to Serve Wet Walnuts on Ice Cream
Proper storage preserves wet walnuts’ texture and syrupy coating, allowing you to fully enjoy their flavor on ice cream. Wet walnuts are a southern culinary delight known for their sweet syrup and nutty crunch.
To creatively serve wet walnuts on ice cream, focus on enhancing texture and flavor contrast. You can:
- Spoon generous amounts over vanilla ice cream to provide a creamy and crunchy contrast.
- Layer wet walnuts with hot fudge sauce on sundaes, adding a rich, gooey texture.
- Incorporate them into banana splits alongside other toppings, balancing sweetness and nuttiness.
These methods elevate simple ice cream servings into sophisticated desserts by integrating wet walnuts’ unique syrupy crunch.
For immediate enjoyment, drizzle the walnut syrup directly over scoops or add them to soft-serve style nice cream after freezing. This preserves moisture and texture, ensuring a consistent, delightful eating experience.
Frequently Asked Questions
Can I Substitute Pecans for Walnuts in Wet Walnut Recipes?
Yes, you can substitute pecans for walnuts in wet walnut recipes without changing cooking times or temperatures.
Use an equal volume of chopped pecans, toast them for 2-3 minutes until fragrant, then boil them with the syrup mixture for 3-5 minutes while stirring constantly.
After cooling, the pecans will create a sticky, syrup-coated topping with a milder, buttery flavor that complements ice cream just like traditional walnuts do.
How Long Do Wet Walnuts Last Unopened in the Pantry?
Picture a sealed jar of wet walnuts, its glossy nuts suspended in syrup, resting quietly on your pantry shelf.
Unopened, you can expect them to last about 3 to 6 months when stored in a cool, dark place away from heat and light.
Keep the container airtight to prevent moisture and odor absorption that could accelerate spoilage.
Always check for off smells or discoloration before use to ensure quality.
Are Wet Walnuts Gluten-Free and Safe for Allergies?
Wet walnuts are naturally gluten-free since their ingredients, walnuts, corn syrup, sugar, butter, milk, and vanilla, contain no gluten proteins.
However, you must verify product labels for gluten-free certification to avoid cross-contamination risks from shared processing equipment or additives.
Also, wet walnuts pose tree nut allergy risks. If you have a tree nut allergy, you should avoid them entirely, as no safe nut substitutes exist.
Use dedicated utensils and surfaces to ensure safety.
Can I Make Wet Walnuts Sugar-Free or Low-Carb?
You can absolutely make wet walnuts sugar-free or low-carb by swapping traditional maple syrup for alternatives like allulose or Swerve, each having negligible carbs and zero glycemic impact.
Studies show allulose contains 90% fewer calories than sugar, making it ideal.
Heat 1/3 cup chopped walnuts with 3 tablespoons of your chosen sugar-free syrup and a pinch of salt at low heat until glossy.
Use these as a keto-friendly ice cream topping.
What Is the Best Tool for Chopping Walnuts Evenly?
The best tool for chopping walnuts evenly is a manual nut chopper like the Progressive International Prepworks or Fullstar model.
They provide consistent cuts and reduce finger injury risk. Use the hand crank to control coarseness precisely, ensuring uniform pieces.
Avoid food processors for even chunks, as they can overprocess. If you prefer manual methods, a rocking chef’s knife with a rolled towel barrier also delivers controlled, even chopping.
From Ice Cream to Pancakes: Uses for Wet Walnuts
Making wet walnuts for ice cream is like crafting a delicate symphony. Each ingredient plays a vital note, blending syrupy sweetness with toasted crunch.
By mastering syrup choice and texture, you ensure your walnuts sing perfectly alongside creamy ice cream. Store and reheat them with care, preserving their harmony for every scoop.
With these precise steps, you transform simple nuts into a timeless dessert companion, elevating your ice cream experience to a refined crescendo.