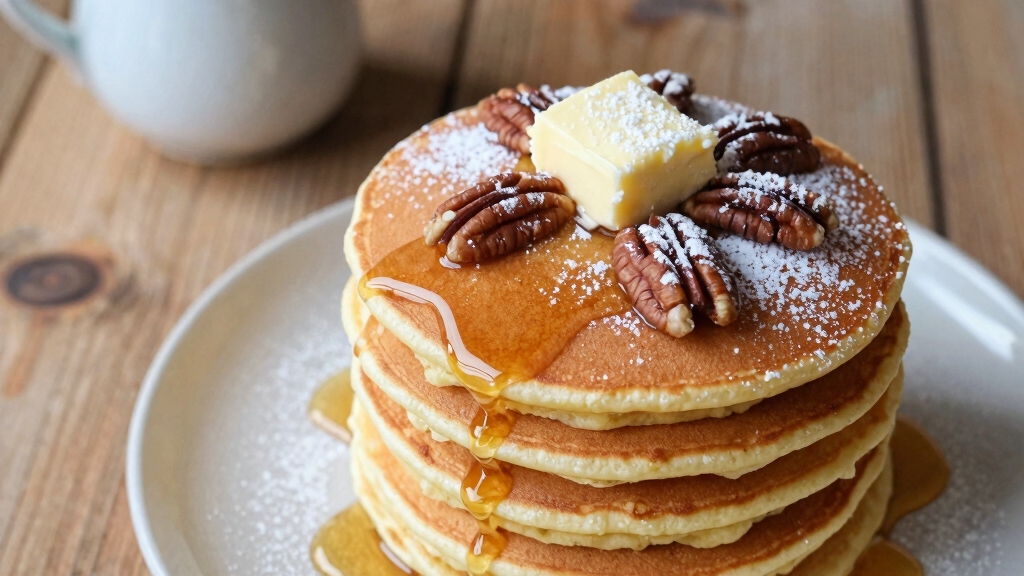
No Egg Sourdough Discard Pancakes: Zero Waste Magic
You can make fluffy no-egg pancakes using sourdough discard by combining ¼ to 1 cup discard with flour, milk or plant-based milk, baking soda, and optional baking powder.
Mix wet and dry ingredients separately, then combine gently to preserve air bubbles. Let the batter rest 15–30 minutes or ferment overnight for better texture and tang.
Adding ground flax or chia seeds helps bind the batter without eggs. Keep cooking low and slow for tender results.
Discover how to master variations, fermentation timing, and cooking techniques next.
Key Takeaways
- Use ¼ to 1 cup sourdough discard with 2 teaspoons ground chia or flax seeds as egg replacements for binding in no-egg pancakes.
- Mix dry ingredients separately; combine wet ingredients including sourdough discard, milk, and melted fat, then fold dry into wet gently to avoid overmixing.
- Rest batter 15–30 minutes or ferment overnight at room temperature to develop bubbles and improve texture and flavor without eggs.
- Add 1 teaspoon baking soda and optional ½ teaspoon baking powder just before cooking to provide proper leavening in egg-free sourdough pancakes.
- Cook pancakes on a preheated skillet at medium-low heat, using butter or oil, and keep warm to preserve softness and prevent sogginess.
Recipe Breakdown for No Egg Sourdough Discard Pancakes
| Ingredient / Component | Amount | Purpose & Tips |
|---|---|---|
| Sourdough discard (100% hydration) | 1–2 cups | Adds tangy flavor and natural fermentation while reducing waste. Adjust liquids if discard is thick or runny. |
| All-purpose flour (or up to 50% whole wheat) | 1–2 cups | Provides structure and body. Whole wheat adds nuttiness but balance with white flour for tender texture. |
| Milk or plant-based milk (soy, almond, oat) | 1–2 cups | Hydrates the batter. Soy milk is ideal for egg-free structure due to higher protein content. |
| Ground flax or chia seeds | 2 teaspoons | Acts as egg replacer and binder. Let sit briefly in liquid to gel before mixing. |
| Baking soda | 1 teaspoon | Reacts with sourdough acidity to create light, fluffy pancakes. Add just before cooking. |
| Baking powder (optional) | ½–2 teaspoons | Provides extra lift and fluffiness. Add close to cooking time for maximum rise. |
| Melted butter or oil | 1–3 tablespoons | Gives moist, tender texture and prevents dryness. Butter adds richness; oil keeps them soft. |
| Sweetener (maple syrup, sugar, honey) | 1–3 tablespoons | Adds balanced sweetness without overpowering sourdough tang. Adjust based on toppings. |
| Apple cider vinegar (optional) | 1–2 teaspoons | Enhances tangy flavor and reacts with baking soda for extra lift. |
| Mix-ins (berries, chocolate chips, spices) | ¼–½ cup | Fold in for custom flavors. Blueberries and cinnamon suit sweet versions; cheese for savory. |
Benefits of Using Sourdough Discard in Pancakes
Why choose sourdough discard for your pancakes? It enhances digestive health by breaking down phytic acid, which otherwise binds minerals and limits absorption. This benefit is often highlighted in sourdough baking books that detail fermentation advantages.
The lactic acid fermentation increases bioavailability of key micronutrients like potassium, magnesium, and folate. Using sourdough discard introduces prebiotic fiber that nourishes gut bacteria, supporting digestive comfort and easier digestion compared to unfermented flour pancakes.
Additionally, the fermentation process produces a lower glycemic response, helping regulate blood sugar and sustaining energy levels without spikes. Nutritionally, sourdough discard adds protein, fiber, and essential vitamins and minerals, depending on the flour used. It is also rich in probiotics that promote a healthy gut microbiome and improve digestion.
Essential Ingredients for Egg-Free Sourdough Pancakes
Which ingredients form the foundation of egg-free sourdough pancakes?
Start with 1 to 2 cups of sourdough discard, preferably 100% hydration, to provide natural fermentation and flavor.
Begin with 1 to 2 cups of 100% hydration sourdough discard for natural fermentation and rich flavor.
For liquid components, use 1 cup of milk or a plant-based alternative like almond milk, optionally combined with 2 teaspoons of apple cider vinegar to mimic acidity. Using natural fermentation enhances the depth of flavor in the batter.
Incorporate 2 tablespoons of sweetener such as maple syrup or cane sugar for balanced sweetness.
To replace eggs, add 2 teaspoons of ground chia or flax seeds as a binding agent. This is especially important when using a gluten-free starter.
Include 1 teaspoon of baking soda and optionally ½ teaspoon of baking powder to activate leavening.
Finally, mix in 1 to 3 tablespoons of melted fat, such as coconut oil, butter, or olive oil, to enhance texture and moisture.
These ingredients ensure proper structure and taste without eggs.
Step-by-Step Preparation of the Pancake Batter

Hey there! First things first, let’s get everything you need for those pancakes. Make sure to measure out your ingredients accurately so you get those perfect results every time. Using the right bowl capacity can make mixing easier and more efficient.
Now, grab a bowl and whisk together your dry ingredients. Once that’s done, it’s time to mix in the wet stuff. Just combine them until they’re mostly blended—don’t worry if there are a few lumps left. That’s totally normal!
After mixing, let your batter sit for a little bit. This little resting period is key! It helps relax the gluten, which will make your pancakes super fluffy and delicious. Using a sourdough starter discard not only adds flavor but also helps reduce food waste. Happy cooking!
Gathering Ingredients
How do you ensure the perfect balance of flavors and textures in your no-egg sourdough discard pancakes? Start by carefully selecting and measuring your ingredients, as each component directly impacts the final batter’s consistency and taste.
- Sourdough Discard: Use ¼ to 1 cup of inactive discard straight from the fridge; its hydration varies, so adjust liquids accordingly. The sourdough discard serves as the base of the batter, adding a unique tang and natural fermentation benefits to the pancakes. Freezing the discard can preserve its natural fermentation benefits for future use without sacrificing flavor.
- Flour: Measure 1 to 2 cups (125g per cup) of all-purpose or a blend with up to 50% whole wheat. Unbleached organic flour enhances quality. Gluten-free options work but affect texture.
- Liquids and Additives: Gather ½ to 2 cups of milk or buttermilk, 1–3 tablespoons melted butter or oil, and optional vanilla extract or sweeteners (1–40g). Include precise leavening agents like baking powder and soda for lift. For enhanced flavor and texture, consider an overnight fermentation of the batter before cooking.
Mixing Wet and Dry
With your ingredients accurately measured and ready, you’ll next combine the dry components: flour, baking soda, baking powder, and salt in a medium bowl. Whisk them thoroughly to distribute leavening agents evenly, ensuring consistent results by using a tare function on your baking scale for precise measurement.
Separately, whisk the wet ingredients: sourdough discard, milk, melted butter, sweetener, and vanilla extract until fully integrated. This step is particularly important because using sourdough discard adds a unique depth of flavor and helps create fluffy pancakes. Add the dry mixture to the wet, stirring gently just until flour streaks vanish.
Avoid overmixing to prevent gluten overdevelopment, which causes dense pancakes. A few lumps are fine.
| Dry Ingredients | Wet Ingredients |
|---|---|
| Flour (1–2 cups) | Sourdough discard (¼–1 cup) |
| Baking soda (¾–1½ tsp) | Milk (½–1¾ cups) |
| Baking powder (½–2 tsp) | Melted butter (1–3 tbsp) |
Mix to a pourable, slightly lumpy batter, ready for cooking or resting.
Resting Batter Time
When should you let your pancake batter rest to achieve the best texture? Resting is crucial for activating baking soda and sourdough starter, hydrating the flour, relaxing gluten, and developing air bubbles. It is also important to consider the cooling and resting times similar to those used in optimal cooling of sourdough bread for the best batter performance.
Ideally, you want to rest your batter for 15-30 minutes to yield fluffier, lighter pancakes. This period also allows the baking powder and baking soda to fully activate, improving the rise of your pancakes.
Follow these key resting guidelines:
- Rest at least 5-10 minutes for initial chemical reactions and softer whole wheat pancakes.
- Aim for 15-30 minutes to optimize air bubble formation and gluten relaxation for same-day cooking.
- For enhanced flavor and tenderness, ferment the batter covered in the fridge overnight, adding baking powder and salt just before cooking.
Use the spoon drag test to check readiness; visible bubbles and smooth consistency indicate optimal batter rest.
Techniques for Achieving Fluffy and Tender Pancakes

Alright, let’s talk about making those pancakes fluffy and tender!
First off, when you’re mixing your wet ingredients, really take your time to whisk them together. You want that sourdough discard to dissolve completely. Whisking gently helps preserve the fermentation bubbles that contribute to the pancake’s light texture.
Once that’s done, it’s time to gently fold in your dry ingredients. Just a heads up—try not to overmix!
Now here’s a little secret: let your batter rest for at least 10 minutes. This resting period is super important because it helps relax the gluten and lets those bubbles develop, which is key for a tender crumb. Plus, that fermentation time really boosts aeration, setting you up for some seriously light and fluffy pancakes. Remember, the batter tends to be thin and bubbles as it rests, which is a good sign of fermentation.
Proper Batter Mixing
Achieving fluffy and tender pancakes starts with mastering proper batter mixing techniques. Begin by whisking your dry ingredients in a medium bowl and wet ingredients in a larger bowl until the sourdough starter dissolves.
Gradually add dry ingredients into wet, avoiding stirring wet into dry to prevent premature gluten activation. Use appropriate tools: a whisk for quick mixing and a rubber spatula or fork to gently fold to minimize gluten development.
Mix just until most clumps disappear; a few lumps preserve air pockets, promoting fluffiness. Adjust batter consistency to be pourable but thick enough to hold shape on the griddle. Using sourdough discard from the fridge or at room temperature works well for the batter consistency.
Follow a precise incorporation sequence: half flour first, then eggs, baking soda last, and melted butter just combined. Stop mixing once no dry streaks remain to ensure tender pancakes.
Effective Fermentation Time
Although quick mixing can yield pancakes immediately, allowing your sourdough discard batter to ferment enhances both texture and flavor considerably. For best results, ferment at room temperature for 12 hours, covered, to develop a dough-like consistency and a balanced tang from bacterial activity. This method also uses an entire cup of sourdough starter, making it an efficient way to reduce discard waste.
Alternatively, refrigerate the batter for 12–24 hours; this longer fermentation intensifies sourdough flavor and creates a stretchy texture. Before cooking, bring refrigerated batter to room temperature for 30 minutes and add leavening agents like baking soda and powder just prior to cooking.
This process breaks down gluten and sugars, improving digestibility while producing light, fluffy pancakes with tender crumbs. Avoid prolonged pre-cook storage to prevent oxidation. Proper fermentation time ensures superior pancake texture and complex flavor compared to quick-mix methods.
Tips for Overnight Fermentation and Batter Resting
How long should you ferment your no-egg sourdough discard pancake batter for ensure results? Aim for 8 to 12 hours at room temperature to allow beneficial bacteria to break down proteins and develop flavor. This fermentation process also enhances the bioavailability of nutrients in the batter.
You can also refrigerate the batter for 8 to 16 hours, but start with 1-2 hours at room temperature to jump-start fermentation. Using a sourdough starter discard adds natural tang and activity to the batter.
Follow these tips for best results:
- Leave the batter uncovered or loosely covered overnight to encourage gas release and bubbling.
- Add eggs and baking soda only in the morning; sprinkle baking soda over the batter and mix gently to avoid overmixing.
- Expect a thick, cake-like consistency after fermentation. Adjust liquid slightly if batter is too dense.
These steps ensure optimal flavor, texture, and digestibility.
Creative Variations and Add-Ins for Flavor
Several creative variations and add-ins can transform your no-egg sourdough discard pancakes, tailoring flavor and texture to your preference.
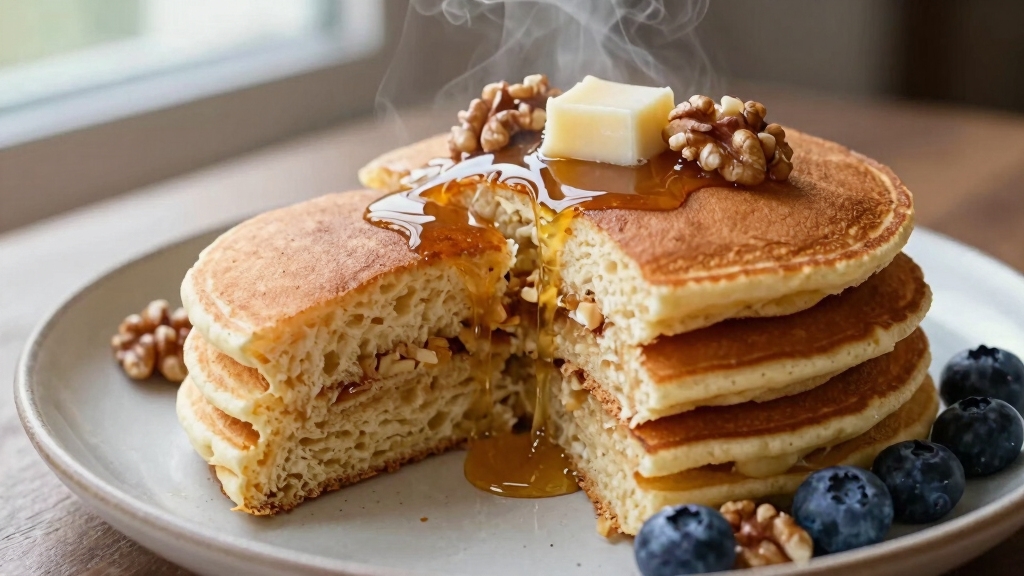
For fruity bursts, fold fresh blueberries, raspberries, strawberries, or blackberries into the batter. Enhance warmth by incorporating cinnamon or pie spice directly into the dough.
You can also apply a cinnamon-sugar topping post-cooking. Using about 1 cup of bubbly sourdough discard, preferably 100% hydration, helps achieve the best texture for these pancakes. Ensure you maintain a consistent feeding schedule to keep your starter active and avoid mold growth.
For sweetness, stir in chocolate chips, maple syrup, honey, or vanilla extract to enrich flavor and moisture. Savory options include mixing shredded cheddar, sun-dried tomatoes, and herbs into the batter, reducing syrup to emphasize tanginess.
Adjust texture with whole wheat or cake flour, or add pumpkin puree as a moisture substitute. Post-cook, slather with butter to boost richness and achieve signature crisp edges.
These precise adjustments let you customize pancakes efficiently without compromising structure.
Best Practices for Cooking and Serving Pancakes
A well-prepared pan and proper batter handling are essential to achieve perfectly cooked no-egg sourdough discard pancakes.
Start by preheating a cast-iron skillet to about 300°F for even browning. Use 1 to 1.5 teaspoons of butter or oil per batch and wipe the pan between batches. Cooking the pancakes low and slow helps develop a golden crust and fluffy interior. Using nonstick surfaces can help prevent sticking and improve the cooking process.
Mix batter just until combined to avoid toughness and ladle ¼ to ½ cup per pancake. Cook pancakes over low heat until edges set and bubbles form, then flip gently and cook an additional 1–3 minutes.
Follow these best practices:
- Maintain medium-low heat and avoid overcrowding to ensure uniform cooking.
- Transfer pancakes immediately to a warm 200°F oven to preserve texture.
- Serve warm with toppings like maple syrup or fresh fruit for optimal flavor.
Frequently Asked Questions
How Long Can Sourdough Discard Pancakes Be Stored After Cooking?
You can store sourdough discard pancakes in an airtight container in the fridge for up to 5 days to maintain freshness and prevent drying.
If you want longer storage, freeze them in a freezer-safe airtight container layered with parchment paper for up to 3 months.
Make sure to cool pancakes completely before storing. Reheat directly from frozen in a toaster or skillet for best texture and flavor retention.
Can I Freeze Sourdough Discard Pancake Batter for Later Use?
You shouldn’t freeze sourdough discard pancake batter because freezing can weaken leavening agents like baking powder and alter texture.
Instead, refrigerate the batter up to 24 hours for fermentation before cooking. Use it within an hour after adding baking powder for best rise.
If you want to store pancakes, cook them first, then freeze individually with parchment paper in a ziplock bag for up to a month, reheating as needed.
What Is the Best Non-Dairy Milk Substitute for These Pancakes?
You’ll find soy milk is the best non-dairy substitute, providing 11 grams of protein per serving to boost your pancake’s structure.
Use about 1 ¼ cups (300 g) to maintain a fluffy, tender crumb. Its protein content mimics eggs, aiding in rise and texture.
Almond or oat milk work too, but soy’s higher protein content ensures better batter cohesion and fluffiness, essential for egg-free sourdough pancakes.
Are Sourdough Discard Pancakes Suitable for Gluten-Free Diets?
Yes, sourdough discard pancakes can be suitable for gluten-free diets if you use a discard derived from a gluten-free starter made with flours like brown rice or sorghum.
Ensure you replace wheat flour with gluten-free blends and add xanthan gum for binding if needed.
Also, confirm all ingredients avoid cross-contamination. This guarantees a fully gluten-free pancake that maintains structure and flavor while accommodating dietary restrictions effectively.
How Do I Adjust Batter Thickness for Thinner Pancakes?
To thin your batter, add water or milk incrementally, about 1 tablespoon at a time, stirring thoroughly after each addition.
Aim for a pourable consistency that drips slowly in stretchy ribbons rather than plopping.
Avoid over-thinning by adjusting gradually. If it becomes too runny, correct by adding flour 1 tablespoon at a time.
Always assess batter thickness visually before cooking to ensure optimal pancake texture and fluffiness.
Bake Fluffy and Magical Eggless Sourdough Pancakes
By using sourdough discard, you reduce waste and boost flavor simultaneously.
You skip eggs but keep the texture light and tender; no compromise there.
Resting the batter overnight? You enhance fluffiness while saving time.
Adding creative mix-ins? You tailor taste without extra fuss.
Cooking on a well-heated griddle seals the deal with perfect golden edges.
So, you transform simple ingredients into remarkable egg-free sourdough pancakes, every step reinforcing the last.