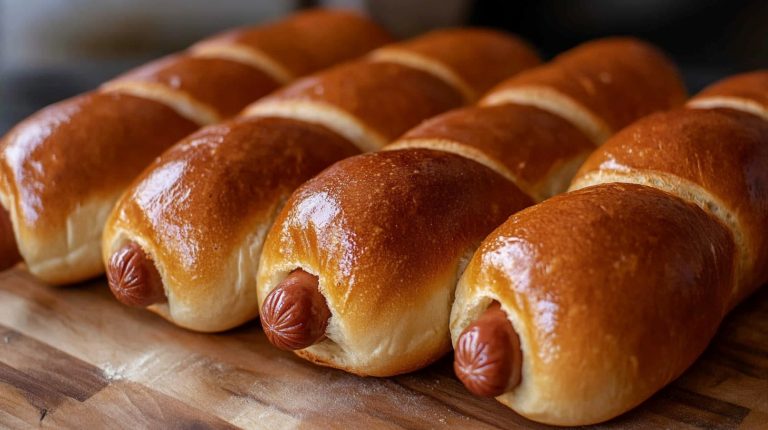
Unfed Sourdough Recipes: Easy No-Waste Baking
You’ll use unfed starter combined with bread or all-purpose flour, lukewarm water, salt, and optional sweeteners like honey for tangy, complex flavors.
Mix until hydrated, then rest and perform stretch-and-folds to develop gluten.
Ferment at room temperature 8–12 hours or cold-proof for enhanced flavor and texture.
Score and bake in a hot Dutch oven for crisp crust.
Mastering these steps optimizes rise and taste, with tips on timing, temperature, and flavor enhancements waiting for deeper exploration.
Key Takeaways
- Use unfed starter (discard) with bread flour, lukewarm water, salt, and optional sweeteners like honey for tangy, flavorful sourdough bread.
- Mix dough until hydrated, rest 20–60 minutes, then perform stretch-and-folds to develop gluten before bulk fermentation at ~70°F for 8–12 hours.
- Cold ferment dough in the fridge 12–24 hours to enhance flavor complexity, improve crust texture, and allow flexible baking schedules.
- Shape dough gently after fermentation, proof for about 1 hour at room temperature or longer in the fridge before scoring and baking.
- Bake in a preheated Dutch oven at 450–500°F, covered initially to trap steam, then uncovered for a crisp, glossy crust.
Essential Unfed Sourdough Starter Techniques Compared
| Method | Temperature | Fermentation Time | Best For | Key Benefits |
|---|---|---|---|---|
| Room Temperature Fermentation | 70°F–75°F | 8–12 hours | Quick turnaround baking, weekday loaves | Faster rise, easier timing, convenient for same-day baking |
| Cold Fermentation | 38°F–45°F (refrigerator) | 12–48 hours | Enhanced flavor, flexible scheduling | Complex tangy taste, improved gluten strength, reduced overproofing risk |
| Immediate Refrigeration | 38°F–45°F | 24–72 hours | Make-ahead dough, flexible baking schedule | Minimal prep time, extended shelf life, deeper flavor development |
| Unfed Starter Direct Use | Room temperature | 10–14 hours | Zero-waste baking, intense sour flavor | No feeding required, pronounced tanginess, ideal for crackers and pancakes |
| Hybrid Method | 70°F (4 hours) then 38°F | 4 hours + 12–24 hours cold | Best of both worlds, balanced flavor | Controlled fermentation, optimal texture and taste, convenient timing |
Ingredients for Unfed Sourdough

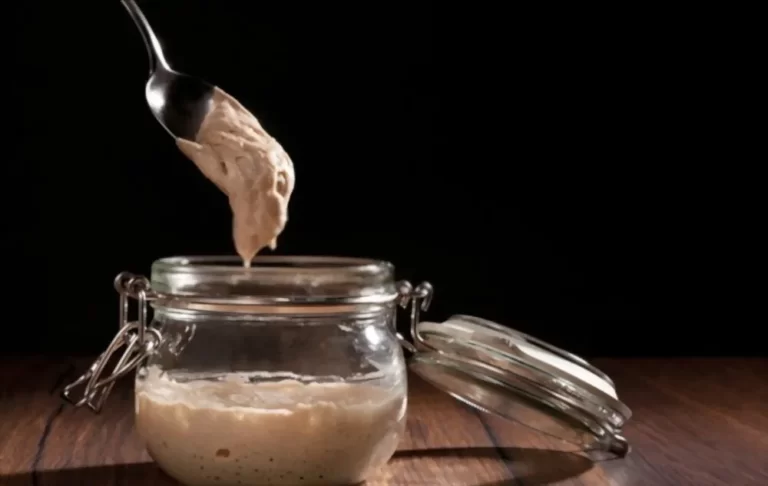
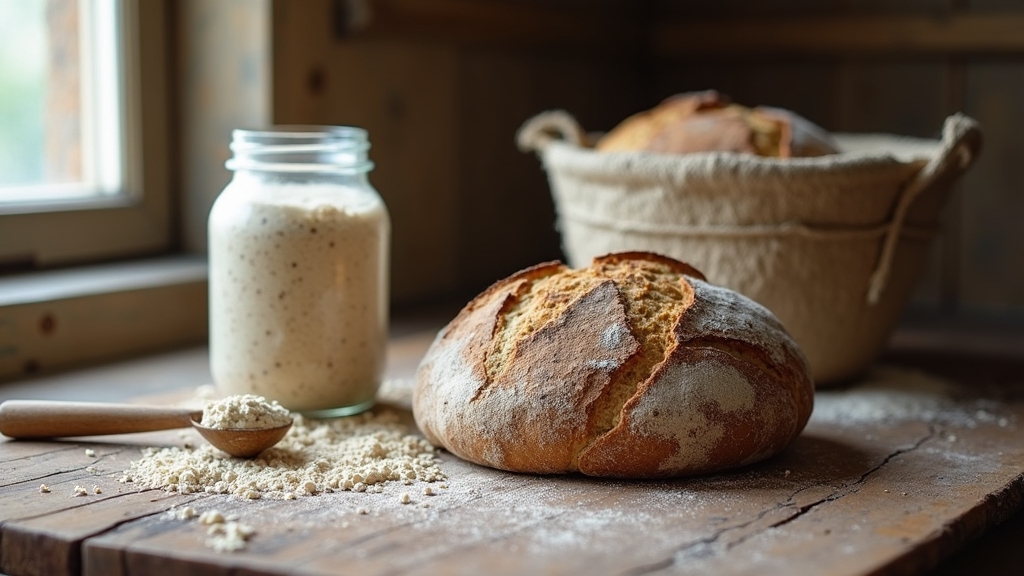
When you use an unfed sourdough starter, you’re working with a mixture of flour and water that’s already fermented to cultivate wild yeasts and lactic acid bacteria.
It may require longer fermentation times due to reduced leavening power. Your starter typically ranges from 85g to 200g, measured by weight for precision. Using stand mixers with sufficient motor power can help achieve consistent dough development despite longer fermentation.
Choose bread flour for its high protein content to support gluten structure, or unbleached all-purpose flour for moderate protein. An unfed starter can be used effectively if it has been fed within the week, ensuring reliable fermentation.
Incorporate whole grain flours like rye or whole wheat partially to enhance flavor and nutrients without compromising dough density.
Use lukewarm, filtered water (75°F–95°F) to optimize microbial activity.
Add kosher salt (10–20g) for flavor and gluten strength, and optionally sweeteners like honey (~20g) to boost yeast fermentation and crust coloration.
These ingredients balance fermentation and dough performance effectively.
Step-by-Step Preparation Process
First things first, grab your unfed sourdough starter, and give it a good mix with some water and flour. Once everything’s combined nicely, let the dough take a little break for about 20 to 30 minutes. This resting period is key because it helps the dough hydrate properly.
Using an unfed starter can simplify the process and still produce excellent bread with proper timing. Remember, maintaining a healthy starter through regular feeding is essential for consistent fermentation results.
After that, it’s time to get your hands a bit dirty! During the bulk fermentation phase, you’ll want to perform some stretch-and-fold cycles. This is where you really develop that gluten structure. Just keep an eye on the fermentation time and how much the dough is expanding.
Remember that fermentation time will vary depending on ambient temperature, so being flexible is important for optimal results.
Once you feel like the dough has reached that perfect point, go ahead and divide it up and shape it. Then, place it in a floured basket for proofing. Don’t forget, you can adjust the proofing time or even pop it in the fridge if you need to control the fermentation a bit more. Happy baking!
Mixing and Resting
Although the mixing and resting phases may seem straightforward, they require careful attention to ingredient order and technique to guarantee ideal dough development.
Begin by measuring liquid into your bowl. Dissolve salt fully, then incorporate the sourdough starter evenly before gradually adding flour. Starting with the liquid allows easy correction of measurement mistakes and ensures even distribution of ingredients. Using all-purpose flour is recommended as it provides a balanced blend of protein and carbohydrates that effectively feed the starter’s yeast and bacteria.
Use a Danish dough whisk or clean hands to mix until no dry patches remain, adjusting hydration if necessary.
Rest the dough covered for 20 to 60 minutes to promote hydration and initial gluten formation. This resting period enhances dough elasticity and creates a silky, smooth texture.
During mixing or early rest, perform stretch-and-fold motions to enhance dough strength.
- Measure liquid first, dissolve salt, add starter, then flour gradually.
- Mix thoroughly; dough should be shaggy but hydrated.
- Cover and rest dough for 20–60 minutes (autolyse).
- Apply stretch-and-fold to build gluten early.
Fermentation and Shaping
Since unfed sourdough starter ferments more slowly, you’ll need to allow 8 to 12 hours of bulk fermentation at around 70°F to achieve proper dough development. Using a healthy, active starter is essential to ensure the dough rises properly during this time. Monitoring dough weight with a digital baking scale can help maintain consistency throughout fermentation.
Monitor the dough until it doubles in size, signaling readiness for shaping. Maintain consistent temperature and check dough texture regularly.
During fermentation, perform stretch-and-folds every 30 minutes if your recipe calls for it, enhancing gluten structure.
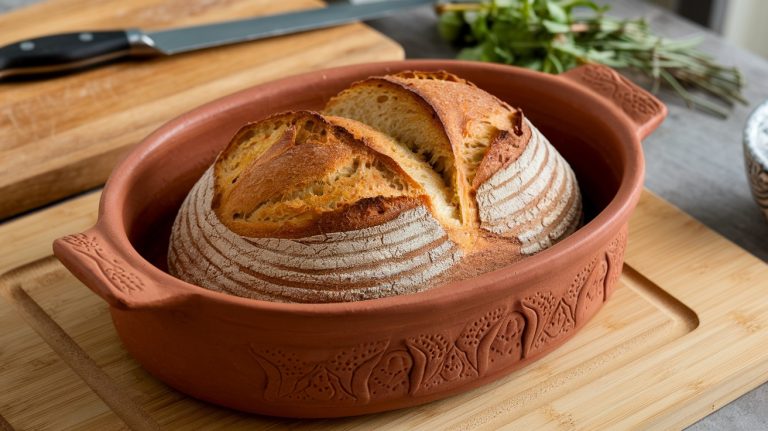
When shaping, handle the dough gently to avoid deflation. Use bannetons or proofing baskets for form, dusting the surface with flour to improve scoring contrast.
After shaping, let the dough rest for about an hour at room temperature or longer in the fridge to relax gluten and facilitate easier scoring.
Use a sharp blade to score decorative cuts just before baking.
Understanding Fermentation Times
When it comes to fermentation time, you really have two main options: room temperature or cold fermentation.
Room temperature fermentation? That one speeds up yeast activity, which is great if you’re in a bit of a hurry. On the flip side, cold fermentation slows things down, but it really enhances the flavor of your dough. Choosing the right temperature settings can also influence how your dough develops during these processes.
Using a small, unfed starter combined with long cold fermentation can produce bread with a similar crumb texture but a more pronounced sourness, especially in whole grain doughs starter activity impact.
So, why does this matter? Well, understanding how these methods affect fermentation can help you tweak the bulk fermentation duration. This way, you can achieve that perfect rise and texture in your dough.
It’s all about finding the right balance for your baking needs!
Room Temperature Fermentation
When you control room temperature during fermentation, you directly influence the rate at which yeast activates and dough develops.
Warmer temperatures accelerate fermentation but can cause stickier dough and faster spreading, requiring adapted shaping techniques. You’ll want to monitor dough volume and texture closely to avoid overproofing. Incorporating bulk fermentation techniques helps achieve optimal dough rise and flavor development.
Key points to manage room temperature fermentation:
- Fermentation rate roughly doubles every 15°F (8°C) increase.
- At 70°F (21°C), expect about 1 hour for noticeable rise; cooler temps slow this.
- Bulk fermentation usually lasts 12–18 hours, with dough nearly doubling in size.
- Use the poke test to gauge readiness; dough should slowly bounce back without collapsing.
- Warmer dough relaxes gluten, resulting in less height and earlier fermentation cutoff.
Adjust your timing based on actual room conditions to optimize flavor and dough handling.
Cold Fermentation Benefits
Although cold fermentation slows yeast activity by lowering the dough temperature, it allows lactic acid bacteria to remain active. This enhances flavor complexity over an extended proofing period.
By refrigerating your dough during the proofing phase, you slow yeast metabolism considerably, often rendering it nearly dormant near 4°C. Meanwhile, bacteria continue producing acetic acid, deepening sourdough’s tangy profile.
Using a tight-fitting lid to cover the dough ensures an airtight environment that prevents drying and crust formation during this time. Accurate temperature control is essential to balance yeast and bacterial activity for optimal flavor development.
This extended timeline promotes enzymatic breakdown of starches and proteins, enriching flavor and improving gluten strength without additional kneading. Cold fermentation also aids crust development, creating thinner, crisper textures and facilitates scoring by firming the dough.
Though not mandatory for successful bread structure, cold proofing grants scheduling flexibility and reduces overproofing risk. Keep in mind that excessively long cold fermentation may over-sour the dough or weaken gluten, so balance timing carefully for ideal results. Using a kitchen scale helps ensure consistent dough hydration and fermentation outcomes.
Baking Techniques for Perfect Crust
How do you achieve that ideal sourdough crust that’s both crisp and glossy?
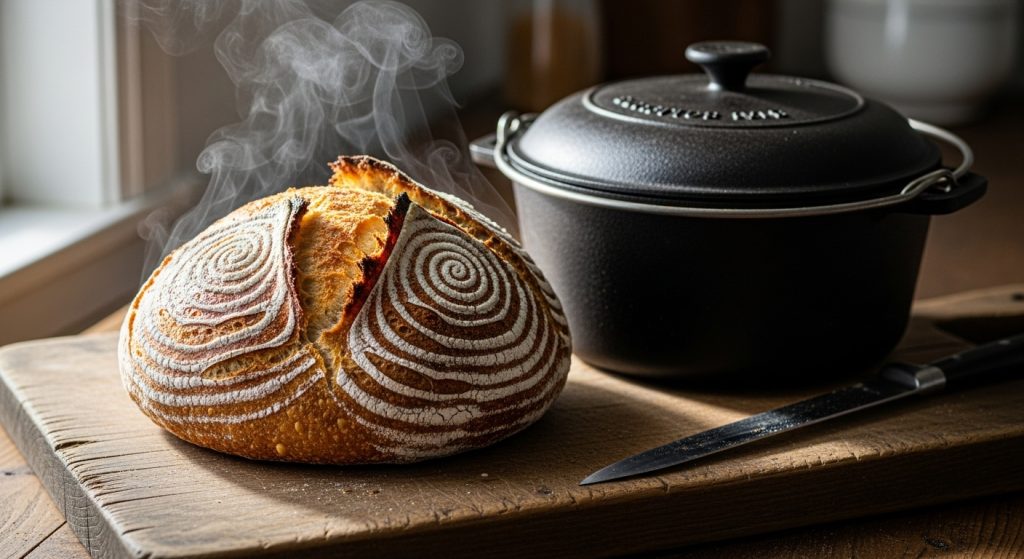
It starts with precise temperature control and steam management. Preheat your oven to 450-500°F and bake covered to trap steam. Using a Dutch oven helps create the optimal steam trapping environment needed for bakery-style crust. The extended fermentation of a sourdough starter also contributes to the crust’s unique tangy flavor and texture.
Then uncover and crack the door near the end for a crisp finish. Score your dough confidently to control expansion and ensure consistent oven spring.
Use a preheated Dutch oven or baking stone to stabilize heat and trap moisture effectively.
- Preheat oven to 450-500°F; bake covered 20-30 minutes to trap steam.
- Score dough with sharp blade; create shallow, 2-3 inch slashes.
- Use preheated Dutch oven or stone; position mid or lower rack.
- Cool on wire rack; wait 22-27 minutes before removing cover to harden crust.
These steps optimize crust texture and color with precise heat and moisture control.
Benefits of Using Unfed Starter
Mastering the crust sets a strong foundation, but the choice of starter plays a significant role in your sourdough’s flavor and texture.
Using an unfed starter imparts a pronounced sourness due to elevated acidity, ideal for recipes needing less rise and more tang. Its lower leavening power means it is better suited for recipes that require gentle fermentation and reduced oven spring.
While its leavening power diminishes, the microbial presence and gluten breakdown remain sufficient for various baked goods like pancakes and muffins. Over time, the gluten may be broken down in the starter, which can affect the texture and digestibility of your baked goods.
This starter also offers convenience by reducing feeding frequency, especially for infrequent bakers.
| Benefit | Description |
|---|---|
| Intense Flavor | Increased acidity provides a tangier taste |
| Versatility | Suits bread, pancakes, naan, and muffins |
| Convenience | Requires less frequent feeding |
Embrace unfed starters to diversify your sourdough repertoire with distinct flavors and textures.
Tips for Optimizing Starter Activity
When you maintain a consistent feeding schedule and control environmental factors like temperature and hydration, your sourdough starter performs ideally. This balance ensures the yeast and bacteria remain active and healthy, promoting reliable fermentation and rise.
To optimize starter activity, focus on these key areas:
- Feed your starter daily at the same time using a 1:1:1 ratio of flour, water, and starter by weight. It is important to note that after use, feeding the starter at this ratio helps refresh the microbial community for the next bake, even if some starter remains unused as a small smear on the jar.
- Keep the starter at about 75°F to maximize microbial activity and fermentation rate.
- Maintain proper hydration with equal parts flour and water to support yeast and bacteria balance. Using a clear container allows you to observe starter expansion and assess ripeness visually, which indicates when the starter is ready for incorporation into dough.
- Monitor your starter’s condition regularly, watching for bubbles and rise patterns to determine readiness and health. Tracking these changes over time, especially before and after refrigeration, helps manage flavor development and fermentation performance.
Flavor Variations and Additions

Optimizing your starter’s activity sets the foundation for a well-fermented dough, but the flavor profile depends largely on the ingredients you incorporate.
You can enhance sourdough with herbs like rosemary or thyme for aromatic complexity, or add savory elements such as cheddar and chives for richness.
Sweet variations benefit from cinnamon, sugar, honey, or fruit infusions like soaked raisins, which contribute moisture and natural sweetness.
For a spicy twist, hot honey infused with red chili peppers works well. Using unfed sourdough discard can also provide a flexible and hands-off fermentation process while still developing flavor.
Innovative additions like pistachios and cranberries add texture and balance.
When adding cheeses, consider parmesan with rosemary for a savory punch or asiago paired with hot honey for contrast.
These precise ingredient combinations allow you to customize your sourdough’s flavor without compromising fermentation quality.
Cold Fermentation and Storage Options
Although cold fermentation takes longer than room-temperature proofing, it considerably enhances dough flavor and strength by slowing yeast activity and allowing complex biochemical processes. Utilizing precise temperature control during refrigeration can further optimize fermentation outcomes.
Cold fermentation slows yeast activity, enriching dough flavor and strength through complex biochemical processes.
You can refrigerate dough immediately after mixing or after a brief rise; immediate refrigeration often requires slightly more yeast.
Using unfed, refrigerated starter extends bulk fermentation, as the starter activates within the dough. This method also eliminates the need to feed the starter just before baking, saving time and reducing waste.
Temperature control and folding during fermentation ensure even yeast activity and gluten development.
Key points to consider:
- Cold fermentation ranges from 12 hours to several days, enhancing flavor and dough strength.
- Bulk fermentation with unfed starter may take up to 16 hours to double dough size.
- Perform 1-3 folds early in refrigeration to equalize temperature and improve structure.
- Final proofing occurs in the fridge (12–24 hours) or at room temperature for convenience.
Frequently Asked Questions
Can Unfed Sourdough Starter Be Frozen for Later Use?
Yes, you can freeze unfed sourdough starter for later use, but it’s best if your starter is mature and stable.
Freezing halts fermentation, preserving microbes in dormancy.
Freeze it in airtight containers or ice cube trays, label with dates, and thaw slowly before reviving.
Feed with flour and water at warm temperatures to reactivate.
Expect multiple feedings over a few days for full recovery, especially if it was unfed before freezing.
How Does Humidity Affect Unfed Sourdough Fermentation?
Humidity acts like a hidden accelerator in unfed sourdough fermentation, speeding up microbial activity and causing your starter to bubble and rise faster.
High humidity makes the environment moist, promoting enzymatic reactions. But it also risks overproofing.
This weakens gluten and leads to a slack, overly acidic starter.
To keep control, you’ll want to monitor temperature closely, reduce hydration slightly, and consider refrigeration to slow down this rapid, sticky dance.
What Is the Best Way to Revive an Unfed Starter?
To revive an unfed starter, discard most of it, keeping about ½ cup.
Feed it with equal parts starter, lukewarm filtered water, and flour by weight or a 1:1:2 volume ratio.
Stir thoroughly and keep it at 75°F–78°F, feeding every 12 to 24 hours.
Stir or pour off hooch before feeding.
Monitor bubbling and doubling; if no progress after several feedings, start fresh.
Are There Gluten-Free Options for Unfed Sourdough Recipes?
Yes, you can definitely use gluten-free options for unfed sourdough recipes.
You’ll want to use gluten-free flour blends combining brown rice flour, tapioca starch, and potato starch.
Add binders like xanthan gum or psyllium husk powder to improve dough elasticity.
Incorporate fats and natural sweeteners for texture and flavor.
These adjustments help you create crackers, muffins, and pancakes with good rise and crumb, all while maintaining a mild tang from the unfed discard.
How Does Altitude Impact Unfed Sourdough Baking Times?
Wondering how altitude affects your unfed sourdough baking times?
At higher elevations, you’ll notice faster fermentation due to lower atmospheric pressure. So, you’ll need to reduce bulk fermentation and proofing times slightly to avoid overproofing.
Also, baking times typically shorten, but you might want to increase oven temperature a bit to improve oven spring and crust.
Keep a close eye on loaf color and internal temperature to nail perfect timing at altitude.
Zero-Waste Artisan Bread with Ultimate Unfed Sourdough
Using unfed sourdough starter can save you time and reduce waste. Yet studies show it still produces bread with up to 20% more complex flavor compounds compared to commercial yeast.
By understanding fermentation times and optimizing starter activity, you’ll consistently achieve a perfect crust and rich taste. Embrace cold fermentation to extend shelf life and explore flavor variations confidently.
Master these techniques, and your unfed sourdough will rival traditional methods in both quality and efficiency.