Oatmeal Raisin Bread: A Classic Comfort Taste
To make perfect oatmeal raisin bread, start by soaking rolled oats and raisins separately to boost moisture and flavor. Use a blend of strong bread flour and white whole wheat for a chewy yet tender crumb.
Mix ingredients carefully, adding soaked raisins last to avoid crushing. Knead until elastic, then ferment and proof at controlled temperatures for ideal rise and taste.
Bake in a greased pan till golden and fully cooked. Follow these steps, and you’ll master every detail for a delicious, lasting loaf.
Key Takeaways
- Use bread flour and white whole wheat flour for a chewy crust and nutritious, airy oatmeal raisin bread texture.
- Soak old-fashioned oats and raisins separately to soften, improve flavor, and aid even distribution in the dough.
- Incorporate soaked raisins late in mixing and knead dough until smooth and elastic for optimal rise and texture.
- Proof at around 79°F for 1.5 hours and bake in a greased 9×5-inch pan at 350°F–425°F for a golden crust.
- Store bread tightly wrapped at room temperature for up to a week or freeze slices individually for longer freshness.
Healthy Oatmeal Raisin Breakfast Quick Bread Recipe
| Ingredient/Step | Details | Tips for Best Results |
|---|---|---|
| Flour Blend | 2 cups bread flour, 1 cup white whole wheat flour, ½ cup all-purpose flour | Ensures chewy texture with balanced nutrition |
| Oats | 1 cup rolled oats, soaked in boiling water 20 min | Softens oats, improves dough cohesion |
| Raisins | 1 cup raisins, soaked 30 min in warm water | Keep plump by hydrating separately and folding in last |
| Sweetener | 3 tbsp honey or maple syrup | Adds natural sweetness and moisture |
| Yeast & Liquid | 2¼ tsp instant yeast, 1 cup warm water | Warm (not hot) water helps yeast activate properly |
| Fat & Binder | 2 tbsp melted butter, 1 egg | Provides richness and tender crumb |
| Spices (optional) | 1 tsp cinnamon, ¼ tsp nutmeg | Creates warm, aromatic flavor |
| Mixing | Combine dry, then add wet; mix until shaggy dough forms | Use stand mixer or knead by hand for elasticity |
| Kneading | 8–10 minutes until smooth and elastic | Prevents dense loaf, builds gluten |
| Fermentation | 1.5 hrs at 79°F (26°C) | Dough should be puffy and airy |
| Final Proof | 1.5 hrs in proofing basket | Keeps loaf shape and lightness |
| Baking | Preheat oven 425°F → reduce to 350°F, bake 35–55 min | Bake until golden brown and 190–200°F internal temperature |
| Storage | Wrap tightly, room temp up to 5 days; freeze slices for 3–6 months | Toast from frozen for fresh-baked taste |
Ingredients for Oatmeal Raisin Bread
When you prepare oatmeal raisin bread, choosing the right flours is crucial to achieving the ideal texture and rise. Opt for bread flour to guarantee enough protein for a strong gluten network, which supports good volume and chewiness.
Incorporate white whole wheat flour to boost flavor, fiber, and nutrition without making the loaf too dense. To balance texture, blend in some all-purpose flour. You can also experiment with adding custom ingredients to enhance flavor and texture.
You can use stone-ground flours for enhanced taste, but it’s optional. Avoid gluten-free or alternative flours in yeast breads, as they don’t provide the necessary structure.
For sweetening, honey is a preferred natural option, adding mild sweetness and moisture. Maple syrup can substitute honey if you want a richer flavor.
Keep sweeteners moderate to let the bread’s natural flavors shine through. Additionally, using old-fashioned rolled oats rather than quick or steel-cut oats ensures the ideal texture in the finished bread due to their proper hydration and consistency during baking, which is especially important when following this recipe developed for high altitude.
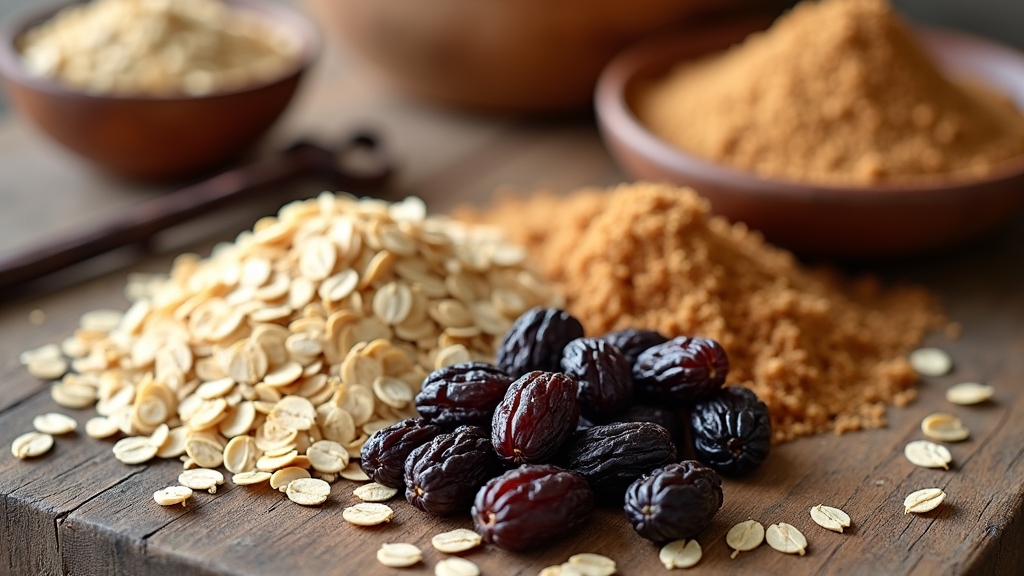
Preparing the Oats and Raisins
Start by soaking your oats in boiling water for 10 to 30 minutes. This softens them and creates the sticky texture needed for dough cohesion, similar to how overnight soaking improves texture in sourdough casseroles.
Meanwhile, soak your raisins separately in warm water for at least 30 minutes. This plumps them up and enhances their sweetness.
Once both the oats and raisins are properly hydrated, drain them well. Measure the raisins after soaking and draining to ensure you use the correct soaked and drained weight.
Gently fold the oats and raisins into the dough. Make sure they’re evenly distributed without crushing the raisins.
Soaking Oats Benefits
Although it may seem like a simple step, soaking your oats and raisins before baking considerably enhances both their nutritional profile and texture.
Soaking softens oats, making them easier to digest by reducing the effort your body needs for mechanical and enzymatic breakdown. It also neutralizes phytic acid, improving absorption of minerals like calcium and iron.
By soaking oats in water—or better yet, with a splash of apple cider vinegar—you promote mild fermentation, which creates prebiotics to support gut health and adds a subtle tangy flavor.
Hydrated oats retain moisture, contributing to a softer bread crumb and prolonged freshness while preventing sticky dough. Additionally, soaking helps achieve a wet and sloppy batter consistency that is crucial for optimal baking results.
To maximize these benefits, soak your oats at room temperature for 12 to 48 hours with a 1:2 oat-to-liquid ratio before mixing into your dough.
Raisin Hydration Tips
Because raisins can greatly influence the texture and flavor of your oatmeal raisin bread, hydrating them properly is vital.
Start by soaking raisins in warm liquid—water, fruit juice, or liqueur—for 10 to 15 minutes. Use hot tap water for a quick 5-minute soak if you want mild plumping without flavor loss.
Soaking raisins in the liquid used in your recipe helps them absorb complementary flavors and enhances their juiciness. For best results, consider the impact of adjustable cake leveler tools on precision when incorporating ingredients evenly.
For deeper flavor, soak overnight in juice or liqueur, then drain and lightly rinse to avoid discoloring the dough.
After soaking, thoroughly drain and pat raisins dry to prevent excess moisture from loosening the dough. Lightly dredge them in flour before folding in to keep them suspended evenly.
Avoid soaking too long or using very hot water, as this can damage texture and flavor.
Proper hydration ensures your raisins stay plump, flavorful, and integrate well during baking.
Texture and Integration
Properly prepared oats and hydrated raisins play key roles in shaping the texture and consistency of your oatmeal raisin bread dough.
Start by soaking rolled oats in boiling water or briefly cooking them to create a porridge; this softens oats and guarantees even moisture distribution. This process prevents dry clumps and contributes to a tender crumb. Using a fed sourdough starter can enhance the dough’s rise and structure during fermentation.
Add oats with liquid ingredients before incorporating flour to hydrate them uniformly. After initial kneading, fold in hydrated raisins gently to avoid crushing and to distribute them evenly. This preserves their moist, chewy bursts inside the crumb.
Expect a sticky, shaggy dough from the soluble fiber in oats and moisture from raisins. This is characteristic of a dough that is well on its way to becoming a perfectly risen, chewy loaf.
Knead thoroughly with a dough hook to develop gluten despite reduced elasticity, balancing dough cohesiveness and creating a moist, pleasantly textured bread.
Choosing the Right Flours
When selecting flours for your oatmeal raisin bread, prioritize unbleached all-purpose or bread flour to guarantee proper gluten development and structure. Flours with a protein content of 12.5% or higher are ideal for creating a chewy crust and airy crumb. Incorporate whole wheat flour to boost fiber and add a hearty flavor, but balance it carefully since it can make the loaf denser.
Understanding these flour types helps you control texture and nutrition in your final bread. For those seeking alternative options, white whole-wheat flour can be used as a suitable substitute that still provides whole grain benefits.
Flour Types Overview
Selecting the right flour is essential for achieving the texture and flavor you want in oatmeal raisin bread. For chewy, elastic dough, bread flour with 11–14% protein is ideal, though it demands more liquid. Bread flour, made from hard wheat, provides higher gluten content necessary for good structure in yeast breads.
All-purpose flour, with moderate protein (10.5–11.7%), offers versatility but results in less chew. Avoid pastry or cake flours; their low protein and weak gluten won’t support the yeast structure.
If you want a lighter crumb, consider Type 00 flour, which has medium protein and less elasticity than bread flour. Regional flours like French Type 55 or German Type 405 vary in ash content, affecting dough hydration and crumb.
Using ancient grains like spelt or rye adds flavor and alters dough handling but requires adjustments due to their unique gluten properties.
Whole Wheat Benefits
Although whole wheat flour may require slight adjustments in hydration and kneading due to its bran content, incorporating it into your oatmeal raisin bread brings substantial health benefits. Using the right tools, like an adjustable air pressure airbrush kit, can help achieve consistent results in decorating your baked goods.
Whole wheat’s insoluble fiber, concentrated in the bran, promotes healthy digestion by adding bulk to stool and nourishing gut bacteria as a prebiotic. This fiber also helps shorten digestive transit time and reduce constipation risk. Additionally, whole wheat contains phytic acid, an antinutrient that can impair mineral absorption, but this effect can be minimized by soaking or fermenting the flour.
Regularly using whole wheat supports cardiovascular health by lowering cholesterol and heart disease risk, thanks to its antioxidants and nutrients.
It also aids metabolic health, improving blood sugar control and reducing type 2 diabetes risk.
Additionally, whole wheat provides essential vitamins, minerals, and antioxidants that protect against oxidative stress, making it a nutritious choice to enhance both the flavor and health profile of your bread.
Mixing and Kneading the Dough
Before you begin kneading, combine your dry ingredients thoroughly to guarantee an even distribution of flour, oats, sugar, salt, yeast, and spices. This step is crucial for achieving consistent flavor and texture throughout the bread.
Mix wet ingredients separately—warm water, melted butter, eggs, and honey—then add gradually to the dry mix until a shaggy dough forms. Using high-quality flour can significantly impact the bread’s final taste and structure.
When kneading, use a stand mixer with a dough hook for 5–10 minutes until the dough is smooth and elastic. Using a stand mixer not only simplifies dough preparation but also ensures consistent results and saves time.
If kneading by hand, work on a floured surface for about 5 minutes, aiming for a tacky but not sticky dough. Employing proper kneading techniques helps develop gluten, which is essential for the bread’s structure.
Adjust hydration carefully by adding small amounts of flour or water to optimize dough consistency. Precise hydration control is key to achieving the perfect crumb and crust balance.
Incorporate soaked raisins toward the end to prevent crushing and ensure even distribution.
Proper mixing and kneading develop gluten for structure and texture while balancing moisture for a soft crumb. Remember, the right tools and techniques can elevate your baking experience and results.
Fermentation and Proofing Tips
When you ferment your oatmeal raisin bread dough, controlling time and temperature is essential to achieve the right balance of flavor and texture. Aim for 1.5 hours at 26°C (79°F) for bulk fermentation or extend up to 24 hours refrigerated for enhanced flavor. The dough will be sticky due to the honey and oats, so do not be discouraged during kneading.
Add soaked raisins after mixing to prevent sinking. Light folding during fermentation redistributes yeast and gas, improving structure. This process supports the carbon dioxide production that creates air pockets and rise in the bread.
For the final proof, keep the dough covered and at a similar temperature for 1.5 hours until puffed. Using proofing baskets helps maintain the shape of your loaf.
| Process | Time & Temp | Key Tip |
|---|---|---|
| Bulk Fermentation | 1.5 hrs @ 26°C (79°F) | Dough well puffed |
| Cold Retardation | Up to 24 hrs @ 4°C | Develops flavor, flexible timing |
| Raisin Addition | After initial mixing | Prevents sinking |
| Folding | During fermentation | Redistributes yeast & gas |
| Final Proof | 1.5 hrs @ fermentation temp | Covered, use proofing basket |
Baking Techniques and Temperature
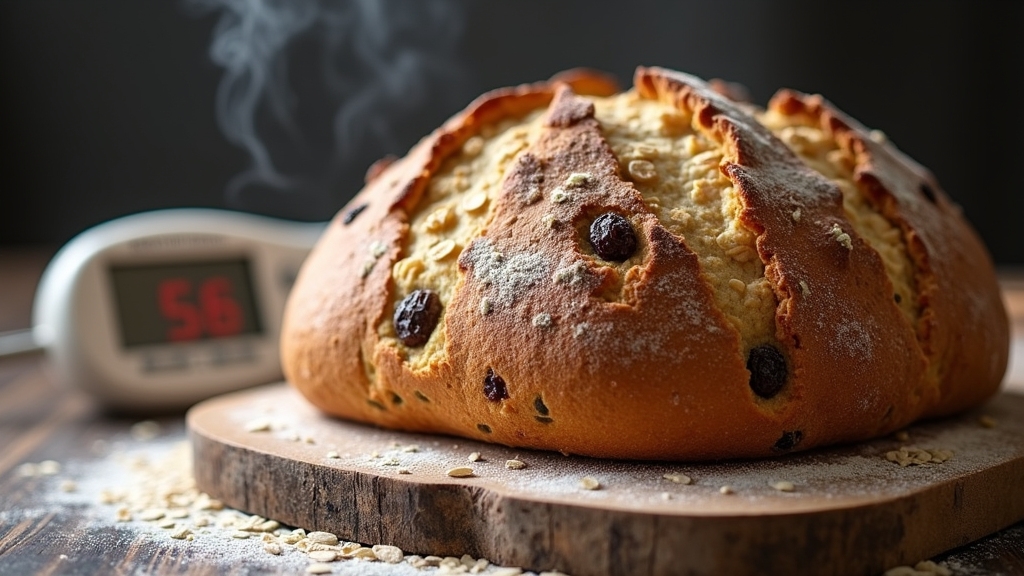
Since baking temperature considerably affects both the crust and crumb of your oatmeal raisin bread, you’ll want to preheat your oven to a precise range between 350°F and 425°F (177°C to 218°C). Starting at a higher temperature, like 425°F, then reducing after 15 minutes can boost oven spring and create a well-formed crust.
Use a greased 9×5-inch pan, shape dough to fit snugly, and cover during final rise to maintain humidity, which helps in bulk fermentation for better dough texture. Bake 35–55 minutes until the crust is deep golden and internal temperature hits 190°F (88°C). It is important to bake until the internal temperature reaches 195-200°F to ensure the bread is fully cooked and has the ideal texture.
- Preheat oven to 350°F–425°F for even heat distribution.
- Use metal pans for better crust browning.
- Apply egg or milk wash for a glossy crust.
- Cool bread on a wire rack to avoid sogginess.
Enhancing Flavor With Spices and Sweeteners
Adjusting baking techniques sets the foundation for your oatmeal raisin bread, but tailoring the flavor comes next by carefully selecting spices and sweeteners. Start with cinnamon for warm, sweet notes; add nutmeg or allspice to deepen complexity. For a bolder kick, incorporate cloves or ginger sparingly. Experiment with blends like pumpkin pie spice or apple pie spice to layer flavors.
Choose sweeteners that enhance moisture and taste—light brown sugar adds caramel richness, honey brings floral sweetness, and molasses offers a robust depth. Don’t forget vanilla extract for balanced warmth. Combine these with raisins or dried fruits to amplify sweetness and texture, while considering nutritional benefits from natural ingredients.
Finally, consider nuts or seeds to add contrast and crunch, creating a nuanced, flavorful bread that delights every bite. Chilling the dough before baking helps the spices and sweeteners meld together, improving the overall flavor and texture of the bread chill dough.
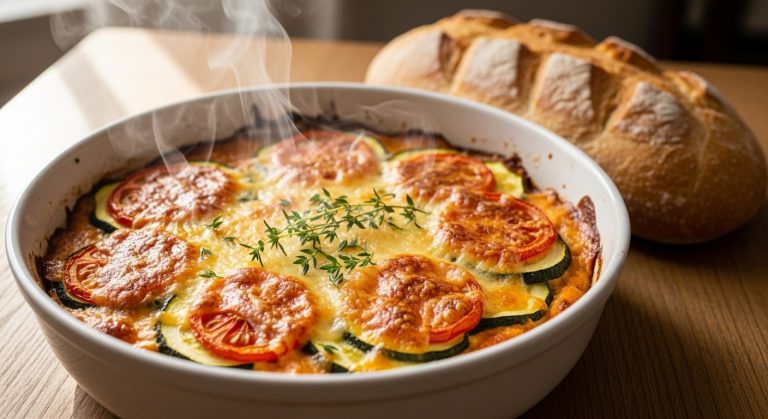
Serving Suggestions and Storage Methods
To enjoy oatmeal raisin bread at its best, you’ll want to serve it toasted with butter or cream cheese. This enhances its moist texture and highlights the sweet bursts of raisin. You can also warm it gently below 350°F to avoid burning the raisins. For optimal taste, make sure the bread has cooled completely before slicing, as this preserves the internal structure.
For storage, cool the bread completely before wrapping it tightly in plastic or foil. This helps prevent moisture buildup and keeps the bread fresh.
Here’s how to serve and store your bread effectively:
- Toast slices and spread with nut butters or fruit preserves for balanced flavor.
- Incorporate into French toast with cream cheese and pecans for a rich breakfast.
- Store wrapped airtight in the fridge for up to one week or freeze slices individually.
- Thaw frozen slices at room temperature or toast directly from frozen for *ideal* texture.
Frequently Asked Questions
Can I Substitute Raisins With Other Dried Fruits in Oatmeal Raisin Bread?
Yes, you can substitute raisins with other dried fruits like golden raisins, dried cranberries, or chopped apricots. Make sure to hydrate denser fruits beforehand to maintain moisture.
Chop larger fruits to raisin-size for even texture and balance sweet and tart flavors by mixing varieties. Adjust dough hydration slightly if needed.
How Does Using Greek Yogurt Affect the Bread’s Texture?
Using Greek yogurt in your bread is like inviting a gentle rain to soften the earth—it tenderizes the crumb, making it moist and fluffy. Its proteins and acidity subtly break down gluten, so your bread feels lighter and less chewy.
Yogurt’s moisture keeps freshness alive longer, while its emulsifying powers distribute air bubbles evenly, giving a fine, uniform crumb.
Just don’t overdo it, or your bread might become too soft and crumbly.
What Is the Shelf Life of Homemade Oatmeal Raisin Bread?
You can expect your homemade oatmeal raisin bread to last 3 to 5 days at room temperature if you store it properly in an airtight container or wrapped tightly.
Refrigeration extends its life to about 7 days but speeds staling.
For longer storage, freeze it well wrapped—up to 3 to 6 months.
Always cool the bread completely before storing to avoid moisture buildup, and thaw frozen bread overnight in the fridge for best texture.
Can I Freeze Oatmeal Raisin Bread Without Affecting Quality?
Freezing oatmeal raisin bread is like putting a clock on pause—it can preserve freshness if you do it right.
Cool the bread completely, then slice it for convenience.
Wrap each slice tightly in plastic wrap and foil to block moisture and freezer burn.
Freeze quickly to avoid large ice crystals forming.
Thaw at room temperature or toast directly from frozen to keep texture and flavor intact, minimizing quality loss.
Is It Possible to Make Oatmeal Raisin Bread Gluten-Free?
Yes, you can make oatmeal raisin bread gluten-free by swapping wheat flour with certified gluten-free flours like brown rice flour, oat flour, or cassava flour.
Use certified gluten-free rolled oats and add xanthan gum or psyllium husk powder to improve texture.
Soak oats and raisins beforehand to prevent dryness.
Opt for yeast or baking powder as leavening agents, and coat raisins lightly with gluten-free flour to avoid sinking during baking for the best results.
Homemade Oatmeal Raisin Bread Recipe You’ll Love
Now that you’ve mastered mixing oats, raisins, and the perfect flours, you’ll notice how the aroma fills your kitchen at just the right moment—coinciding with your growing hunger.
Don’t rush fermentation or baking; these steps *reveal* the bread’s full flavor and texture.
Remember, a pinch of cinnamon or honey can elevate your loaf, so experiment confidently.
Store your bread properly to keep it fresh, and enjoy every slice knowing you’ve crafted something truly special.