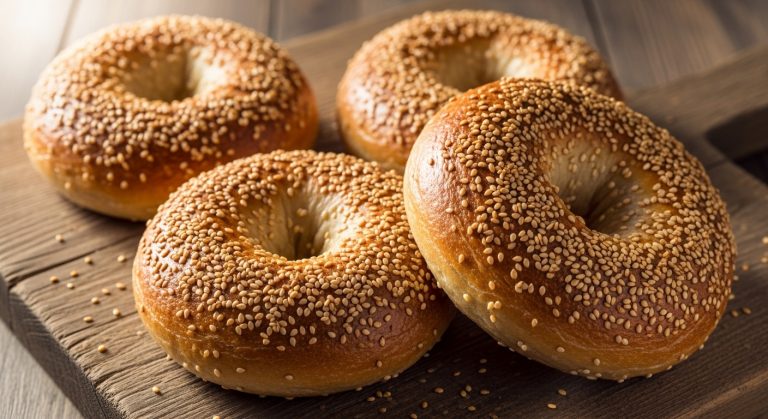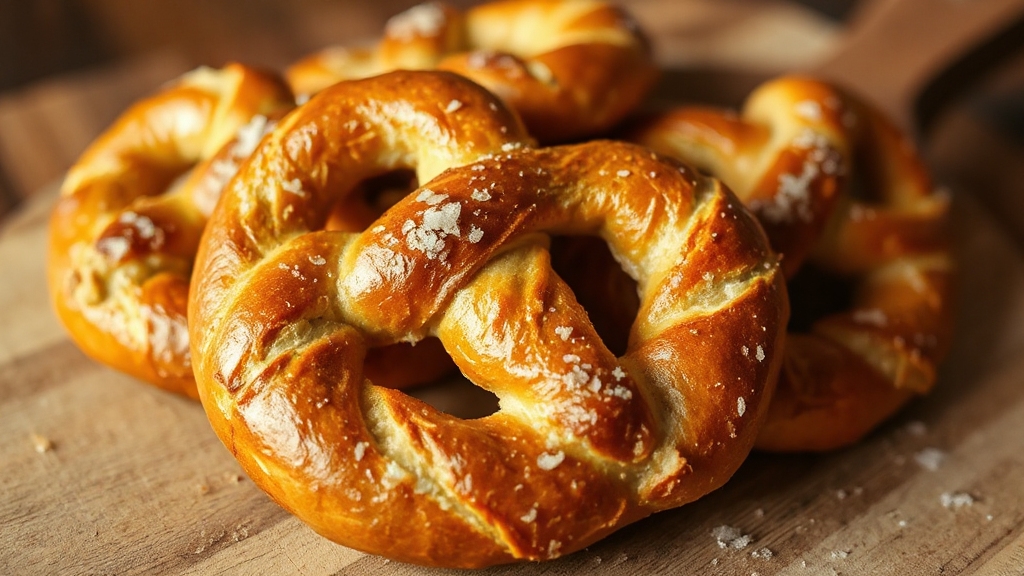
Hard Sourdough Pretzels: Golden Twists of Joy
To make hard sourdough pretzels, start by mixing strong wheat flour with your sourdough starter and a touch of malt for flavor and color. Knead until smooth and proof until doubled, then gently shape into thin, even rods.
Boil briefly in a baking soda bath to develop that signature crust, then bake at high heat for a crisp, golden finish. Add coarse salt or seeds for extra texture. Keep going, and you’ll uncover tips to perfect every bite.
Key Takeaways
- Use strong wheat flour and incorporate sourdough starter for flavor and firm texture in hard pretzels.
- Achieve proper gluten development by kneading dough 7–15 minutes until elastic and tacky but not sticky.
- Boil pretzels in an alkaline bath (baking soda solution) for 30 seconds per side to create a glossy, chewy crust.
- Bake pretzels at 425°F to 450°F until deep golden brown and crunchy for the ideal hard texture.
- Brush with egg wash and sprinkle coarse salt immediately after boiling to enhance crust and flavor.
Detailed Recipe Table for Hard Sourdough Pretzels
| Ingredients | Process |
|---|---|
| 3 cups strong wheat flour | Combine all dry ingredients in a large mixing bowl |
| 1 cup active sourdough starter | Gradually add warm liquids to dry ingredients, mixing until shaggy |
| 2 tablespoons malt syrup | Rest dough for 10 minutes to boost hydration |
| 1 teaspoon salt | Knead for 7-15 minutes until smooth, elastic, and tacky but not sticky |
| 1 teaspoon sugar | Bulk ferment for 3.5-6 hours at 78-82°F until roughly doubled |
| 3/4 cup warm water | Gently punch down dough to release excess gas |
| 2/3 cup baking soda | Divide dough into equal portions using bench knife |
| 10 cups boiling water | Shape into rods 18-24 inches long with even thickness |
| Coarse salt for topping | Final proof for 30 minutes to 2 hours at 75-80°F |
| 1 egg beaten (for wash) | Prepare alkaline bath by dissolving baking soda in boiling water |
| Dip each pretzel in bath for 30 seconds per side | |
| Brush with egg wash and sprinkle with coarse salt | |
| Bake at 250°F for 25 minutes, then increase to 300°F for 10-40 minutes | |
| Cool on wire racks to stabilize the crust |
Ingredients and Dough Composition
When you immerse yourself in making sourdough pretzels, the foundation lies in selecting the right ingredients and mastering the dough composition. You’ll start with all-purpose or strong wheat flour, essential for gluten development and structure.
Crafting sourdough pretzels begins with choosing quality flour and perfecting the dough’s structure.
Incorporating malt syrup or malt adds subtle sweetness, enhances color, and aids fermentation. A pinch of sugar supports yeast activity, while salt—around 1–2% of flour weight—balances flavor and strengthens the dough.
Your leavening mainly depends on a lively sourdough starter, sometimes complemented by minimal commercial yeast for consistency. Hydration hovers near 50–60%, adjusted for starter moisture and flour absorption, ensuring firm, kneadable dough ideal for shaping. It is important to dissolve the salt and sugar in warm water before mixing to aid fermentation and achieve a smooth and elastic dough.
While fats rarely enter traditional recipes, a baking soda bath will later help perfect that iconic crust. Every component plays a crucial role in crafting pretzels with authentic texture and rich flavor.
Mixing and Kneading Techniques
Mastering the mixing and kneading techniques shapes the character of your sourdough pretzel dough just as much as the ingredients themselves. Start by combining dry ingredients, then gradually add warm liquids to control hydration.
Mix on medium speed until the dough looks shaggy, then rest it for 10 minutes to boost hydration. Knead for 7–15 minutes until the dough feels smooth, elastic, and tacky but not sticky. Salt can be added after initial kneading to avoid tightening gluten too soon.
Whether you hand knead or use a mixer, aim for dough that resists sticking yet is pliable enough to shape. Incorporating a sourdough starter into the dough not only enhances flavor but also contributes to the unique texture characteristic of traditional pretzels.
| Step | Purpose | Tips |
|---|---|---|
| Mix dry, then wet | Even hydration | Pour liquids slowly |
| Rest dough | Flour absorption | Cover for 10 minutes |
| Knead 7-15 mins | Gluten development | Use medium speed or hand knead |
| Salt addition | Flavor, gluten control | Add after initial kneading |
Fermentation and Proofing Process
Although fermentation requires patience, it’s the stage where your sourdough pretzel dough truly transforms, developing the gas and flavor that define its texture and taste.
You’ll bulk ferment the dough for 3.5 to 6 hours in a warm, draft-free spot around 78-82°F, letting it roughly double in size as yeast and bacteria work their magic.
After gently punching down the dough to release excess gas, you divide and preshape it, resting the pieces briefly to relax gluten.
During the final proof, cover the shaped dough to prevent drying and let it puff slightly—usually 30 minutes to 2 hours at 75-80°F—before baking.
This careful fermentation nurtures the characteristic sour tang and airy crumb that make hard sourdough pretzels so irresistible.
Using a bread maker with customizable fermentation settings can help maintain ideal conditions for this process.
Shaping Pretzel Rods
Shaping pretzel rods starts with dividing your dough into manageable pieces, ensuring each one is roughly the same size for even baking. Lightly flour your counter to prevent sticking but avoid drying the dough. Pat it into a fat rectangle, then use a bench knife or scraper to quarter and halve repeatedly until you have equal portions.
Next, roll each piece into a smooth “snake” about 18–24 inches long, maintaining even thickness to promote uniform crispness. Work on a lightly floured surface to gain traction without sticking, and avoid tears or holes that could dry out during baking. It is important to maintain even taper from the center to the ends while rolling to ensure proper shaping and appearance.
Whether you’re shaping simple rods or classic pretzel twists, handle the dough with care and speed to preserve elasticity and achieve that perfect, satisfying bite.
Preparing the Alkaline Bath
You’ll start by mixing a baking soda solution, often baked first to boost alkalinity, ensuring the perfect pH for that iconic pretzel crust. Using a high-quality baking sheet or stone can help maintain even heat during baking for optimal crust development.
Keep the bath warm but never boiling—temperature control is key to preserving dough shape and maximizing flavor development. Tools made from heat-resistant materials are ideal for handling the warm alkaline bath safely.
Timing your dips precisely, usually around 30 seconds, lets the alkaline bath work its magic without overwhelming the dough.
For hard sourdough pretzels, the recipe typically requires lower water content and longer baking time to achieve the desired texture. The use of a sturdy peel or spatula ensures easy transfer of pretzels to and from the oven without distortion.
Baking Soda Solution
How do you achieve that signature pretzel crust without using harsh lye? You prepare a carefully balanced baking soda solution.
Dissolve about 2/3 cup of baking soda in 10 cups of boiling water, stirring until fully dissolved to create an alkaline bath with a pH around 9-10. This raises the dough’s surface alkalinity, promoting the Maillard reaction for a deep brown, chewy crust—though lighter than with lye.
Using a wide, non-metal container helps ensure even coating and ease of handling during this step, which is important for durable construction in your baking process.
Use a wide, non-metal container to dunk your pretzels safely, flipping and gently pressing them under the surface for about 30-60 seconds. It is important to dip the pretzels for about 30 seconds on each side to ensure proper coating and browning.
Precise concentration matters: too much baking soda risks bitterness and over-darkening, too little yields a pale crust. For stronger alkalinity, you can bake baking soda into washing soda to reuse, but fresh solutions are safest for consistent, delicious sourdough pretzels.
Bath Temperature Importance
Although the alkaline solution’s concentration is essential, the bath temperature plays an equally important role in developing that perfect sourdough pretzel crust. You want to keep the bath between 100°F and 120°F to guarantee the alkaline solution activates properly without prematurely cooking or deforming the dough.
This warm range maximizes Maillard reactions after baking, giving you that deep brown color and signature chewiness. Too hot, and the pretzels soften; too cool, and the crust won’t develop fully.
Maintaining consistent temperature assures even surface treatment and that shiny, firm crust you crave. For authentic flavor, it’s important to use baked soda—a baking soda that has been baked at 250°F for 1 hour—in the bath to create a more alkaline solution.
- Dissolve baking soda in warm water around 110°F for ideal alkalinity
- Avoid boiling water to prevent dough swelling and shape loss
- Use a thermometer to monitor and maintain bath temperature precisely
- Replace bath water after each session to maintain solution effectiveness
Timing and Duration
When preparing the alkaline bath for sourdough pretzels, timing and duration become essential factors that directly influence the crust’s texture and color.
You’ll want to immerse each pretzel for about 30 seconds per side—no more than a minute total—to activate that signature shiny, dark crust without softening the dough too much. Boil them in small batches of 3-4 to keep the bath effective and ensure even crust development.
After the bath, place pretzels on parchment to drain briefly, letting residual moisture set the crust before baking. Using a large pot for boiling pretzels helps maintain consistent water temperature and provides enough space for them to float properly during the process.
Baking for Perfect Crust and Texture
You’ll want to bake your sourdough pretzels at a high temperature, around 425ºF to 450ºF, to develop that signature crunchy crust.
This intense heat triggers caramelization and Maillard reactions, giving the pretzels their deep brown color and satisfying snap.
Using a 3 to 4% lye solution for dipping before baking is crucial to achieve that distinctive pretzel flavor and crust.
Mastering this balance guarantees each bite delivers a perfect contrast between a chewy interior and a crisp, flavorful exterior.
Oven Temperature Tips
Mastering oven temperature is essential to baking sourdough pretzels with the perfect crust and texture, as it controls how moisture evaporates and how the dough firms up.
Start low at 250°F (120°C) to gently dry the pretzels without burning, then raise to around 300°F (150°C) to finish hardening. This gradual approach guarantees the interior dries evenly, avoiding toughness or chewiness. Using heavy-duty parchment paper can help support the dough during baking and prevent sticking.
Keep your oven rack centered for even heat, and rotate pans halfway through baking. Avoid high heats early on—they brown fast but don’t dry thoroughly.
It is also important to brush pretzels with egg wash before baking to achieve a glossy, mahogany finish and enhance crust texture.
Here are key tips to guide you:
- Begin baking at 250°F for about 25 minutes for slow moisture release
- Increase temperature to 300°F for 10–40 minutes to complete hardening
- Rotate trays midway for uniform baking and color
- Space pretzels apart for ideal air circulation and crispness
Achieving Crunchy Crust
Although achieving a crunchy crust on sourdough pretzels requires attention to multiple factors, the foundation lies in preparing a stiff, well-kneaded dough and carefully managing its rest and proofing stages. You’ll want to let the dough rest initially, then for a longer stretch—about two hours—to build gluten strength.
Rolling the dough thinly and shaping it evenly ensures uniform baking and a crisp crust. Don’t skip the alkaline baking soda bath; boiling your pretzels in it triggers Maillard reactions, thickening the crust and deepening that signature golden-brown hue.
Brushing with egg wash and sprinkling coarse salt before baking adds crunch and gloss. Ultimately, bake until deep golden brown and allow cooling on trays to stabilize the crust. These steps together guarantee a satisfyingly crunchy sourdough pretzel every time.
For added precision in decorating your pretzels, consider using adjustable air pressure settings to control the application of coatings or toppings for optimal texture.
Finishing Touches and Toppings
When you prepare sourdough pretzels for baking, the finishing touches and toppings play an essential role in achieving that irresistible crust and flavor profile. After carefully dipping your pretzels in a warm baking soda bath, brushing on a light egg wash not only enhances the golden shine but also helps toppings stick perfectly.
Choose your toppings to match your craving—classic coarse salt adds crunch and taste, while seeds and spices introduce layers of flavor. Applying these immediately after the bath locks in their essence, setting the stage for a beautifully browned, crisp crust.
- Brush with egg wash for a glossy, rich finish
- Sprinkle coarse pretzel salt for traditional flavor
- Add sesame, poppy, or caraway seeds for aromatic complexity
- Experiment with garlic powder or cheese for savory twists
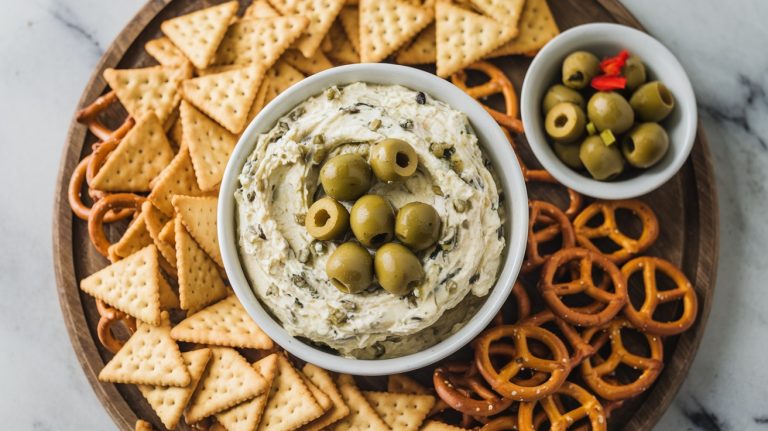
Serving Suggestions and Pairings
Serving sourdough pretzels with thoughtfully chosen dips and beverages transforms them from a simple snack into an unforgettable experience.
Thoughtful dips and drinks turn sourdough pretzels into an unforgettable culinary delight.
Pair your pretzels with honey mustard for a sweet-tangy contrast or immerse yourself in creamy beer cheese dips that amplify their savory crunch. Mustard variants like Dijon add a sharp bite, while marinara brings subtle acidity.
Pretzels can also be enjoyed plain or topped with flaky sea salt or everything bagel seasoning to enhance their flavor and texture. Exploring regional variations in dough and seasoning can further elevate the pretzel experience.
For drinks, lagers and ales complement the pretzel’s saltiness, while cider offers a fruity balance. Sparkling water refreshes your palate between bites, and dry whites or light reds enhance flavor without overpowering.
Serve pretzels warm alongside charcuterie boards or as part of a casual spread, accompanied by small bowls of dips for interactive enjoyment. This thoughtful pairing elevates every bite, making your sourdough pretzel experience truly memorable. Incorporating artisan bread techniques into your pretzel dough can deepen flavors and improve texture.
Frequently Asked Questions
How Should Leftover Sourdough Pretzel Rods Be Stored for Maximum Freshness?
To keep your leftover sourdough pretzel rods fresh, let them cool completely on a wire rack first—that prevents moisture buildup and sogginess.
Once cooled, store them in an airtight container at room temperature to maintain their crunch for a few days.
Avoid refrigeration or freezing, as that can ruin their texture.
If they soften, just pop them in a 350°F oven for a few minutes to crisp them right back up.
Can Hard Sourdough Pretzel Dough Be Frozen Before Baking?
You might be surprised how freezing dough can actually work in your favor. Yes, you can freeze sourdough pretzel dough before baking. Just seal it airtight to avoid freezer burn, then thaw it slowly in the fridge or at room temperature.
Freezing pauses proofing, so once thawed, give it extra time to ferment and rise. This way, you control your baking schedule without sacrificing much on taste or texture.
Are There Gluten-Free Options for Making Hard Sourdough Pretzel Rods?
Yes, you can definitely make gluten-free hard sourdough pretzel rods. Start by using gluten-free flours like brown rice or millet for your sourdough starter.
Incorporate psyllium husk to mimic gluten’s elasticity, which helps create that chewy texture you want. Maintain proper hydration and fermentation times, then boil your shaped dough in a baking soda solution before baking.
This process gives you that classic chewy crust, even without gluten.
What Is the Best Way to Re-Crisp Pretzel Rods That Have Softened?
When pretzel rods lose their crunch, don’t let them fade into the background like forgotten stars.
Preheat your oven to 300°F, spread the pretzels on a baking sheet, and heat them for 5 to 10 minutes, flipping halfway.
This gentle warmth draws out moisture, restoring crispness without burning.
Let them cool fully on the sheet—their snap will return like magic, ready to satisfy your crunchy cravings again.
How Does Sourdough Fermentation Affect the Nutritional Profile of Pretzels?
Sourdough fermentation transforms pretzels nutritionally by boosting probiotics that support your gut health. It lowers gluten, making digestion easier if you’re mildly sensitive.
You’ll get more B vitamins, antioxidants, and minerals like iron thanks to reduced anti-nutrients. Plus, it breaks down carbs to lower the glycemic load, helping your blood sugar.
The resulting tangy flavor also aids digestion, making your snack both delicious and nourishing.
Every Bite, a Flavorful Encore
Now that you’ve mastered the art of hard sourdough pretzels, you hold a golden ticket to crusty, tangy perfection. Each step, from mixing to baking, shapes a flavor journey that dances on your taste buds like a well-rehearsed symphony.
Remember, patience in fermentation and that alkaline bath magic are your secret weapons. So, roll up your sleeves, embrace the process, and enjoy every bite—you’re not just baking pretzels; you’re crafting edible happiness.