Sourdough Pullman Loaf Recipe: Easy and Impressively Tender
You’ll start your sourdough Pullman loaf with a lively starter made from whole wheat flour and water, feeding it regularly for a bubbly rise. Mix your flours and liquids carefully, then knead to develop gluten and ferment at a cozy 78°F.
Shape the dough tightly into the Pullman pan to get that classic square bread, proof gently, and bake with the lid on for a soft crust and tender crumb. Follow these steps, and you’ll discover the secrets to baking this perfectly shaped, flavorful loaf.
Key Takeaways
- Use about 400g bread flour with whole wheat, 100g water, 125–150g milk, butter, sugar, and salt for a soft, enriched sourdough Pullman loaf.
- Prepare and maintain a lively sourdough starter by feeding equal flour and water every 12 hours at 75°F–80°F for consistent fermentation.
- Mix liquids and starter first, autolyse 10–15 minutes, then knead with stretch and folds to develop gluten and a smooth, elastic dough.
- Shape dough into a tight cylinder with good surface tension, place seam side down in a greased Pullman pan, and proof at 74°F–78°F until slightly springy.
- Bake covered at 425°F for 15 minutes, then uncovered at 350°F for 30–35 minutes, cool fully on a rack before slicing for best texture.
Recipe Table for Sourdough Pullman Loaf
| Ingredients | Process |
|---|---|
| 1 cup stone-ground grits | Soak grits in 2 cups hot water for 15-20 minutes to soften before mixing |
| 1 cup all-purpose flour | Whisk together with dry ingredients in large bowl |
| 1 tablespoon brown sugar | Mix with flour and other dry ingredients for subtle sweetness |
| 2 teaspoons baking powder | Combine with dry ingredients to ensure proper rise |
| 1 teaspoon salt | Add to dry ingredient mixture for flavor balance |
| 1 cup buttermilk | Whisk with wet ingredients until smooth |
| 2 large eggs | Beat and combine with buttermilk mixture |
| 1/4 cup melted butter | Cool slightly before adding to prevent curdling |
| 1/2 cup shredded cheese (optional) | Fold in gently for extra richness |
| 1 can (15 oz) creamed corn | Stir in last for added moisture and corn flavor |
Ingredients for Sourdough Pullman Loaf
When you’re ready to bake a sourdough Pullman loaf, selecting the right ingredients is key to achieving that perfect texture and flavor. You’ll typically use about 400 grams of bread flour for ideal gluten and chewiness, or blend all-purpose with whole wheat flour for a softer crumb.
Whole wheat alone, around 700 grams, gives a denser, nuttier loaf suited for a 9x4x4-inch pan. Choose unbleached, stoneground flours to boost flavor and nutrition.
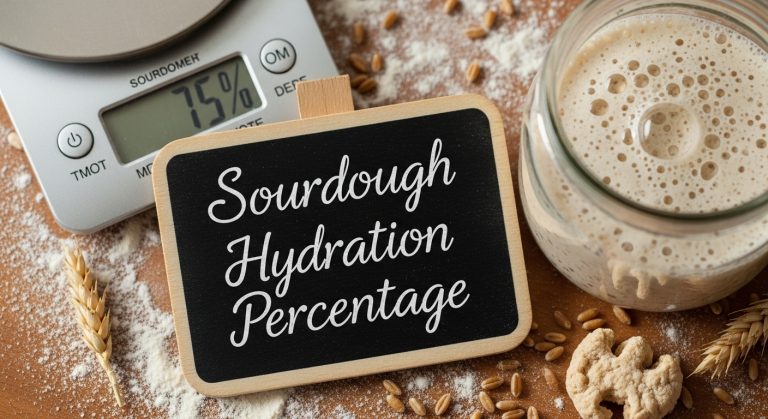
Liquids like 100 grams of water and 125–150 grams of whole milk enrich the dough and activate the starter, balancing hydration for a manageable, slightly soft texture.
Butter—about 50 grams—and a touch of sugar enhance softness and crust color. Don’t forget 10 to 12 grams of salt for flavor and gluten strength, essential for that classic Pullman loaf. The Pullman loaf is traditionally baked in a lidded bread pan, which helps create its distinctive square shape and uniform crumb.
Preparing the Sourdough Starter
You’ll start by mixing whole wheat flour and water in equal weights to give your sourdough starter a strong, active foundation. This initial step, typically done on Day 1, helps to kickstart the fermentation process. Keeping a consistent feeding schedule is key—discard some starter daily, then add fresh flour and water to maintain its vitality.
With proper care and the right environment, your starter will bubble and double, signaling it’s ready to bring your Pullman loaf to life. Using a bread maker with temperature control capabilities can help maintain the ideal conditions for your starter’s growth.
Starter Ingredients Essentials
How do you kickstart the magic of sourdough baking? It all begins with the starter’s simple ingredients: flour and water. Start with whole wheat or rye flour to give your starter a nutrient-rich boost, helping wild yeasts thrive.
Use filtered or dechlorinated water—tap water needs to stand uncovered for 24 hours to let chlorine evaporate.
Combine equal weights of flour and water for a 100% hydration starter, creating a smooth, batter-like consistency.
Choose unbleached all-purpose or bread flour for daily feedings to maintain activity.
Use a clean glass jar with a breathable cover and measure precisely with a kitchen scale. These essentials ensure your starter develops strong fermentation, setting the foundation for your delicious sourdough Pullman loaf. Maintaining a consistent feeding routine is key to optimal starter development.
Feeding Schedule Tips
Although it may seem simple, sticking to a consistent feeding schedule is essential to keep your sourdough starter lively and ready. Aim to feed every 12 hours, ideally around 9:00 a.m. and 9:00 p.m., which helps you anticipate when your starter will be ripe for baking.
Warmer temperatures speed up fermentation, so adjust feeding frequency accordingly. To maintain predictability, feeding at consistent times also helps train the starter for a reliable rise. Each feeding, discard most of the starter, keeping about 20 grams, then refresh it with equal weights of flour and water—typically a 70/30 mix of all-purpose and whole rye flour—to maintain 100% hydration.
Loosely cover your jar to let gases escape while protecting the starter. Using fresh, high-quality ingredients can improve the flavor and activity of your starter, similar to how ingredient quality influences bread dipping mixes. Watch for doubling and bubbles to know it’s ready. This routine encourages a strong, active starter perfect for your Pullman loaf.
Maintaining Starter Health
When you prepare your sourdough starter, paying close attention to its health guarantees a lively, robust culture ready to leaven your Pullman loaf. Maintaining starter health starts with selecting the right flours—mix about 30% whole grain rye with 70% bread flour to boost fermentation. The initial creation requires careful observation and adjustment to the environment to establish a strong microbial community.
Keep hydration at 100% (equal parts water and flour by weight) and mix thoroughly to avoid dry pockets. Store your starter in a warm spot around 75°F to 80°F and cover it loosely to allow gas exchange.
Regularly discard some starter and refresh it with fresh flour and water to prevent over-acidification and keep microbes balanced.
- Use a consistent flour blend for predictable fermentation
- Maintain warm, stable temperatures to encourage yeast activity
- Discard and feed regularly to sustain vitality
- Store starter based on your baking frequency—countertop or fridge
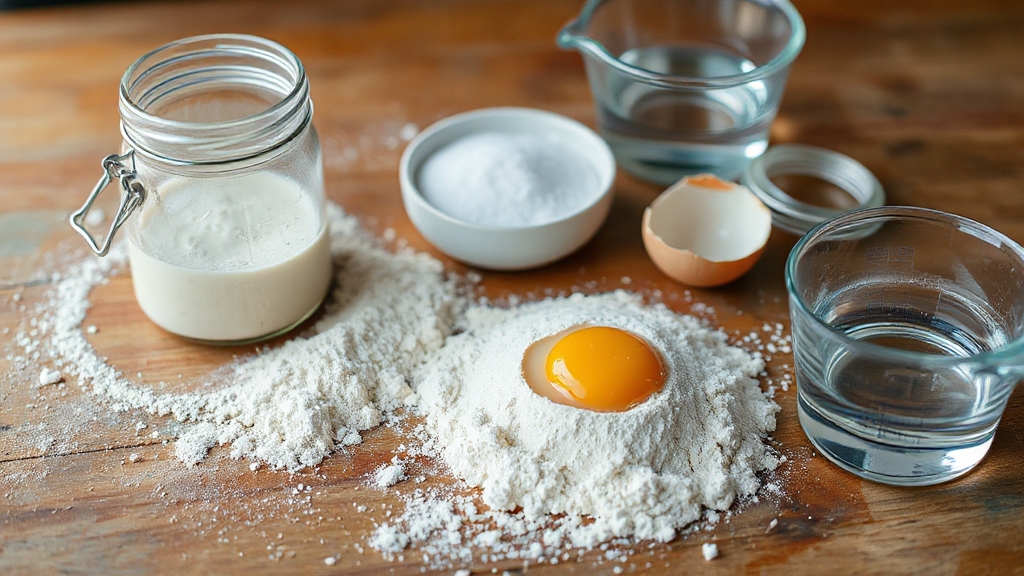
Mixing and Kneading the Dough
Before kneading, you’ll want to combine all the liquids and sourdough starter to guarantee even distribution. Then, gradually add the flour while monitoring the dough’s hydration. Proper hydration is key to achieving that tender crumb and thin crust typical of a perfect Pullman loaf, which can be preserved longer when stored in a bread box with moisture control.
Combine all liquids and sourdough starter first, then add flour gradually while watching dough hydration closely.
Use a mixing bowl on a scale for accuracy, adding flour cup by cup until a rough, shaggy dough forms. This initial mixing allows the starches and proteins in the flour to begin absorbing water, which is essential for gluten development.
Let it rest uncovered for 10–15 minutes—this autolyse step helps the flour fully hydrate, making kneading smoother.
When kneading by hand, work the dough for at least five minutes using stretch and fold or slap and fold methods, aiming for a smooth yet slightly sticky texture.
If it feels too sticky, resist adding flour; instead, cover and rest it for 30 minutes before resuming.
Bulk Fermentation and Gluten Development

Since bulk fermentation lets your dough rest and rise as a single mass, it plays a crucial role in developing both flavor and structure. During this stage, yeast and bacteria generate carbon dioxide and organic acids, which inflate the gluten network and deepen flavor complexity. This initial rise is the fourth step in making sourdough bread and is essential for developing the dough’s texture and structure.
You’ll notice your dough becoming smooth, elastic, and well-risen—key for the Pullman loaf’s fine crumb. To optimize gluten development and dough strength, consider these points:
- Perform periodic stretch and folds to realign gluten strands and improve elasticity.
- Maintain fermentation temperature around 78°F for balanced yeast and bacteria activity.
- Watch for dough volume increase and surface texture as cues for fermentation progress.
- Avoid under or over-fermentation to prevent weak gluten or slack dough.
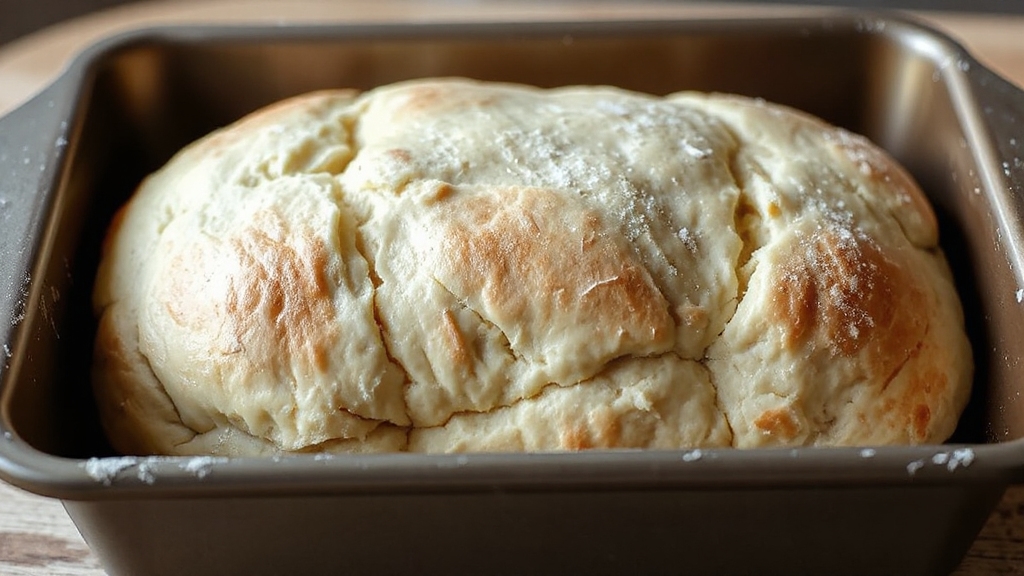
Shaping the Dough for the Pullman Pan
When shaping your dough, focus on rolling it tightly into a smooth cylinder to build the right surface tension and prevent air pockets. Using a proofing basket beforehand can help develop this tension by supporting the dough during its final rise.
Pinch the seam firmly and place the dough seam side down into the Pullman pan for a clean, square loaf shape.
Getting this step right guarantees your bread rises evenly and bakes with that classic Pullman crumb.
Because the pan supports the dough, you can achieve a higher hydration level for a moister crumb without losing structure.
Rolling Technique Essentials
Although shaping dough for a Pullman loaf demands attention to detail, mastering the rolling technique is key to achieving that signature tight, uniform crumb and tall, rectangular structure.
Start by flattening your dough into a rectangle slightly smaller than your pan. Then, roll it tightly like a cinnamon roll, using your hands or a bench scraper to keep the log snug and smooth. Seal the edge carefully to prevent unfolding.
It is helpful to seal the ends of the dough to maintain shape and prevent seams from opening during proofing and baking. Using a flexible silicone spatula can assist in scraping excess dough from surfaces, ensuring minimal waste during shaping.
When you place the dough seam side down in the pan, you lock in the shape for proofing and baking.
Keep these essentials in mind:
- Allow dough to rest before rolling to relax gluten.
- Avoid loose areas inside the roll for consistent crumb.
- Use gentle yet firm pressure to prevent tearing.
- Ensure the seam is securely sealed and positioned.
Pan Placement Tips
Mastering pan placement is essential to shaping your dough perfectly for a Pullman loaf that boasts a smooth, even crust and a consistent interior. Always place the dough seam side down to avoid seam rupture and promote a sleek top crust under the lid.
When working with larger pans, divide dough into equal balls, shape tightly, and arrange evenly to prevent gaps and ensure uniform expansion. Using proofing baskets can help maintain dough shape before transferring it to the pan. Grease and flour your pan to ease release and stabilize dough during proofing. It is also important to use a 9 x 4 x 4-inch Pullman loaf pan or a similar size to achieve the ideal loaf shape and baking results.
| Aspect | Tip | Result |
|---|---|---|
| Seam Orientation | Seam down in pan | Smooth crust, no rupture |
| Dough Division | Equal balls for large pans | Uniform crumb, even shape |
| Pan Preparation | Grease & flour or non-stick coat | Easy release, stable proofing |
Final Proofing Techniques
Since final proofing shapes the loaf’s texture and rise, you’ll want to control temperature and environment carefully to get the perfect Pullman loaf. Aim for a room temperature of 74°F to 78°F, letting the dough rise 3 to 6 hours until it gently springs back when pressed. Using an ergonomic design in your baking tools can help maintain control and precision during shaping.
Final proof at 74°F–78°F for 3–6 hours until dough gently springs back when pressed.
Alternatively, slow proof in the fridge for 10 to 16 hours to develop deeper flavor.
Use a lightly greased, floured pan and shape your dough tightly to fit snugly inside. Cover the pan with its lid or greased plastic wrap to prevent drying. This method helps achieve the square-shaped loaves ideal for sandwiches and slicing.
- Keep proofing temps steady to avoid overproofing and dough collapse
- Use tactile cues like gentle indentation to judge readiness
- Retard dough in the fridge to enhance flavor complexity
- Shape dough seam side down for smooth expansion and uniform crumb
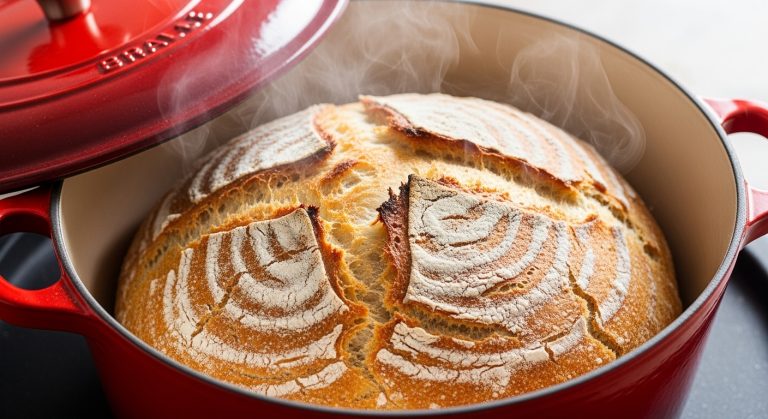
Baking the Pullman Loaf
When you’re ready to bake your Pullman loaf, preheating the oven to the right temperature guarantees a perfect crust and crumb. Set your oven rack in the lower third and preheat to 425°F (220°C).
Place the lidded pan inside and bake for 15 minutes to kickstart oven spring. Then, lower the heat to 350°F (175°C) and continue baking for 30 to 35 minutes.
Aim for an internal temperature of about 204°F (95°C) to ensure thorough baking. Proper gluten development through stretch and folds during fermentation improves the loaf’s structure and final texture.
Once done, carefully remove the pan and take off the lid.
Let the loaf rest in the pan for 10 minutes before transferring it to a wire rack to cool completely. This careful process seals in moisture and maintains the loaf’s iconic shape.
Achieving the Perfect Crust and Crumb
Achieving the perfect crust and crumb in your sourdough Pullman loaf starts with understanding how hydration and ingredients shape texture. Aim for about 70% hydration to create a soft, open crumb while using butter and eggs to enrich the dough, softening both crust and crumb. Incorporating natural flavor enhancers like anise oil can subtly elevate the aroma and taste of your bread.
Handle your dough gently—degassing just enough to expel large air pockets ensures a fine, uniform crumb ideal for sandwiches. Using a Pullman pan with a sliding lid is essential to achieve the loaf’s characteristic uniform square slices and thin crust.
- Preshape tightly to relax gluten but maintain structure
- Proof at 68°F with light humidity for a thin, soft crust
- Bake with the Pullman lid on to trap steam and prevent thick crust
- Remove lid near the end for subtle browning without hardening
These steps help you balance tenderness, flavor, and that classic Pullman loaf look.
Tips for Best Results and Storage
Maintaining the perfect texture and flavor of your sourdough Pullman loaf doesn’t stop once it’s out of the oven. Cool it on a wire rack for at least an hour to prevent sogginess, and never wrap it while warm to avoid trapped moisture.
Allowing the loaf to cool fully also helps minimize starch retrogradation, which can lead to a firmer crumb. Using proper storage techniques ensures that moisture levels remain balanced, which is crucial for preserving the bread’s quality.
For room temperature storage, keep your loaf uncut for up to five days, placing cut sides down on a wooden board to preserve moisture and crust crispness. Use breathable linen bags instead of plastic to allow airflow. This method helps maintain optimal freshness by preventing excess moisture buildup and mold growth.
Refrigerate only if you need longer freshness, tightly wrapped to minimize drying, and bring it to room temperature or toast before eating. Refrigeration slows down staling but can also alter texture if not properly managed.
For long-term storage, freeze fully cooled bread wrapped in plastic and an airtight bag. Always refresh refrigerated or thawed bread by warming to revive its delightful texture. Proper freezing methods ensure that the loaf’s flavor and crumb structure remain intact during extended storage.
Frequently Asked Questions
Can I Use All Water Instead of Milk for Hydration?
You can definitely use all water instead of milk for hydration, but expect some differences. Your dough might feel thinner and need a bit more water to keep the right consistency since milk solids add body.
The crumb will be firmer and less tender, and the crust crisper with less browning. Adjust hydration carefully, watch dough texture, and be ready to tweak kneading times to get the best results without milk.
What Type of Sourdough Starter Works Best for This Loaf?
You’ll want a sourdough starter with bread flour for strong gluten development, giving your loaf that perfect structure and chew. A stiff starter, around 50-60% hydration, helps produce a tender crumb with mild sourness—ideal for Pullman style.
If you prefer more tang and complex flavor, try a rye or whole wheat starter, but expect a denser crumb. Keep your starter well-fed and consistent for predictable, delicious results every time.
How Do I Adjust Baking Time for High Altitude?
Ever feel like your oven’s on fast-forward at high altitude? You’ll want to increase the temperature by 15-25°F and shave off 5 to 8 minutes per 30 minutes of sea-level baking time. This prevents overbaking and dryness caused by faster evaporation and gas expansion.
Keep an eye on your loaf’s color and internal temp, and tweak hydration and leavening slightly to maintain moisture and texture. Test changes gradually for the perfect bake.
Can I Freeze the Dough Before Baking?
You can definitely freeze your dough before baking. Just make sure you shape it and complete bulk fermentation first to develop gluten properly.
Wrap it tightly in plastic or place it in a lined banneton to prevent drying out. When you’re ready, you can bake it straight from the freezer, but expect a longer baking time and possibly a slight difference in texture.
Proper wrapping and storage keep it fresh for months.
What Is the Best Way to Slice a Pullman Loaf Evenly?
To slice a Pullman loaf evenly, use a long, sharp serrated knife and a bread slicing guide for uniform slices.
Let the loaf cool completely or chill it for an hour to firm up the crumb.
Place it on a stable cutting board, then saw gently with smooth, continuous motions without pressing down.
Marking slice widths lightly on the crust helps, too.
Aim for ½ to ¾ inch thickness to keep slices neat and consistent.
A Loaf Worth Every Note—Let Your Kitchen Sing
Baking a sourdough Pullman loaf is like crafting a symphony—each step, from starter to crust, plays a crucial note in creating harmony. With patience and care, you’ll transform simple ingredients into a beautiful, tender loaf with a perfect crumb and crisp crust.
Keep practicing, embrace the process, and soon your kitchen will be filled with the warm, inviting aroma of homemade bread that’s as rewarding to make as it is to eat.