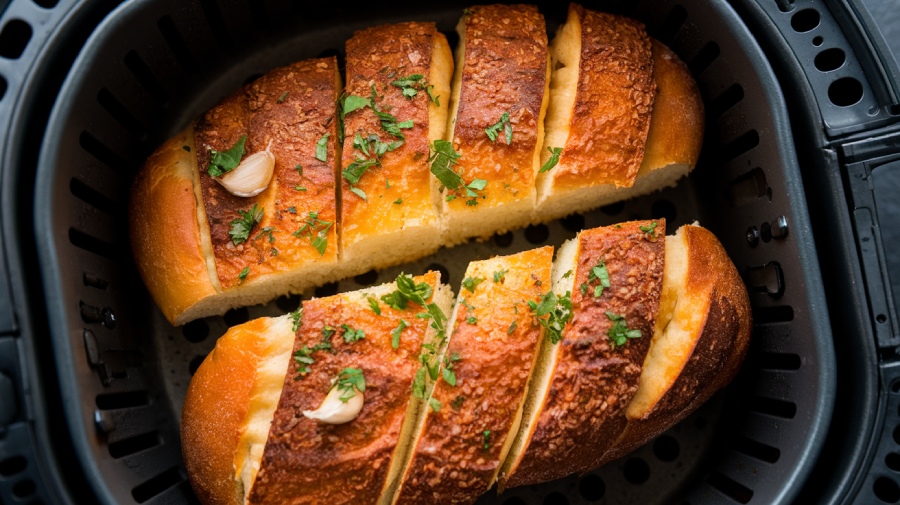
Can You Make Frozen Garlic Bread in the Air Fryer?
You can absolutely make frozen garlic bread in an air fryer! Simply preheat your air fryer to 360°F – 400°F, then unwrap your garlic bread and cut it into smaller pieces if needed.
Arrange them in a single layer for ideal crispiness. Cook for about 5 to 7 minutes, keeping an eye on them to avoid burning.
For added flavor, consider topping with cheese or herbs before cooking. There’s even more to discover about perfecting your garlic bread experience.
Key Takeaways
- Yes, you can cook frozen garlic bread in an air fryer for quick and crispy results.
- Preheat the air fryer to 360°F – 400°F before placing the bread inside.
- Arrange the bread in a single layer for optimal air circulation and even cooking.
- Cooking time typically ranges from 5 to 7 minutes; monitor closely to avoid burning.
- Experiment with toppings like cheese or herbs for enhanced flavor before air frying.
Ingredients and Equipment Needed
When it comes to making delicious frozen garlic bread in the air fryer, having the right ingredients and equipment makes all the difference.
You’ll need frozen garlic bread as your main star—choose between cheesy or non-cheesy varieties. For that extra kick, consider adding optional grated cheese and dried herbs. Garlic butter and minced garlic can further elevate the flavor, though these are typically more suited for fresh bread. Cooking time for frozen garlic bread in air fryer is 5-7 minutes, so be sure to keep an eye on it as it cooks.
Your essential equipment includes an air fryer, of course, along with an air fryer basket for ideal air circulation.
Don’t forget a cutting board and knife for slicing the bread, plus tongs or a spatula to safely remove the finished product.
Preparation Steps for Cooking
To whip up a batch of frozen garlic bread in your air fryer, start by preheating the appliance to a temperature between 360°F and 400°F.
Make sure your air fryer basket is clean and ready; a quick spray of cooking spray can help prevent sticking.
Unwrap the frozen garlic bread, removing any packaging, and if necessary, cut it into smaller pieces to fit the basket.
Arrange the bread in a single layer, ensuring they don’t overlap for ideal air circulation. Cooking frozen garlic bread in the air fryer is easy and fast, so you can have it ready in just a few minutes.
Feel free to get creative and add toppings like cheese or herbs before cooking
Cooking Techniques for Best Results
Achieving the perfect garlic bread in your air fryer hinges on a few key cooking techniques.
First, arrange your frozen garlic bread in a single layer with gaps between each piece. This allows hot air to circulate freely, preventing sogginess from overlapping. Additionally, using real butter in your garlic bread recipe enhances the flavor and richness.
For that extra crunch, flip the bread halfway through cooking, but skip this step if it’s cheesy to avoid sticking.
Monitor the cooking closely—higher temperatures can crisp quickly but need your attention, while lower temps yield a softer crust.
If your air fryer is small, cook in batches and consider slicing the bread into smaller pieces for efficient cooking.
Recommended Cooking Times and Temperatures
When cooking frozen garlic bread in the air fryer, the right temperature and time can make all the difference. Setting your air fryer to around 375°F will give you a deliciously toasted result while adjusting to 400°F can enhance that crispy texture you crave.
Keep an eye on the clock, as most breads will need about 5 to 7 minutes to reach perfection. Additionally, cooking from frozen without preheating allows for quicker preparation, making it a convenient option for busy days.
Optimal Cooking Temperatures
Cooking frozen garlic bread in the air fryer requires careful attention to temperature and time to achieve that perfect golden-brown crispiness.
For ideal results, set your air fryer to around 360°F, which is commonly recommended. However, you can experiment within a temperature range of 350°F to 400°F, depending on your desired crispiness. Additionally, reliable and tested cooking methods ensure that your garlic bread turns out delicious every time.
Preheating your air fryer for about five minutes guarantees consistent cooking. Remember, some models may differ in performance, so you might need to make adjustments.
Cooking thicker bread or those with cheese may necessitate higher temperatures or slightly longer cooking times.
Ideal Cooking Durations
Perfectly timing your air fryer garlic bread can make all the difference in achieving that irresistible crispy texture. Typically, you’ll want to cook it from frozen for about 5-8 minutes at 375°F (190°C), but this can vary depending on your air fryer model and the type of garlic bread you’re using.
For a beautifully golden finish, consider cooking at 360°F (180°C) for up to 12 minutes, especially if you’re using baguette-style bread. Remember, smaller pieces cook faster! To achieve that crispy texture on the outside with a soft, fluffy middle, consider using garlic butter spread on your bread before air frying. To avoid overcooking, check halfway through.
No need to thaw beforehand, as cooking from frozen locks in that delightful crispiness. Adjust your times based on package instructions, and keep an eye on those last few minutes for perfect results!
Storage and Reheating Tips
To keep your garlic bread fresh and delicious, proper storage and reheating techniques are essential. Store any leftover garlic bread in the refrigerator for up to three days, wrapping it in aluminum foil or placing it in an airtight container to retain moisture. If you want to save it longer, freeze your garlic bread for three to six months, ensuring it’s tightly wrapped to prevent freezer burn. Proper storage helps maintain moisture and texture, ensuring your garlic bread remains enjoyable for later meals.
When it’s time to enjoy, reheat your garlic bread in the air fryer at temperatures between 340°F and 375°F for 2-5 minutes. Flip or rotate it for even heating, adjusting the time to achieve your perfect crispiness.
Variations and Pro Tips for Garlic Bread
After you’ve enjoyed your delicious garlic bread, consider experimenting with variations and pro tips to elevate your next batch. Here are three exciting ideas to get you started:
- Cheesy Delight: Layer on rich mozzarella or sharp cheddar for a gooey twist.
- Herbal Infusion: Sprinkle fresh basil or rosemary to enhance the flavor profile. Incorporating fresh herbs can elevate the aroma of your garlic bread.
- Spicy Kick: Add red pepper flakes for an unexpected heat.
For pro tips, mix softened butter with garlic and herbs for a punchy spread, and try different breads like French or Italian for unique textures. Additionally, remember that homemade garlic bread is often superior in flavor and quality to store-bought options.
Don’t forget to guarantee even cooking by spreading the garlic butter all the way to the edges.
Frequently Asked Questions
Can I Make Homemade Garlic Bread in the Air Fryer?
Absolutely, you can make homemade garlic bread in the air fryer!
Start by selecting your favorite Italian or French bread. Mix softened butter with minced garlic and herbs for that perfect flavor. Spread the mixture generously on your sliced bread, and preheat the air fryer to 350°F.
Cook for about 6-7 minutes until golden brown. If you like, add cheese in the last few minutes for a delicious twist.
Enjoy your warm, crispy garlic bread!
Is It Safe to Stack Garlic Bread in the Air Fryer?
When it comes to stacking garlic bread in the air fryer, you’re walking a tightrope.
While it might seem tempting, stacking can lead to uneven cooking and a soggy mess. To achieve that crispy exterior you crave, keep the slices in a single layer, allowing air to circulate freely.
This way, you’ll enjoy perfectly cooked, delicious garlic bread every time. Remember, less is more when it comes to air frying!
Can I Use the Air Fryer for Garlic Bread With Toppings?
Absolutely, you can use the air fryer for garlic bread with toppings! Just spread your favorite toppings, like cheese or herbs, on the bread before cooking.
For the best results, add cheese during the last couple of minutes to let it melt perfectly.
Keep an eye on the cooking time since it might vary based on the toppings.
Enjoy that crispy, flavorful garlic bread straight from the air fryer, and savor every bite!
How Do I Prevent Garlic Bread From Burning in the Air Fryer?
So, you wanna create the perfect garlic bread without turning it into a charcoal briquette?
First, don’t overcrowd that air fryer—give those slices some breathing room! Check on them halfway, and adjust the cooking time as needed. Preheat your fryer, and avoid overlapping.
And remember, a little butter goes a long way—too much, and you’ll have a grease fire instead of golden perfection.
Happy cooking, and may your garlic bread be forever crispy!
Can I Cook Garlic Bread With Other Foods in the Air Fryer?
Yes, you can cook garlic bread with other foods in the air fryer!
Just make certain to manage your space wisely. Arrange your garlic bread and other items in a single layer, avoiding overlap for even cooking.
Stick to foods that cook at similar temperatures and times, so everything’s done together.
If you’re cooking in batches, keep an eye on the garlic bread to guarantee it doesn’t burn while waiting!
Enjoy your meal!
Quick, Crunchy and Irresistibly Delicious!
So, there you have it! In just a few minutes, your frozen garlic bread transforms into a golden, crispy delight, like a warm hug for your taste buds. With the air fryer’s magic, each bite bursts with flavor, inviting you back for more.
Whether you’re pairing it with pasta or enjoying it solo, this simple treat is a game-changer. Embrace the convenience and savor the deliciousness, because life’s too short for soggy bread.