Best Chocolate Pizzelle Recipe: Crispy and Crunchy Perfection
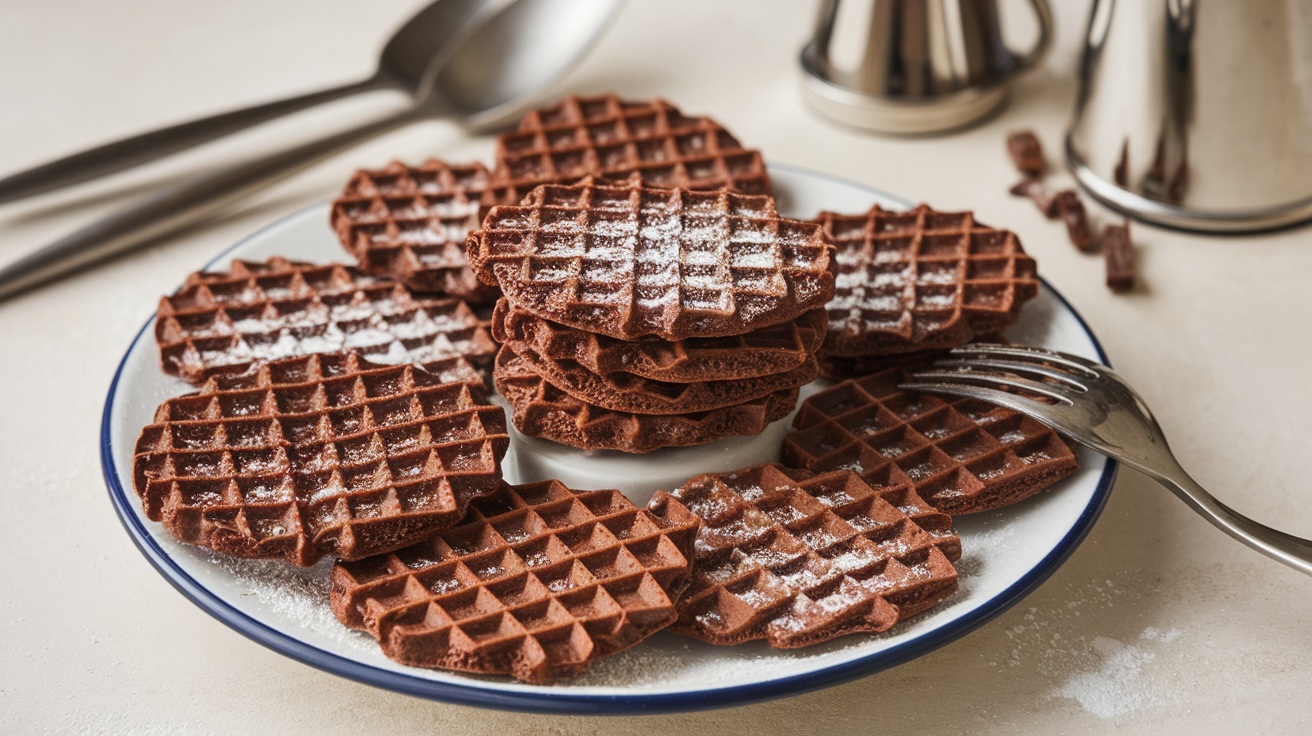
Get ready to bake the best chocolate pizzelles! Start with 3 large eggs, 1 cup sugar, 1-3/4 cups flour, 1/3 cup sifted unsweetened cocoa powder, and 1/2 cup melted unsalted butter. Whisk the eggs and sugar until fluffy, then gently fold in the dry ingredients for a thick batter.
Preheat your pizzelle iron, add a tablespoon of batter, and cook for 30-60 seconds until golden. Cool them on a wire rack for that perfect crunch. Want to add a twist or gain insider tips for perfect pizzelles? Stay tuned for more delightful secrets.
Key Takeaways
- Use high-quality unsweetened cocoa powder for rich chocolate flavor in your pizzelle batter.
- Ensure all ingredients, especially eggs and butter, are at room temperature for optimal mixing.
- Preheat your pizzelle iron properly to achieve even cooking and crispiness.
- Experiment with flavor variations like espresso powder or hazelnut extract for unique twists on traditional chocolate pizzelles.
- Store cooled pizzelle in airtight containers to maintain their crispiness and freshness.
Ingredients Needed
When you’re ready to whip up some delicious chocolate pizzelles, you’ll want to gather a handful of key ingredients that create the perfect balance of flavor and texture.
Start with three large eggs, which provide richness and structure to your cookies. You’ll need one cup of granulated sugar for sweetness, and if you like, add 2-1/2 teaspoons of vanilla for that extra burst of flavor.
For the dry ingredients, measure out 1-3/4 cups of all-purpose flour and 1/3 cup of sifted unsweetened cocoa powder to give your pizzelles that decadent chocolate taste. A bit of baking powder—about 2 teaspoons—will help them rise, while 1/4 teaspoon of fine sea salt enhances the overall flavor. If you’re feeling adventurous, a sprinkle of espresso powder can deepen the chocolatey notes. Traditional Italian pizzelles often feature unique flavors like chocolate during festive occasions, making them a delightful treat.
Lastly, for a rich texture, incorporate 1/2 cup of melted and cooled unsalted butter, and if you prefer, a touch of vegetable oil for added moisture.
Preparation Steps
To create those irresistible chocolate pizzelles, you’ll start by preparing your dry ingredients, ensuring everything is sifted and mixed well. The key to achieving the perfect texture lies in using a specialized pizzelle iron. Next, you’ll whisk together the wet components until they’re light and fluffy, blending in that rich butter and vanilla. Finally, you’ll gently combine the two mixtures, creating a smooth batter that’s ready to transform your kitchen into a sweet haven.
Essential Dry Ingredients
Starting with the right dry ingredients is vital for crafting the perfect chocolate pizzelles. Begin by sifting all-purpose flour and unsweetened cocoa powder together to guarantee even distribution and eliminate lumps. Accurate measurement of these ingredients is significant for achieving a consistent texture in your pizzelles.
Once sifted, whisk them in a separate bowl, adding a pinch of salt for flavor balance and a scoop of baking powder for that desired lightness. To enhance the chocolate flavor, consider incorporating a touch of espresso powder.
This addition deepens the richness without overwhelming the chocolate notes. Pizzelle are crisp cookies that will benefit from the smooth batter created by sifting before whisking, preventing any gritty texture in your final product.
Mixing Wet Components
With your dry ingredients prepped and ready, the next step involves mixing the wet components to create a rich, flavorful base for your chocolate pizzelles.
Start by cracking a few eggs into a large mixing bowl. Whisk them vigorously for about 2-3 minutes until they’re light and frothy. This aeration is key! Gradually add sugar, whisking continuously for another 3-4 minutes until the mixture thickens and becomes smooth.
Next, it’s time to incorporate your wet ingredients. Pour in some vegetable oil and a splash of vanilla extract, whisking together until well combined, which should take about 30 seconds.
Now, gently add melted butter, ensuring it blends seamlessly into the egg and sugar mixture. This process creates a delightful moisture that’ll enhance your pizzelles. Melted butter is an important ingredient that adds richness to the batter.
As you whisk, aim for a consistency that resembles a thick pancake batter. This texture is essential for achieving that perfect pizzelle. Remember, mix just until combined to avoid overmixing.
Once your wet ingredients are ready, you’ll have a luscious base that’s primed for the dry ingredients, setting the stage for delicious chocolate pizzelles.
Combining Mixtures Thoroughly
Combining the wet and dry mixtures is an essential step that sets the foundation for your chocolate pizzelles. Start by sifting together your flour, cocoa powder, and baking powder. This not only eliminates lumps but also aerates the ingredients, ensuring a lighter texture.
Once sifted, gently fold the dry mixture into your wet ingredients. Remember, you’re looking for just a blend—overmixing can lead to tough pizzelles, so a few gentle strokes will do.
Now, it’s time to incorporate your cooled, melted butter or light olive oil. Stir until everything’s well combined. The batter should have the consistency of thick pancake batter—pourable but substantial. If you notice any lumps, don’t panic; a fine-mesh strainer can help catch them before they make their way into your pizzelles. Additionally, make sure to use unsalted butter for optimal flavor in your batter.
Be sure to scrape down the sides and bottom of your bowl with a rubber spatula, ensuring even distribution.
Finally, avoid the temptation to rush; take your time with each step.
Cooking Process
To create delicious chocolate pizzelle, you’ll want to begin by preheating your pizzelle iron according to the manufacturer’s instructions.
While that heats up, melt your butter and let it cool. In one bowl, whisk together your dry ingredients—flour, cocoa powder, and baking powder. In another bowl, beat the eggs and sugar until they’re light and fluffy.
Don’t forget to sift the dry ingredients to verify everything’s mixed evenly. Pizzelle are a variation of traditional Italian wafer cookies, and their unique texture and flavor make them a delightful treat.
Now, it’s time to cook! Here’s how:
- Place a tablespoon of batter in the center of each pattern on the preheated pizzelle iron.
- Close the lid and cook for 30-60 seconds, or until they turn slightly golden.
- Adjust the cooking time based on your desired crispness and the iron settings.
- Carefully remove the cooked pizzelle using a spatula or wooden dowel.
- Transfer them to a wire rack to cool completely.
Keep these tips in mind: don’t overmix the batter, grease your iron lightly, and wait for steam to stop before checking for doneness.
Tips for Success
To make your chocolate pizzelle truly shine, the quality of cocoa you choose plays a vital role.
Achieving the perfect batter consistency is essential for that delightful crunch, while experimenting with flavor variations can elevate your treat to new heights. One classic option is to consider adding a touch of traditional flavoring like vanilla or anise for a unique twist on your chocolate pizzelles.
Let’s explore these tips to guarantee your pizzelle turns out perfectly every time!
Quality Cocoa Matters
Quality cocoa plays an essential role in crafting delicious chocolate pizzelle, and choosing the right cocoa powder can elevate your treats from ordinary to extraordinary. When you invest in high-quality cocoa, you’ll notice a remarkable difference in flavor, color, and texture.
Here are some tips to guarantee you’re using the best cocoa:
- Sift: Always sift cocoa powder to remove clumps for a smooth batter.
- Type: Opt for unsweetened, regular, or dark cocoa powder based on your desired flavor profile.
- Brand: Consider Dutch-process cocoa like Double-Dutch Dark Cocoa for enhanced flavor.
- Measurement: Accurately measure cocoa powder to maintain a balanced flavor.
- Freshness: Check your cocoa powder’s freshness to avoid any stale taste.
Perfect Batter Consistency
The secret to your pizzelle’s delightful texture lies in achieving the perfect batter consistency. You want your batter to mimic thick pancake batter or softly whipped cream. Avoid over-mixing; just fold the dry ingredients into the wet until they’re barely combined. This helps prevent your pizzelle from becoming too soft, ensuring a satisfying crunch that enhances the overall experience.
To guarantee accurate flour measurement, stir the flour before spooning it into your measuring cups, and sift it afterward to promote even distribution. Remember that homemade pizzelles are often preferred over store-bought for their authentic taste and texture. Using high-protein flour can further enhance the cookie’s texture and crispness.
Using scoops can make your life easier. Choose a tablespoon or teaspoon scoop based on your desired pizzelle size, and keep the scoops wet to prevent sticking. This method guarantees consistent portions for even cooking. Don’t forget to stir your batter occasionally to maintain that perfect thickness.
Experiment a bit with your batter quantity; the first few pizzelle might require adjustments. When cooking, place the batter slightly off-center towards the back of the pizzelle iron for ideal distribution. Press down firmly to achieve thin and crispy cookies.
Flavor Variations to Explore
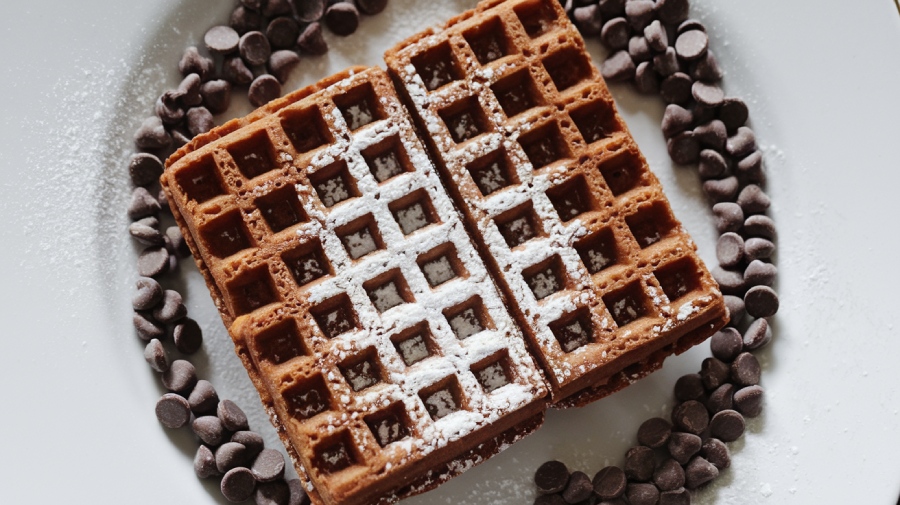
Once you’ve mastered the perfect batter consistency, it’s time to explore the exciting world of flavor variations that can elevate your pizzelle game.
With a few simple adjustments, you can transform the classic chocolate pizzelle into delightful treats that excite your taste buds. Here are some delicious options to try:
- Mocha: Stir in 1 teaspoon of instant coffee powder dissolved in warm water for a rich coffee flavor.
- Chocolate Hazelnut: Substitute hazelnut flavor for vanilla extract to indulge in a nutty twist.
- Chocolate Orange: Add 1 teaspoon of finely grated orange zest for an invigorating citrus kick.
- Espresso Chocolate: Incorporate 1/2 teaspoon of espresso powder to intensify the chocolate richness.
- Coconut Chocolate: Mix in 1 teaspoon of coconut extract for a tropical flair.
As you experiment with these variations, remember to balance flavors and use high-quality ingredients.
Don’t be afraid to try different extracts and spices, like almond or cinnamon, to create your unique pizzelle.
Preheat your iron well for that perfect crispy texture, and store your creations in an airtight container to keep them fresh!
Common Mistakes
When making chocolate pizzelle, avoiding common mistakes is vital for achieving that perfect crispy texture. One major pitfall is overfilling the pizzelle iron. Too much batter leads to cakey, soft pizzelle instead of the delightful crunch you crave. Stick to 1 to 2 teaspoons of batter—using a small ice cream scoop can help with uniformity.
Insufficient preheating is another common error. Always follow your iron’s instructions to guarantee it heats up properly. A well-preheated iron ensures even cooking, so don’t rush this step. Additionally, incorrect ingredient handling can compromise your pizzelle. Sift cocoa powder to remove clumps, stir and spoon flour into your measuring cups, and use room temperature eggs for best mixing. Avoid overmixing to keep the batter light. Remember that each cookie contains approximately 85 calories, which can be a consideration if you’re counting calories.
Lastly, don’t neglect your pizzelle iron’s maintenance. Clean the plates regularly and lightly grease them before each use. A paper towel dipped in olive oil works wonders to prevent sticking.
Serving Suggestions
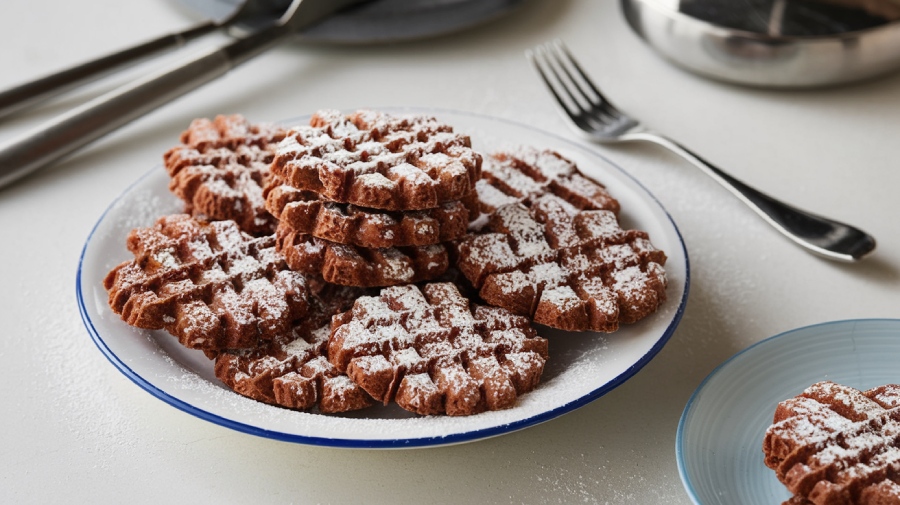
- Dust with powdered sugar for a simple yet elegant finish.
- Serve with a dollop or more of whipped cream.
- Use as a base for ice cream sandwiches.
- Mold into cones, shells, or cups for creative dessert presentations.
- Pair with cannoli filling, pastry cream, or mousse.
You can also get playful with your pizzelle! Roll them into tubes and fill them with sweetened ricotta for a cannoli-like treat, or crumble them into parfait glasses layered with whipped cream and fresh berries. Additionally, consider using a heatproof spatula to remove your pizzelle easily from the press without breaking them.
If you’re feeling adventurous, press pizzelle into muffin tins to create mini cheesecake crusts.
No matter how you choose to serve them, chocolate pizzelle will always be a crowd-pleaser, perfect for any occasion.
Storage Recommendations
Storing your chocolate pizzelle properly is essential for keeping it crisp and delicious. Start by allowing your pizzelle to cool completely on wire racks, as this prevents moisture retention. Once cooled, place them in airtight containers like cookie tins or large coffee cans to maintain their freshness. Avoid humid environments and direct sunlight, which can lead to sogginess. If you need an alternative, consider using paper bags or aluminum foil.
For longer storage, freezing your pizzelle is a great option. Wrap them in plastic and group them in sets of four to five before placing them in a freezer container. Remember to label the container for easy identification later. Additionally, ensure that your pizzelle are made with the right ingredients to enhance their longevity and flavor.
Your pizzelle can last up to three months in the freezer without losing their delightful crunch. If they soften, you can restore their crispness by reheating them in a low-temperature oven (under 200°F).
Frequently Asked Questions
Can I Make Pizzelle Without Eggs?
Yes, you can definitely make pizzelle without eggs! Instead of traditional eggs, try using liquid egg substitutes, flaxseed meal mixed with applesauce, or even mashed fruit like bananas for binding.
Adjust your sugar levels, choose the right flour, and add flavor enhancers like vanilla or spices.
Just make sure your batter is thick yet pourable, and remember to preheat your pizzelle iron for that perfect crispy texture.
Enjoy experimenting with these alternatives!
How Do I Know When the Pizzelle Are Done?
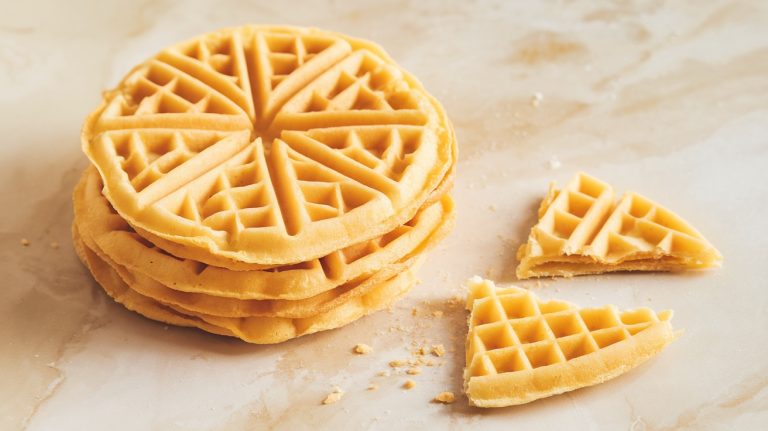
You’ll see a contrast between the soft, pliable pizzelles fresh from the iron and the crisp, golden treats they become as they cool.
Watch for the indicator light on electric models; when it turns green, they’re ready! For non-electric irons, flip them after 1-2 minutes. Aim for a light golden color, and remember, they’ll firm up quickly.
Cooling on a wire rack enhances their crispness, so be patient!
Can I Use Gluten-Free Flour for This Recipe?
Absolutely, you can use gluten-free flour for your pizzelles!
Just whisk together your favorite gluten-free flour with sugar and baking powder. Incorporate eggs and melted butter, mixing until just combined.
It’s essential not to overmix; you want a soft batter. When you cook them, make certain the pizzelle iron is preheated for the best results.
Enjoy the delightful crispness of your gluten-free pizzelles, perfect for any occasion!
What Is the Best Way to Clean the Pizzelle Iron?
To clean your pizzelle iron effectively, start by wiping it down with a damp cloth to remove any residue.
For deeper cleaning, sprinkle baking soda on the surface and drizzle with white vinegar, then gently scrub with a toothbrush.
If you have stuck-on batter, use a fork or knife’s edge to dislodge it.
Always remember to re-season the iron with shortening or oil after cleaning to maintain its non-stick surface.
How Can I Add Filling to My Pizzelle?
Picture your pizzelle like a canvas, waiting for a masterpiece.
To fill your pizzelle, let them cool completely first, then use a pastry bag or a plastic zipper bag with a cut corner for precision. Squeeze the filling in a circular motion, keeping about an inch from the edge.
For a delightful surprise, try cream cheese or raspberry-chocolate filling. Dust with powdered sugar for a finishing touch, and enjoy your delicious creation!
Golden, Crisp, and Chocolatey Pizzelle Perfection
As you savor each delicate bite of your chocolate pizzelles, think of them as little treasures that bring joy to your table, much like stars lighting up a night sky. You’ve woven together simple ingredients to create a symphony of flavor, a showcase of your culinary journey.
So, share these delightful treats with loved ones, spreading warmth and sweetness, and let each pizzelle be a reminder that the best moments are often crafted with care and a sprinkle of love.

