How to Bake Sourdough in a Clay Baker: Golden Crust, Tender Crumb
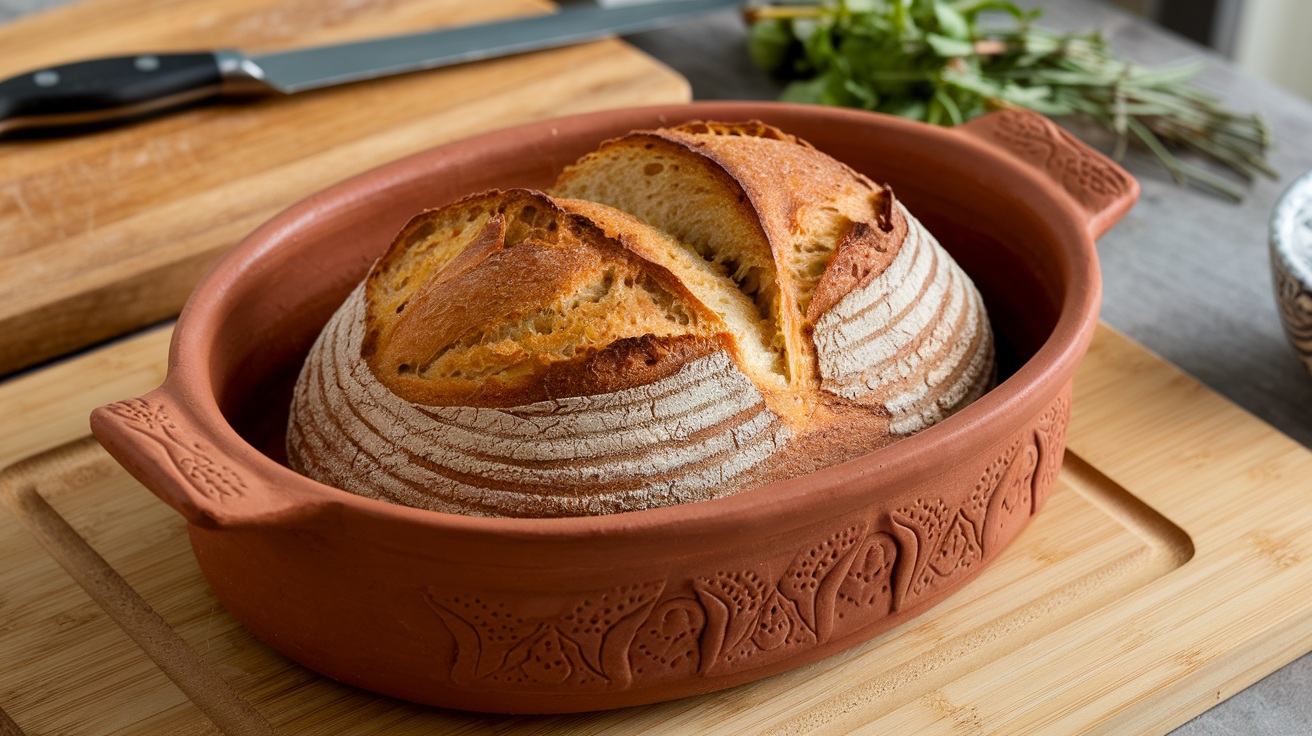
Baking sourdough in a clay baker creates a magical experience that yields crusty, flavorful loaves. Start by mixing your dough ingredients and let them rise overnight with stretch and folds.
Soak your clay baker in lukewarm water for 15-30 minutes. Preheat it in a cold oven to infuse steam and warmth.
Score the dough and bake covered at 425-450°F for 20-30 minutes, then uncover for a golden crust. Allow the loaf to cool before slicing, and clean your baker gently after use.
Embrace the process, and you’ll reveal the secrets to perfect sourdough every time.
Key Takeaways
- Mix water, sourdough starter, olive oil, flour, and salt to form a shaggy dough, allowing it to hydrate for 15-30 minutes.
- Soak the clay baker in lukewarm water for 15-30 minutes, then grease and line it with parchment before preheating.
- Preheat the oven with the baker inside at 425-475°F for 30 minutes or use the cold start method at 450°F for 60-65 minutes.
- Bake the dough covered for 20-30 minutes to trap steam, then uncover and bake for an additional 10-15 minutes for crust development.
- Cool the loaf in the baker gradually, then store it inside the baker to retain moisture and freshness.
Preparing the Dough
Preparing the dough is the heart of sourdough baking, where your journey begins. Start by gathering your ingredients: water, sourdough starter, olive oil, bread flour, and fine sea salt. In a large bowl, mix these together with a fork or spatula until you form a stiff, dry, shaggy dough.
Let the flour absorb the water for 15 to 30 minutes—this is vital for the dough’s texture. The use of a sourdough starter is essential because it cultivates wild yeasts and bacteria that help create the bread’s unique flavor, contributing to the fermentation process.
Next, embrace the pincer method. Fold and pinch through the layers, blending in any additional ingredients. Cover the bowl and let the dough rest for 30 minutes to 1 hour, allowing the flour to hydrate.
Once rested, it’s time for bulk fermentation. Stretch and fold the dough using a wet hand, rotating the bowl as you go. Repeat this 2 to 4 times during a 12-hour rise, spaced 30 minutes apart.
Keep the dough in a warm spot until it doubles in size. This is the moment when your dough transforms, gaining strength and elasticity, setting the stage for the masterpiece that’s about to come.
Preparing the Clay Baker
Before you bake your sourdough, you need to prepare your clay baker with care and intention.
Start by soaking it in lukewarm water to make sure it can handle the heat without cracking, then place it in a cold oven to preheat gradually. This step is crucial because moisture retention during the baking process helps create steam, which is essential for achieving a good oven spring in your bread. Additionally, using a well-glazed surface in your clay baker ensures that the food particles do not absorb the material, enhancing hygiene and making the cleanup process easier.
Soaking the Clay Baker
Soaking the clay baker is an important step that can greatly enhance your sourdough baking experience. Submerging the baker in lukewarm water for at least 15 minutes allows it to trap moist air, which aids in maintaining a consistent temperature during baking. This moisture helps support your dough’s oven spring, resulting in a beautifully risen loaf. Additionally, soaking distributes heat evenly in the baking cavity, ensuring that your bread bakes uniformly.
Furthermore, this method creates an environment where steam is essential for achieving a perfect crust. After soaking, carefully remove the clay baker and towel dry it. Starting with a cold oven is essential to avoid sudden temperature changes that could crack the unglazed clay.
Remember, proper heat distribution is critical, especially in gas ovens, and this soaking technique guarantees that heat travels evenly throughout the baking cavity.
If you’re using parchment paper, it’ll help prevent your dough from sticking to the baker’s surface. Always handle your clay baker with care to prolong its life and avoid chipping or cracking.
Preheating Techniques
The right preheating technique can make all the difference in your sourdough baking journey, ensuring a perfectly textured loaf with a crispy crust.
Start by considering direct preheating: set your oven to 425-475°F and place the clay baker inside for about 30 minutes. This method traps the steam released by the bread, enhancing the crust’s crispiness and allowing for impressive oven spring. If your baker is glazed, you won’t need to soak it, making this approach simple and effective. Additionally, using a Romertopf clay pot for baking can further enhance the bread’s texture and moisture retention.
Alternatively, you can try the cold start method. Place your dough inside a cold baker, then set the oven to 450°F. This takes longer—about 60-65 minutes—but gently warms the clay, reducing the risk of cracking.
Handling and Safety
To guarantee your clay baker is ready for action, start by soaking it in water for about 15 minutes. This simple step helps prevent cracking, ensuring your beloved baker lasts through many baking adventures.
After soaking, make sure it’s thoroughly dry before placing it in the oven. Let your clay baker acclimate by putting it in a room-temperature oven. This way, you’ll avoid sudden temperature changes that could cause damage. Additionally, soaking the clay baker may enhance steam retention for better baking results, as a heavy lid helps trap steam and improves crust quality.
Here’s a handy guide to keep in mind:
| Preparation Steps | Care Tips |
|---|---|
| Soak for 15 minutes | Handle with care |
| Dry thoroughly | Avoid extreme temperature shifts |
| Place in a room-temp oven | Lightly oil the unglazed areas |
| Use parchment paper | Don’t place hot baker on cold surfaces |
When transferring dough, use a parchment paper sling for a seamless drop into the baker.
Baking the Sourdough
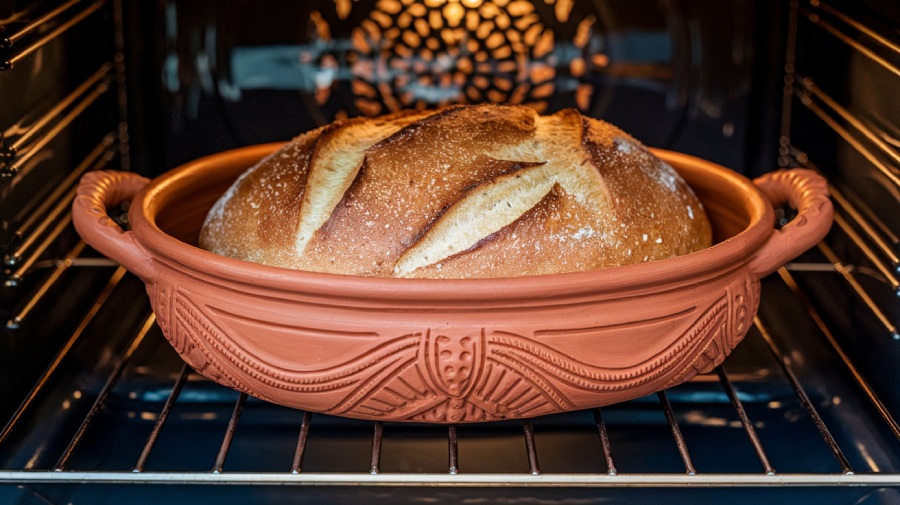
Now that you’ve prepared your clay baker, it’s time to focus on the ideal baking temperature and timing to create that perfect crust. Set your oven between 425-450°F (220-230°C) for the initial bake, allowing your sourdough to rise and develop a beautiful golden hue.
To achieve optimal results, remember that using a Romertopf clay baker enhances moisture retention, contributing to a crispy crust. Preheating the baker before adding the dough can further enhance the crust’s texture.
Optimal Baking Temperature
Understanding the ideal baking temperature is essential when aiming for the perfect loaf of sourdough. Depending on your recipe and crust color, it would be best to preheat your oven to between 425°F and 500°F.
Remember to soak your clay pot in water for about 15 minutes before use, which prevents cracking. Once it’s dry, please place it in the oven to preheat alongside it. The preheating process is crucial to achieving a well-risen loaf with a crispy crust, ensuring that the dough benefits from optimal steam retention during baking.
Here are some key points to take into account:
- Bake covered for 20-30 minutes to trap steam and encourage oven spring.
- Uncover the pot for an additional 10-15 minutes to achieve that beautiful golden crust.
- The clay pot retains moisture from the dough, creating a steamy environment similar to a traditional masonry oven. Additionally, using a Breadtopia clay baker enhances the baking process by providing even heat distribution.
- If your pot allows, you can start with a cold pot, placing it in the oven as it heats.
Baking Time Recommendations
Mastering the baking time for your sourdough is crucial to achieving that perfect balance of crust and crumb.
Begin by placing your dough in a preheated clay baker; preheating it guarantees even heat distribution. Soak the baker in water before preheating for ideal thermal retention, and dry it thoroughly to prevent moisture issues. To keep your dough from sticking, use parchment paper or a bit of butter.
For most recipes, start with 20 to 30 minutes of baking with the lid on. After removing the lid, continue baking for another 10 to 15 minutes to develop that beautiful crust.
Keep an eye on the total baking time, which can range from 45 minutes to over an hour, depending on your oven and the size of your clay baker. If the crust isn’t sufficiently browned, don’t hesitate to add a few more minutes.
As you bake, monitor the internal temperature; it should reach about 200°F (93°C) to confirm that your bread is done.
Achieving the Right Crust
Achieving the right crust on your sourdough is a delicate balance of technique and timing that transforms your loaf from ordinary to extraordinary. To nail that perfect crust, you need to pay attention to the preheating process, the baking time, and how you manage moisture.
Start by soaking your clay baker for at least 15 minutes, then preheat it alongside your oven. This prevents thermal shock and guarantees even cooking.
- Bake with the lid on for the first 30 minutes to capture steam.
- Remove the lid to allow the crust to brown and crisp up nicely.
- Keep an eye on your baking temperature; staying below 425°F is key.
- Confirm your clay baker is dry before baking to avoid steam issues.
The steam generated inside the clay baker plays a vital role in forming that beautiful golden crust. A gradual temperature increase helps you achieve even browning. Remember to score your dough just before placing it in the oven to control expansion and enhance the crust quality.
Handling the Clay Baker
Handling a clay baker requires a bit of finesse to guarantee your sourdough turns out perfectly every time. Start by soaking the clay baker in lukewarm water for 15-30 minutes. This prevents cracking and helps create steam during baking.
After soaking, dry it thoroughly to remove any excess moisture. When it’s time to preheat, make sure the clay baker is at room temperature. You can place it in a cold oven or put it in while the oven heats up.
Before adding your dough, grease the bottom with butter or oil to avoid sticking. For easier removal later, line the base with parchment paper. Gently place your dough into the preheated baker, using a parchment sling or a lightly floured hand.
Don’t forget to score the bread for proper expansion and aesthetic appeal. Once the dough is in, cover it with the lid to trap steam, enhancing the baking process.
Always handle the clay baker with care; it’s delicate and can crack from thermal shock.
Post-Baking Care
After the delightful aroma of freshly baked sourdough fills your kitchen, it’s vital to focus on post-baking care to preserve your masterpiece.
Start by letting the clay baker cool down gradually in the oven; this prevents cracking. Gently lift the bread using parchment paper to avoid sticking and transfer it to a cooling rack, ensuring even cooling. Proper handling is key to maintaining the bread’s quality, as freezing can help preserve its original flavor and texture.
Remember to wait at least 10-20 minutes before slicing, as this allows the crumb to set perfectly. Additionally, proper care of your clay baker is crucial for longevity, especially since the manufacturer does not provide a warranty against cracking.
Here are some essential post-baking care tips:
- Cool your clay baker in the oven to avoid thermal shock.
- Clean with hot water and a scrub brush; avoid soap to preserve the clay’s integrity.
- Store your bread in the clay baker with the lid on, allowing it to breathe while retaining moisture.
- Check for freshness regularly, keeping it in a cool, dry place away from direct sunlight.
Frequently Asked Questions
Can I Use All-Purpose Flour Instead of Bread Flour?
Absolutely, you can use all-purpose flour instead of bread flour, but let’s be real: it’s like trying to build a skyscraper with toothpicks!
While all-purpose flour can work, it’ll yield a softer, less chewy sourdough.
If you want that glorious, traditional texture, consider mixing it with bread flour for the ultimate balance.
Experiment with ratios, and you might just discover a delightful new twist on your sourdough journey!
How Do I Know When the Dough Has Risen Enough?
You’ll know your dough has risen enough when it’s doubled in size, typically after 8-18 hours.
Check for bubbles and a puffy texture; it should feel airy and soft to the touch.
Gently tap it—if you hear a hollow sound, that’s a good sign!
Trust your instincts, and don’t rush the process.
Each dough is unique, so take the time to observe these signs for the perfect rise.
Happy baking!
What Is the Best Way to Store Leftover Sourdough?
To store leftover sourdough, you’ll want to keep it fresh and delicious.
Wrap it in a breathable cloth bag or a tea towel, and avoid plastic to prevent sogginess.
For cut bread, place it cut-side down on a board, covering it with a towel.
If you’ve got more than you can eat, slice it and freeze it tightly wrapped for easy toasting later.
Your sourdough deserves the best care!
Can I Bake Sourdough Without a Clay Baker?
Did you know that nearly 70% of home bakers create delicious sourdough without a clay baker?
You can absolutely bake sourdough using alternatives like a Dutch oven or cast iron skillet. Preheat your chosen vessel to lock in steam, ensuring a crispy crust.
Experiment with baking stones or even a regular oven, utilizing water pans for steam. Each method brings unique flavors, so immerse yourself and discover what works best for your baking journey!
How Can I Troubleshoot Dense or Gummy Bread?
If your bread turns out dense or gummy, start by checking your yeast activity; verify your sourdough starter’s at its peak.
Adjust your hydration, as too little or too much water can affect texture.
Handle your dough gently—overworking it can ruin gluten structure.
Finally, make certain your baking temperature and time are spot on.
Allow your bread to cool fully before slicing; this’ll help achieve that perfect crumb you’re aiming for!
Perfect Crusts Every Time: The Clay Baker Secret
Baking sourdough in a clay baker isn’t just a method; it’s an art that can elevate your bread to new heights. Did you know that nearly 80% of bakers report that using a clay baker results in a superior crust and texture?
So, as you slice into your golden, crackling loaf, savor the fruits of your labor. Embrace the journey of sourdough baking, and let that delicious aroma fill your kitchen—your taste buds will thank you.

