Anne Burrell Focaccia Bread Recipe: Create and Share
You’re about to enjoy Anne Burrell’s mouthwatering focaccia bread recipe!
Start by activating yeast with warm water and sugar, then combine it with flour, olive oil, and salt to create a soft dough. Knead it until it’s elastic, then let it rise in a warm spot until it doubles in size.
After a second rise, spread the dough on a baking sheet, sprinkle with coarse sea salt, and bake at 425°F for 25-30 minutes until golden brown. For extra flavor, add toppings like herbs or olives.
There’s so much more to explore, so keep going to uncover all the delicious details.
Key Takeaways
- The recipe yields 8 to 10 servings and requires a total time of 3 hours and 5 minutes, including rising and baking.
- Key ingredients include warm water, active dry yeast, all-purpose flour, extra-virgin olive oil, and kosher salt.
- Activate the yeast by combining warm water, sugar, and yeast, letting it sit for 15 minutes until bubbling occurs.
- The dough requires two rises, ideally in a warm, draft-free environment, to achieve optimal texture.
- Bake at 425°F for 25-30 minutes, until golden brown, and enhance flavor with toppings like herbs or cheese.
Recipe Overview
When you make Anne Burrell’s focaccia bread, you’re in for a rewarding experience that takes about 3 hours and 5 minutes from start to finish. This intermediate-level recipe yields 8 to 10 servings, making it perfect for gatherings or as an indulgent side dish.
The dough can be customized with various toppings, such as flavorful enhancements like herbs or cheese, to elevate your focaccia. You’ll start by activating the yeast in warm water, which sets the stage for your dough to rise beautifully. After mixing the flour, salt, and olive oil into the yeast mixture, you’ll knead it until smooth.
The magic happens during the two-rise process: first, let the dough rest in a warm place until it doubles in size—about an hour. Then, shape the dough in a pan, creating those signature finger holes.
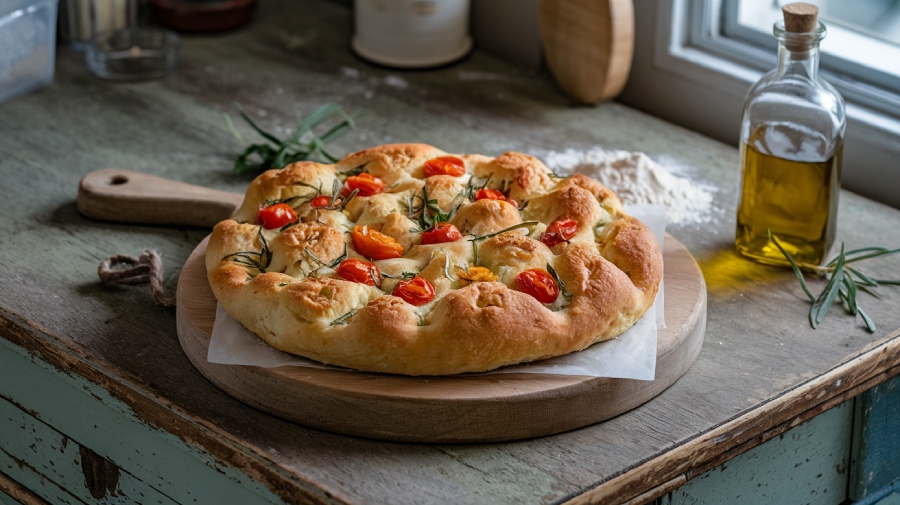
These holes not only add texture but also help the olive oil seep in, ensuring a delectably oily crust. When you finally bake the focaccia at 425°F for 25-30 minutes, the result is a golden-brown crust that’s crispy on the outside and soft on the inside. You’ll be amazed at how such a simple combination of ingredients transforms into a delicious focaccia that everyone will adore.
Let’s try..
Ingredients List
To create Anne Burrell’s delightful focaccia bread, you’ll need a few simple yet impactful ingredients to form a mouthwatering treat. Start with 1¾ cups of warm water, which activates 1 package of active dry yeast along with 1 tablespoon of sugar. This mixture is vital to a beautifully risen dough. For the dough itself, gather 5 cups of all-purpose flour, plus extra for kneading, ensuring perfect texture.
The flavor is essential, so don’t forget 1 tablespoon of kosher salt, which enhances every bite. You’ll also want to sprinkle coarse sea salt on top before baking for that irresistible crunch. The richness of the focaccia comes from ¾ cup of extra-virgin olive oil, split between the dough and generously coating your jelly roll pan, preventing sticking and adding flavor.
With these ingredients, you’re on your way to making a soft, flavorful focaccia with a crispy crust that yields 8 to 10 servings.
Preparation Steps
As you start preparing your focaccia, activating the yeast is essential for that perfect rise. The moisture level in your dough also plays a significant role, as maintaining a steamy environment helps with the fermentation process, leading to a better texture in the final product.
You’ll also need to master the kneading techniques to guarantee a smooth, elastic dough. Finally, creating the right environment for rising can make all the difference in achieving a light and airy texture, as understanding the importance of steam can elevate your baking quality steam’s role in baking.
Yeast Activation Importance
Activating the yeast is a critical step in making focaccia bread, and it’s where the magic begins. Start by combining 1 package of active dry yeast with 1 tablespoon of sugar and 1 3/4 cups of warm water, ideally between 100°F to 110°F.
This warm environment encourages yeast activation, allowing it to wake up and get ready for action, which is crucial for achieving the right texture and flavor in your bread. Let it sit for at least 15 minutes, and watch as it transforms. You’ll see bubbling and a frothy top, signaling that fermentation has kicked in and your yeast is alive.
This aromatic mixture is essential—it’s the foundation for your dough’s rise. If you don’t see any bubbling or foaming, your yeast may be inactive, leading to potential dough failure. In such cases, it’s best to start over with fresh yeast to guarantee your focaccia has the proper rise during both the first and second proofing stages.
Dough Kneading Techniques
Once the yeast has fully activated, you’re ready to plunge into the kneading process, an essential step in developing the right texture for your focaccia. Start by using a stand mixer fitted with a dough hook on low speed.
Combine the flour, kosher salt, olive oil, and your activated yeast mixture until a rough dough forms. Once you see that taking shape, crank up the mixer to medium speed and knead the dough for 5-6 minutes.
You’ll want to make certain it becomes smooth and elastic; if it feels too sticky, don’t hesitate to add more flour gradually. For best results, consider using a digital scale to guarantee accurate flour measurements, as this can greatly enhance the dough’s texture.
After mixing, transfer the dough to a lightly floured surface and knead by hand for an additional 1-2 times. This final touch helps achieve an even consistency. Before placing the kneaded dough back in the mixer, make sure to lightly coat the bowl with olive oil to prevent sticking during the first rise.
Remember, properly kneaded dough should be soft and pliable, setting the foundation for that perfect focaccia texture.
- Use a stand mixer for efficiency
- Monitor the dough’s stickiness
- Aim for a smooth, elastic feel
- Don’t skip the hand kneading
- Olive oil is your friend
Rising Environment Factors
Creating the perfect rising environment is crucial for your focaccia dough. The right conditions will guarantee that your dough rises beautifully, resulting in a light and flavorful bread. Aim for a warm place, ideally around 75-85°F, to encourage ideal yeast activity during the rising process.
To help retain moisture, cover your dough with plastic wrap or a damp cloth. This creates a cozy environment for the yeast to thrive. Find a draft-free location to set your dough; avoid areas near cold windows or air conditioning vents, as these can hinder rising. If your kitchen is too cool, consider placing the dough in an oven with the light on or near a heating source to maintain warmth.
Watch for your dough to rise until it has doubled in size, typically about 1 hour. This guarantees a good texture and flavor in the final focaccia. Here’s a quick reference to help you:
| Factor | Ideal Condition | Tips |
|---|---|---|
| Temperature | 75-85°F | Use an oven light if cool |
| Covering | Plastic wrap or cloth | Retains moisture |
| Location | Draft-free | Avoid cold drafts |
| Rising Time | About 1 hour | Until doubled in size |
Baking Instructions
To achieve the perfect focaccia, you’ll want to start by preheating your oven to 425°F while your dough undergoes its second rise. This step guarantees your focaccia bakes evenly and achieves that desirable texture. For an added twist, consider incorporating a mix of all-purpose and whole wheat flour in your dough, as this combination enhances both structure and flavor, resulting in a more delicious bread. Once your oven is hot, gently place your dough on a baking sheet lined with parchment paper.
Before you bake the focaccia, sprinkle a generous amount of coarse sea salt over the surface and drizzle it with olive oil. This adds enhanced flavor and helps create that beautiful, crispy crust. High baking temperatures yield a golden brown crust; pre-baking the dough can also prevent sogginess when adding toppings.
Now, it’s time to bake the focaccia! Slide it into the preheated oven and let it transform for 25-30 minutes, or until it develops a stunning golden brown color.
As tempting as it may be, resist the urge to cut into it immediately. Allow the focaccia to cool for a few minutes out of the oven; this guarantees it retains its structure and flavor.
Finally, for the best experience, serve the focaccia warm, allowing everyone to enjoy its delightful aroma and texture.
- Preheat the oven
- Coarse sea salt
- Golden brown color
- Cool before cutting
- Olive oil
Flavor Enhancements
When it comes to elevating the flavor of your focaccia, incorporating fresh ingredients can make all the difference. Start by mixing aromatic elements like minced garlic or fresh herbs, such as rosemary or thyme, directly into the dough before the first rise. This adds depth and fragrance that permeates the entire bread.
Before baking, don’t forget to sprinkle coarse sea salt or Herbes de Provence on top of the dough, enhancing its savory profile and creating an irresistible aroma. You can also get creative with toppings; adding sliced olives, sun-dried tomatoes, or caramelized onions introduces delightful layers of flavor and texture.
To elevate your focaccia, drizzle the dough with flavored olive oil—think garlic- or chili-infused—before it goes in the oven. This enriches the taste and contributes to a beautiful golden crust. Finally, experimenting with different types of flour, like bread flour or 00 flour, can greatly impact the texture, resulting in a loftier and more flavorful focaccia that’ll impress everyone at your table.
Storage and Serving Tips
Storing and serving your focaccia properly can enhance your enjoyment of this delightful bread. To keep it fresh, you can store focaccia at room temperature in an airtight container for up to two days. If you have leftovers, consider freezing half after it cools. Just wrap it tightly in plastic wrap and aluminum foil to prevent freezer burn.
When it’s time to serve, warm your focaccia for the best flavor and texture. Here are some tips to elevate your focaccia experience:
- Cut into squares or strips for easy serving.
- Pair with olive oil or dukkah for a delicious dipping option.
- Use as a side dish for gatherings, adding a rustic charm to your meal.
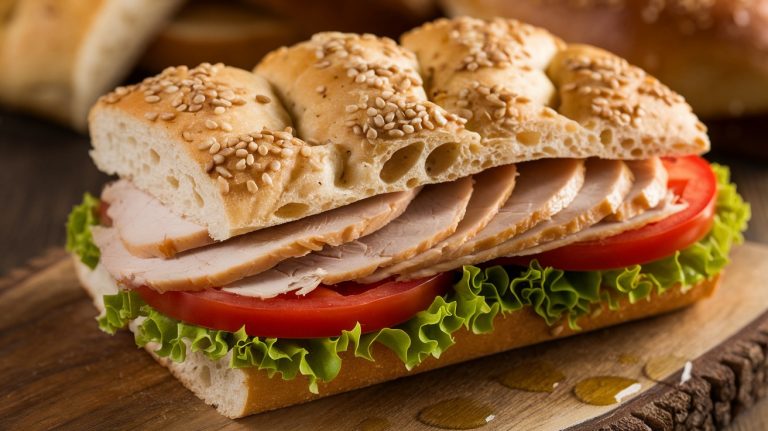
- Make sandwiches by layering your favorite fillings between the focaccia slices.
- Reheat frozen focaccia in a low oven (about 350°F) for 10-15 minutes to restore its freshness.
Frequently Asked Questions
Is It Better to Use Bread Flour or All Purpose Flour for Focaccia?
When making focaccia, you’ll find that bread flour creates a chewier texture and loftier rise, while all-purpose flour yields a softer crumb. Choose based on your preference for chewiness and structure in the final loaf.
What Makes Focaccia Bread Different?
When it comes to focaccia, it’s a whole different ball game. Its airy texture, dimpled surface, and rich olive oil make it stand out. Plus, it’s versatile with toppings, elevating any meal to new heights.
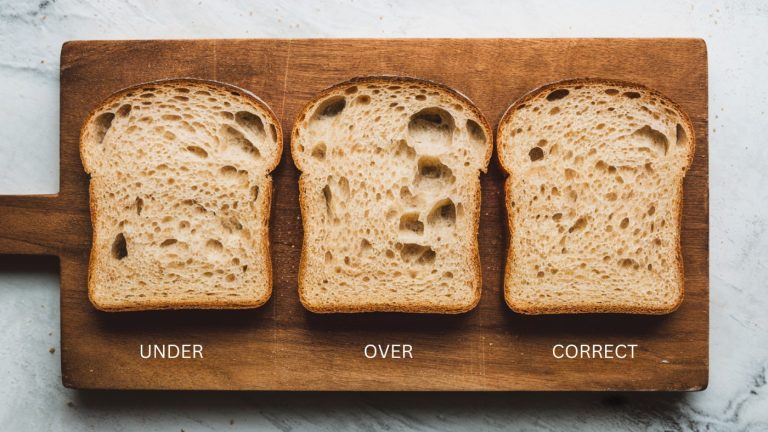
Why Is My Focaccia Not Fluffy?
If your focaccia isn’t fluffy, it could be due to insufficient yeast activation, too little water, or inadequate rising time. Make sure you knead just enough and bake at the right temperature for a perfect result.
Is Focaccia a Healthy Bread?
Imagine golden crusts kissed by olive oil; focaccia’s not just a treat. It’s low in sugar and cholesterol-free, offering heart-healthy fats. When topped with herbs, it transforms into a delicious, nutritious companion for your meals.
Explore Every Step for a Truly Delicious Focaccia
By now, you’ve mastered Anne Burrell’s delicious focaccia bread recipe, transforming simple ingredients into a culinary delight. Did you know that over 90% of Americans enjoy baking at home, finding it a therapeutic activity?
As you slice into your golden, airy focaccia, remember the joy it brings—not just to your taste buds but also to your spirit. So, gather your loved ones, share the warm bread, and savor the satisfaction of creating something truly special.