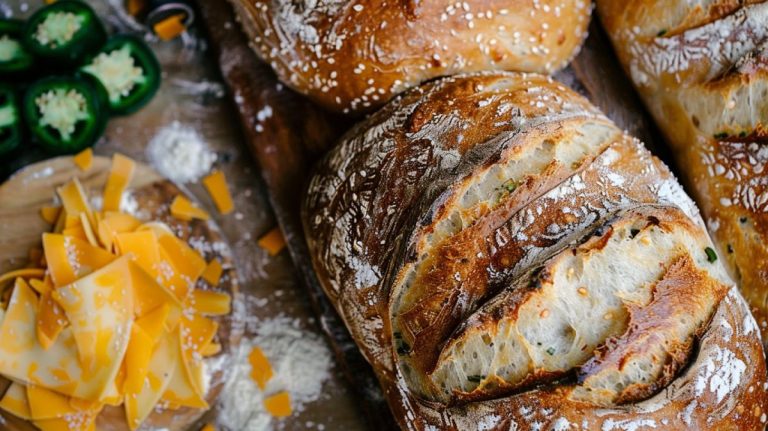
Sourdough Hoagie Rolls Recipe: Crisp Crust, Airy Interior
To make mouthwatering sourdough hoagie rolls, you’ll need a ripe sourdough starter, bread flour, water, milk, olive oil, and a touch of sweetness from agave syrup or honey. Mix wet and dry ingredients and knead the dough until smooth and elastic.
Let it rise in a warm spot for 4 to 12 hours to develop flavor. After shaping the rolls, allow them to rise again before baking at 425°F for a golden crust. Enjoy these rolls stuffed with your favorite fillings, and keep exploring for tips on perfecting every aspect.
Key Takeaways
- Combine liquid ingredients like water, milk, olive oil, and agave syrup with dry ingredients including sourdough starter and bread flour for dough preparation.
- Knead the dough for 10-15 minutes to develop gluten structure and achieve a smooth texture.
- Allow the dough to ferment in a warm environment for 4-12 hours until puffed and bubbly.
- Shape the dough into rolls, permit a second rise for 1-2 hours, and score before baking.
- Bake at 425°F for 20 minutes, using steam for the first 10 minutes to enhance the crust.
Ingredients Needed
To create delicious sourdough hoagie rolls, you’ll need a few key ingredients that come together to form the perfect dough.
First off, gather 150 grams of water and 125 grams of milk, which will provide moisture and richness. Adding a touch of flavor with 25 grams of olive oil will enhance tenderness. For sweetness, use 25 grams of agave syrup or honey, enhancing the rolls’ overall taste.
Your sourdough starter is essential—make sure it’s ripe and around 125 grams. This starter not only ferments the dough but also contributes a complex flavor that’s hard to beat.
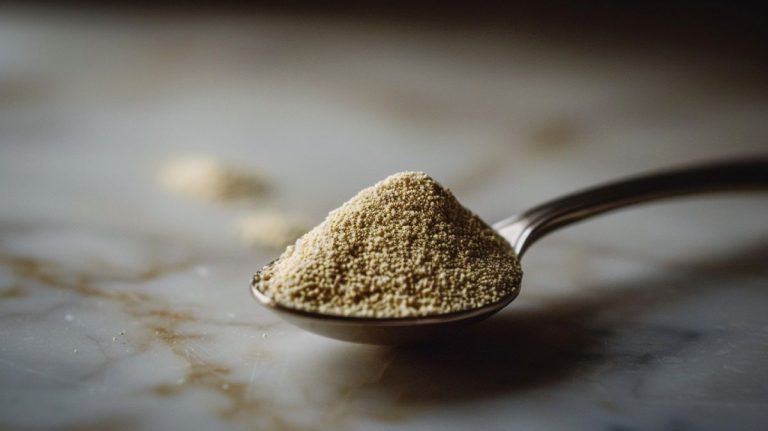
To improve the texture and rise, incorporate 11 grams of diastatic dry malt powder; it’s a game-changer for achieving that delightful crust.
Next, you’ll need 500 grams of bread flour, which is vital for providing the soft, chewy consistency you crave in a hoagie roll.
Finally, 10 grams of sea salt to bring out the flavors and strengthen the dough.
Dough Preparation Steps
To prepare the dough, you’ll mix the liquid ingredients to create a flavorful base.
Ensuring the correct hydration levels, as highlighted in the sourdough starter essentials, will enhance the dough’s texture.
Once everything’s combined, knead the dough for a couple of minutes to build that all-important elasticity, which is key for a perfect rise.
Additionally, be attentive to the dough’s temperature; maintaining a consistent warmth will help it double in size and develop incredible texture.
Ingredient Mixing
Before starting the mixing process, gather your ingredients and confirm everything is ready for seamless dough preparation. This will help you work efficiently and guarantee that each component is well incorporated.
A Dutch oven, such as the Lodge Enameled Cast Iron Dutch Oven, can enhance your baking experience by providing even heat distribution and steam retention, which is crucial for achieving that perfect crust.
Here’s what you need to do:
- Create the wet mixture: In a bowl, mix together water, milk, olive oil, agave syrup, and sea salt. This blend hydrates the dry ingredients effectively, setting the stage for a successful dough.
- Add diastatic malt powder: Incorporate 11 grams (1 tsp) of diastatic dry malt powder into the wet mixture. This ingredient improves dough rise and enhances the crust’s color during baking.
- Combine with flour: Gradually add 500 grams (3¾ cups) of bread flour to the wet mixture, mixing thoroughly to confirm even distribution and prevent dry pockets.
- Monitor hydration: Pay attention to the dough’s hydration level. A well-hydrated mixture leads to a softer and fluffier final product, which is important for delicious hoagie rolls.
Kneading for Elasticity
Kneading the dough is an essential step that transforms your mixture into a smooth and elastic masterpiece. As you knead, you’ll want to knead for about 10-15 minutes, ensuring the dough becomes glossy and smooth. This process develops the gluten structure, which is vital for elasticity. A successful windowpane test indicates good gluten strength, enhancing the rise and texture of your rolls.
As you knead, use a consistent technique of folding and pressing to promote even gluten development throughout the dough. To check if your dough has reached the right elasticity, perform the “window pane test.” Stretch a small piece between your fingers until it’s thin enough to let light through without tearing. If it tears, keep kneading!
Remember, proper kneading activates gluten proteins that trap gases produced during fermentation, giving your rolls their rise and delightful texture. If you find the dough sticking to your hands, sprinkle a small amount of flour while kneading. However, be careful not to add too much, as you want to maintain the intended hydration level.
Fermentation Temperature Importance
After achieving the perfect elasticity in your dough, the next step takes you into the warm embrace of fermentation. The temperature you choose plays an essential role in the final outcome of your sourdough hoagie rolls. Aim for around 86°F (30°C) to optimize yeast activity and dough rise.
Temperature management is vital for ensuring consistent fermentation, and warmer environments can greatly speed up the process. Here’s why temperature matters:
- Flavor Development: A warmer environment allows for the breakdown of gluten, resulting in a richer flavor profile.
- Moisture Retention: Cover your dough to keep it warm and moist, preventing it from drying out during fermentation.
- Time for Complexity: Allow the dough to ferment for 4-12 hours at the ideal temperature to develop complex flavors and a desirable texture.
- Visual Cues: Keep an eye on your dough; it should become puffy with visible bubbles, indicating it’s ready for shaping.
Rising and Shaping
To achieve perfectly airy hoagie rolls, you need to pay close attention to the rising process.
Start by placing your dough in a warm spot to encourage it to double in size, as this fermentation phase is essential for developing flavor and texture.
Once it’s ready, gently shape each piece for the best texture.
Mastering these rising and shaping techniques will guarantee your rolls have the ideal structure to hold all your favorite fillings.
Importance of Proper Rising
Achieving the perfect sourdough hoagie rolls hinges on proper rising, which plays a significant role in developing texture and flavor. When you allow the dough to rise correctly, it ferments and expands, creating that delightful chewiness and depth of taste that makes sourdough special.
Here are four key points to take into account for ideal rising:
- First Rise Duration: Let your dough undergo bulk fermentation for 4 to 12 hours. Aim for at least a 50% increase in size to guarantee good gas production and a complex flavor profile.
- Shaping the Dough: Divide the dough into equal portions after the first rise. This creates tension in each piece, setting the stage for a uniform second rise.
- Second Rise Importance: Allow the shaped rolls to rise for 1 to 2 hours. This step is essential for achieving that puffy, airy texture, indicating active yeast and relaxed gluten.
- Scoring Before Baking: Don’t forget to score your rolls! This prevents uncontrolled expansion and enhances the crust’s final look and texture.
Baking Process
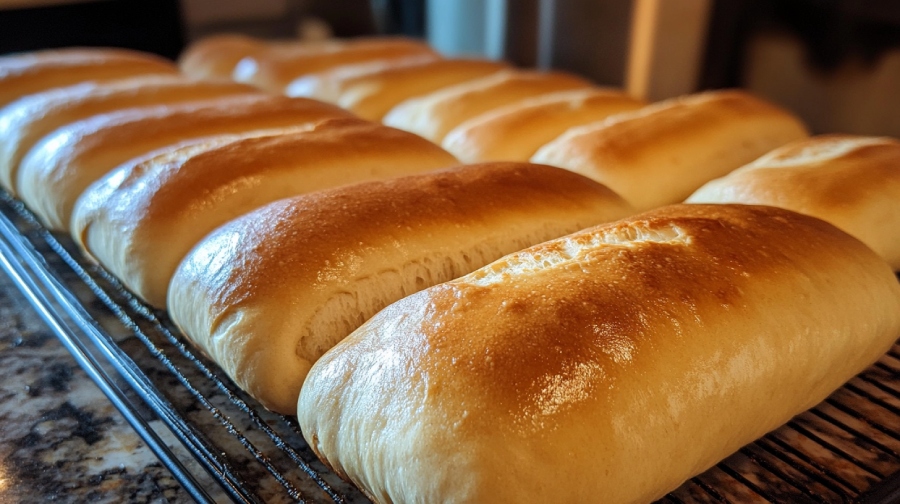
The baking process is often where your sourdough hoagie rolls truly come to life. The transformation from dough to golden-brown rolls happens in just a few simple steps, guaranteeing you achieve that perfect texture and flavor.
- Preheat Your Oven: Set your oven to 425°F (220°C), and don’t forget to place a cup of ice in a steam tray. This creates steam during the initial baking, giving your rolls a crispy crust.
- Brush with Egg Wash: Before you slide your rolls into the oven, brush them with an egg wash. This step is essential for achieving that beautiful golden-brown finish.
- Baking Time: Bake your rolls for 20 minutes in total. Start with the steam tray in the oven for the first 10 minutes, then remove it to let the rolls bake dry for the remaining time.
- Check for Doneness: Watch your rolls closely as they bake. Look for a rich golden-brown color to confirm they’re perfectly done.
Serving and Filling Ideas
Once your sourdough hoagie rolls are perfectly baked and golden brown, it’s time to explore the countless ways to enjoy them. These rolls are ideal for crafting deli-style sandwiches, and you can fill them with various ingredients. Imagine layers of classic Italian cold cuts, or you’d prefer turkey and avocado for a fresh twist. For a hearty option, grill up some chicken Caesar and tuck it inside—each bite is a flavor explosion.
The soft, chewy texture of these rolls makes them perfect for toasting or grilling, which enhances the flavor and adds a satisfying crunch. You can also slice the rolls into smaller pieces for sliders or mini sandwiches, making them a great choice for meal prep or gatherings.
To elevate your sandwich experience, don’t forget to add toppings like melted cheese, fresh veggies, or flavorful spreads. Whether you’re hosting a party or just enjoying a quiet meal at home, the versatility of sourdough hoagie rolls shines through.
Plus, if you happen to have leftovers, you can freeze them for up to six months, ensuring you always have delicious bread ready for future meals.
Frequently Asked Questions
Can I Substitute the Sourdough Starter With Store-Bought Yeast?
Absolutely, you can substitute sourdough starter with store-bought yeast! Just remember, your rolls might lose that unique tangy flavor, so adjust your fermentation time carefully to achieve the best results. It’s all about balance!
How Long Can I Freeze the Baked Hoagie Rolls?
You can freeze baked hoagie rolls for up to six months without losing quality. Just cool them completely, wrap them tightly, and store them in a resealable bag. Thaw overnight before reheating for the best texture.
What Type of Flour Works Best for This Recipe?
Did you know bread flour contains about 12-14% protein? For ideal chewiness and rise, you should use bread flour. Mixing in whole wheat flour can enhance nutrition and flavor, creating a delightful balance in your rolls.
How Do I Know if My Dough Has Risen Enough?
To know if your dough’s risen enough, look for it to double in size and feel airy. Perform a poke test; if the indentation stays, it’s ready. A pleasant aroma indicates fermentation is on point!
Can I Add Herbs or Spices to the Dough?
Absolutely, you can add herbs or spices to your dough! Consider using dried oregano, basil, or garlic powder. Just mix in 1-2 teaspoons for flavor, and adjust based on how intense you want it!
The Perfect Sourdough Hoagie Experience
With your golden-brown sourdough hoagie rolls in hand, you’re not just holding bread; you’ve crafted edible clouds ready to cradle your favorite fillings. The crust crackles like a crisp autumn leaf underfoot, while the soft, airy interior invites juicy meats and vibrant veggies to dance harmoniously.
So, take a moment to savor your creation—each bite is a celebration of flavor, a proof of your baking journey, and a delicious canvas for endless culinary masterpieces.