Stiff Sourdough Starter Recipe for High Hydration: Wet to Wow
To create a stiff sourdough starter for high hydration baking, you’ll need 25g of ripe starter, 50g of flour (mix whole wheat and all-purpose), and 25g of warm water. Combine these ingredients in a clean container and mix until blended, then knead briefly for a dough-like consistency.
Allow it to ferment at around 76-78°F for about 6 to 12 hours until you see bubbles. This starter enhances flavor and gluten structure, making your bread chewy and sour. If you want to master the art of sourdough, stick around to uncover more tips and techniques.
Key Takeaways
- A stiff sourdough starter has a 50% hydration level, using 25g warm water for every 50g flour.
- Incorporate 25g of ripe sourdough starter for wild yeast and bacteria to enhance flavor and fermentation.
- Maintain fermentation temperature between 76-78°F (24-25°C) for optimal yeast activity and gluten development.
- Feed the starter regularly using a 1:2:2 ratio of starter, flour, and water for consistent results.
- Use high-protein flours to improve dough strength and support high-hydration recipes for better texture and oven spring.
What is a Stiff Starter?
When you immerse yourself in the world of sourdough, understanding stiff starters can greatly enhance your baking experience. A stiff sourdough starter, with a hydration level of 50%, consists of 50 grams of water for every 100 grams of flour. This unique ratio not only enriches the flavor complexity of your bread but also helps reduce acidity, which can be beneficial for maintaining a healthy starter.
If you’re looking to create a dough with increased strength, especially when incorporating fats and sugars, a stiff starter is your best friend. It noticeably improves gluten network development, leading to a better texture in your final product.
To create a stiff starter, simply mix equal parts of your regular starter, flour, and water—typically 25 grams of starter, 50 grams of flour, and 25 grams of warm water. You’ll find that stiff starters boost yeast activity, allowing for quicker fermentation times, making them ideal for recipes like baguettes and croissants.
Plus, they’re more forgiving when it comes to refreshment timing, making them easier to maintain. By grasping the nuances of stiff starters, you’re setting yourself up for success in your sourdough journey, and understanding the importance of hydration levels can further enhance your results.
Benefits of Stiff Starters
Understanding the advantages of stiff starters can transform your baking results. With a hydration level of just 50%, stiff starters enhance flavor complexity, giving your bread a more pronounced sour taste that’s often sought after in artisanal baking. This lower hydration also promotes better gluten development, which means your dough will have the strength to support high-hydration recipes, leading to beautifully structured loaves.
Additionally, mastering the creation and maintenance of a robust sourdough starter is essential for achieving peak fermentation, as sourdough starter essentials highlight the importance of a consistent feeding schedule.
Moreover, stiff starters generate more acetic acid during fermentation, resulting in a less acidic flavor profile—perfect for recipes like baguettes and croissants where subtlety is key. Regularly incorporating a stiff starter into your baking routine can improve both dough strength and fermentation time, resulting in an impressive oven spring and a delightful open crumb structure in your high-hydration bread.
Another practical benefit is that maintaining a stiff starter requires less frequent feeding compared to its liquid counterparts. This makes it easier for you to manage your starter, giving you more time to focus on perfecting your high-hydration techniques.
What You Need?
A successful stiff sourdough starter relies on a few essential ingredients that work together to create a robust base for your baking. Each component plays a vital role in achieving the perfect texture and flavor of your bread.
Additionally, the type of flour you choose can impact the nutrient source and microbial activity in your starter, enhancing its performance and flavor; for instance, whole-grain flours provide essential nutrients.
Here are the key ingredients you’ll need:
- 25 grams of ripe sourdough starter: This establishes the necessary wild yeast and bacteria for fermentation, giving your starter its unique character.
- 50 grams of flour: A blend of whole wheat and all-purpose flour is recommended. The high-protein content in the flour supports gluten development, which enhances the starter’s structure.
- 25 grams of warm water: This helps achieve a 50% hydration level and activates the yeast. The flour-to-water ratio is vital, maintaining 2 parts flour to 1 part water by weight.
- Kneading and mixing: Thoroughly combine all ingredients until a cohesive dough forms. A brief kneading may be necessary to guarantee even distribution.
Lastly, keep an eye on the fermentation temperature. Aim for around 76-78°F (24-25°C) during the 6 to 12 hours of fermentation to optimize yeast and bacteria activity in your starter.
Step-by-Step Starter Creation
Creating your stiff sourdough starter is an exciting process that allows you to harness the wild yeast and bacteria for your baking adventures. Begin by gathering your ingredients: 25 grams of your existing regular starter, 50 grams of flour (a mix of whole wheat and all-purpose is ideal), and 25 grams of warm water. In a clean container, combine these ingredients and mix until they’re mostly integrated.
Please ensure your environment is slightly damp, as it helps maintain moisture for your starter.
Next, knead the mixture briefly to achieve a dough-like consistency. Once you’ve done that, place the dough back into the container and cover it to prevent drying out. Now, let the stiff starter ferment at a warm temperature, around 76-78°F (24-25°C), for 6 to 12 hours. During this time, keep an eye out for air bubbles and a domed surface, which indicate that it’s coming along nicely.
Feeding your starter regularly is essential; maintaining starter health guarantees it stays active and vibrant.
When you’re ready to use your stiff starter in recipes, remember to break it into smaller pieces for even mixing. To maintain its strength, regularly feed your starter using a 1:2:2 ratio of starter, flour, and water, and store it in the fridge when you’re not using it.
Signs of a Ready Starter
When your stiff sourdough starter is ready, it transforms into a lively mixture that signals its prime for baking. You’ll notice several key signs indicating that it’s at its peak. Regular monitoring of bubbles and texture can also help guarantee your starter remains healthy and vibrant, avoiding any signs of a dead starter that could affect your baking results.
- Visible Air Bubbles: Look for air bubbles throughout the mixture. These indicate active fermentation and a robust yeast presence.
- Surface Appearance: The surface of the starter may appear domed or slightly caved in, showcasing that it’s reached its peak fermentation time, usually within 6 to 12 hours.
- Aroma: Give it a sniff! A pleasant, slightly tangy aroma should greet you. Avoid any off-putting or overly vinegary smells, as these suggest unhealthy fermentation.
- Texture and Weight: When you touch the starter, it should be slightly sticky yet able to hold its shape when formed into a ball.
Additionally, using a scale, you’ll find it weighs approximately the same or slightly more than before, confirming it has risen and developed those all-important air pockets.
Incorporating Into Recipes
When you’re ready to incorporate your stiff sourdough starter into recipes, consider how it pairs with different dough types.
Use techniques like breaking the starter into small pieces for even distribution and adjusting water content to maintain the right hydration.
This careful approach not only enhances flavor but also elevates the overall texture of your baked goods.
Ideal Recipe Pairings
Incorporating a stiff sourdough starter into your baking can elevate your bread-making game, particularly when tackling high-hydration recipes like baguettes and ciabatta.
This robust starter enhances flavor and strengthens the gluten network, resulting in beautifully structured loaves. Using a stiff starter also improves oven spring, leading to a lighter and airier crumb.
Additionally, blending in almond flour’s moisture retention can further enrich your bread’s texture and flavor profile.
Here are some ideal recipe pairings to take into account:
- Baguettes: The stiff starter will give you a crispy crust and chewy texture.
- Ciabatta: Enjoy an open crumb structure that’s perfect for holding oils and dips.
- Brioche: The reduced acidity from the stiff starter balances the sweetness, creating a delightful flavor profile.
- Focaccia: The added yeast activity guarantees a fluffy bread that’s perfect for layering with toppings.
When adapting high-hydration recipes, try using the stiff starter in a ratio of 10-20% of your total flour weight.
Pair it with high-protein flours to support the necessary structure. With these combinations, you’ll be well on your way to baking extraordinary bread!
Incorporation Techniques Explained
Integrating a stiff sourdough starter into your recipes can seem intimidating, but it’s a rewarding process that greatly enhances your bread’s flavor and texture.
Start by breaking your stiff starter into smaller pieces; this guarantees even distribution throughout the dough. For better hydration integration, mix those pieces with a portion of the water from your recipe before you add the flour and the remaining water.
Once you’ve done that, employ a kneading technique like slap and fold to combine the starter with the other ingredients effectively. This method promotes gluten development and helps create a smooth, elastic dough.
Keep an eye on the dough’s texture as you work; it should be cohesive and pliable without excessively sticking to your work surface.
Flavor Profile Enhancements
The flavor is the heart of any great bread, and a stiff sourdough starter can transform your high-hydration recipes into something truly special. By incorporating this lower hydration starter, you’ll notice a complexity that elevates your baking.
Here are some key enhancements you can expect:
- Pronounced Sour Taste: The stiffer starter yields more acetic acid, adding a tangy depth that balances the inherent sweetness of high-hydration doughs.
- Improved Texture: With a chewier crumb from better gluten development, your bread will have a delightful contrast against the moistness of high-hydration recipes.
- Robust Oven Spring: Using a stiff starter in baguettes or ciabattas leads to a light, airy structure, enhancing both the visual appeal and flavor profile.
- Tailored Acidity: By experimenting with the ratio of stiff starter to dough, you can fine-tune the acidity and flavor nuances to match your personal preferences.
Incorporating a stiff sourdough starter enhances flavor and allows for a more satisfying bread experience.
Recipe Variations and Adaptations
Mastering the techniques for incorporating a stiff sourdough starter opens the door to a variety of recipe variations and adaptations that can enhance your baking experience.
By tweaking your approach, you can achieve unique flavors and textures in your high hydration breads. Here are some ideas to get you started:
- Adjust Water Content: When using a stiff starter, reduce the overall water content in your dough by about 10-15%. This helps balance the moisture levels and guarantees peak fermentation.
- Experiment with Flours: Try adding whole wheat or rye flour to your recipe. This not only boosts flavor complexity but also works well with the characteristics of a stiff starter.
- Incorporate Techniques: Utilize methods like autolyse and slap & fold to effectively develop gluten structure in your high hydration dough. These techniques promote elasticity and strength.
- Manage Temperature: Keep your dough and environment slightly cooler. This helps manage stickiness and maintains structure, making the incorporation of your stiff starter much easier.
Dough Handling Techniques
Understanding effective dough handling techniques is vital for achieving that perfect sourdough loaf. After your initial rise, you’ll want to fold the dough four times. This strengthens the gluten structure and redistributes the yeast, enhancing fermentation.
When you preshape the loaf, do it gently; shape it into a round while keeping a light touch to avoid degassing the dough too much. Once you’ve shaped the dough, let it rest for about 20 minutes. This relaxation period is important for easing the gluten, making your final shaping a breeze.
During that final shaping, place the dough seam side up on a floured cloth. This positioning supports proper oven spring, ensuring your loaf rises beautifully. For best flavor development, consider refrigerating the shaped dough, covered, for 16 to 24 hours before baking.
This slow fermentation process enhances flavor and texture.
Fermentation and Proofing
After you’ve skillfully handled your dough, the next phase involves fermentation and proofing, which are essential to developing the flavor and texture of your sourdough.
During fermentation, you’ll typically wait between 6 to 12 hours, depending on the temperature and the strength of your starter. Keep an eye out for:
- Air Bubbles: Look for tiny bubbles forming in your dough, indicating active yeast.
- Slight Doming: A gentle rise in the starter suggests it’s ready for the next step.
- Warm Environment: Aim to keep the temperature around 76-78°F (24-25°C) to boost yeast activity.
- Longer Bulk Fermentation: Allow between 3 to 5 hours for ideal gluten development for high-hydration doughs.
Adjust the dough’s hydration level as needed, especially when using a stiff starter, and monitor how your dough behaves during this vital phase.
This attention to detail will guarantee your sourdough rises beautifully, resulting in a loaf that’s both flavorful and structurally sound.
Tips for Best Results
Achieving the best results with your stiff sourdough starter hinges on a few key practices that enhance both flavor and texture. Start by using a combination of high-protein flour, like bread flour and whole wheat flour, to improve gluten structure and support higher hydration levels. Stick to a consistent feeding schedule, ideally every 24 hours, to keep your starter active and flavorful.
Monitor the temperature during fermentation; a warm environment around 76-78°F (24-25°C) boosts yeast activity, improving the rise and texture of your starter. When you’re ready to incorporate your stiff starter into dough, break it into small pieces. This guarantees even distribution and proper hydration during mixing.
Lastly, allow your stiff starter to ferment for 6 to 12 hours until you see signs of peak activity, such as air bubbles and a domed top.
| Tip | Purpose | Details |
|---|---|---|
| Use high-protein flours | Enhance gluten structure | Mix bread and whole-wheat flour |
| Consistent feeding schedule | Maintain activity and flavor | Feed every 24 hours |
| Monitor fermentation temperature | Boost yeast activity | Keep between 76-78°F (24-25°C) |
| Break starter into pieces | Guarantee proper hydration | Distribute evenly in the dough |
Frequently Asked Questions
Can I Use Whole Wheat Flour in the Starter?
Absolutely, you can use whole wheat flour in your starter! It boosts yeast activity, adds nutrients, and creates a richer flavor. Just remember to adjust the hydration since whole wheat absorbs more water than all-purpose flour.
How Often Should I Feed My Stiff Starter?
Think of your starter like a pet; it thrives on regular attention! Feed it at least once every 24 hours at room temperature or weekly if it’s in the fridge. Watch for those bubbly signs of life!
What Is the Ideal Temperature for Fermentation?
The ideal temperature for fermentation is between 76-78°F (24-25°C). This range maximizes yeast activity, ensuring your dough develops properly. Keeping the environment stable helps achieve consistent, flavorful results in your baking process.
Can I Refrigerate My Stiff Starter?
Yes, you can refrigerate your stiff starter! This slows fermentation, extending its shelf life. Just remember to feed it every 1-2 weeks and revive it with a few feeds before baking.
How Long Can I Store a Stiff Starter?
Oh, the tragedy of a forgotten starter! You can store your stiff starter in the fridge for 3-6 months, but don’t forget to feed it every few weeks, or it’ll turn into a sad science experiment.
Why Embrace the Challenge? The Magic of High-Hydration Dough
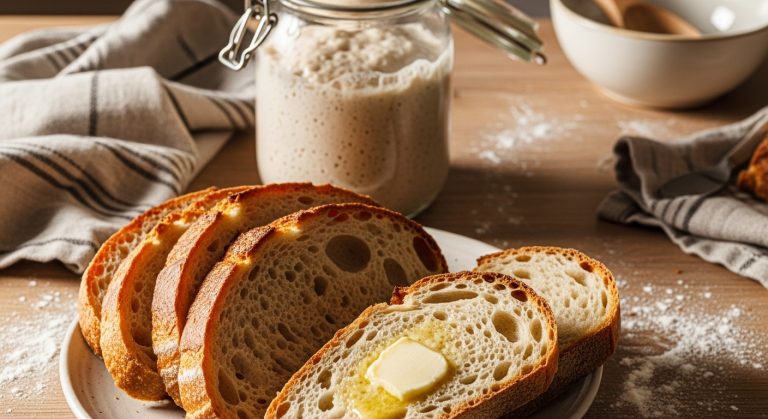
Creating a stiff sourdough starter might seem intimidating, but once you see the vibrant bubbles forming and smell that tangy aroma, you’ll realize it’s worth every moment. Don’t worry if it feels tricky at first; with a little patience and practice, you’ll master the art of high-hydration baking.
Imagine pulling a crusty, golden loaf from the oven, its interior airy and flavorful—it’s an experience that’ll have you hooked. Embrace the journey, and the rewards are sure to follow.